Table of Contents
Manually replacing a coat in Photoshop is a time-consuming task. It requires precise masking around complex edges like collars and sleeves, realistic recreation of fabric folds and shadows, and perfect color matching to the original lighting. Even for experienced editors, this process can take 20-30 minutes and often results in an unnatural, “pasted-on” look where the new garment doesn’t convincingly interact with the model’s pose or the environment.
1.The AI Solution: Intelligent Garment Replacement
This is where Nano Banana in Photoshop changes the game. Instead of manual pixel manipulation, you use AI to understand the task. By marking the original coat in red, you give the AI a clear visual target. The intelligent engine then analyzes the new garment image, understands the model’s posture, and seamlessly integrates the coat with correct perspective, lighting, and natural fabric draping. It transforms a complex edit into a simple, three-step command.
2.What You’ll Need
- Adobe Photoshop with the PsAide plugin installed.
- A full-body model photo.
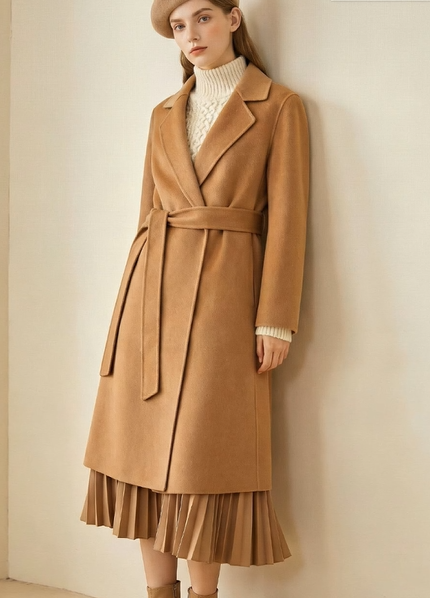
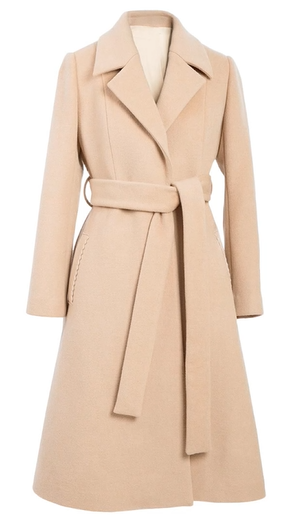
- A clear image of the replacement coat.
- 2-3 minutes of total time.
The 3-Step Coat Swap Process
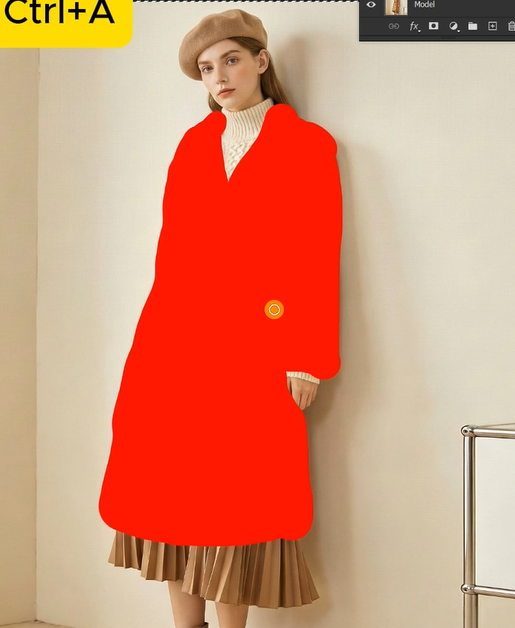
Step 1: Prepare with Simple Marking
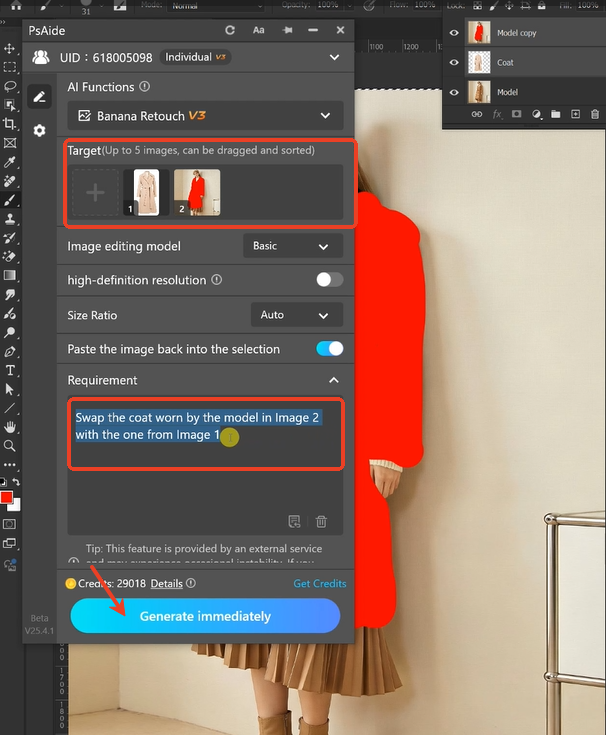
Open both your model photo and the new coat image in Photoshop. On a duplicate layer of your model photo, use the Brush Tool with a bright red color (RGB: 255,0,0) to paint over the coat you want to replace. This creates a clear, high-contrast guide for the AI.
Step 2: Upload and Command
Launch Nano Banana from the PsAide panel. Upload your two images in the correct order:
- Image 1: Your new coat (the product image).
- Image 2: Your model photo with the red-marked coat.
In the prompt box, use this clear instruction:
“Swap the coat worn by the model in Image 2 with the one from Image 1.”
Step 3: Generate the Perfect Fit
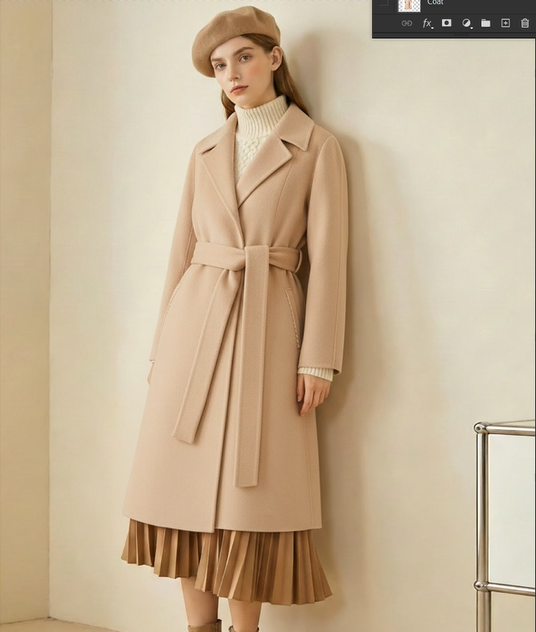
Click “Generate.” Within 30-60 seconds, the AI will process your request. It removes the red-marked coat, positions the new garment to fit the model’s body shape and posture, matches the lighting and shadows of the original scene, and blends everything for a natural result. The final image looks as if the model was photographed wearing the new coat.
Pro Tips for Best Results
- For best AI recognition, ensure your replacement coat image is clear and well-lit.
- The red marking doesn’t need perfect edges, but try to cover the entire garment area.
- This method works excellently for structured coats and jackets where the AI can easily understand the form.
With Nano Banana, transforming a model’s outfit is no longer a chore of complex masking, but a quick three-step process that delivers professional, realistic results in minutes. ver provides a fast solution when dealing with complex backgrounds, allowing you to work more quickly and save valuable time.
Download link
https://psaide.com/?sfrom=A86R4u
Invitation Code: A86R4u