Table of Contents
The Festive Photo Editing Challenge
As the holiday season approaches, individuals and businesses alike face a common creative challenge: how to quickly transform ordinary photos into festive Christmas content without expensive equipment or advanced editing skills. Whether you’re creating personalized holiday cards, updating social media profiles, or preparing marketing materials, adding seasonal elements like Christmas headbands traditionally requires precise selection work, perspective adjustments, and lighting matching in Photoshop—tasks that can frustrate even experienced users and consume valuable time during the busiest season of the year.
What if you could add perfect Christmas accessories to any portrait with just two images and a simple instruction? This guide demonstrates how to use Nano Banana in Photoshop, the innovative AI feature within the PsAide plugin, to seamlessly place Christmas headbands on your photos. This technique eliminates the technical complexity of manual compositing, allowing anyone to create professional-looking holiday portraits in minutes—perfect for spreading Christmas cheer without the traditional editing headaches.
Why Traditional Accessory Editing Fails in Photoshop
Manually adding headbands or other accessories in Photoshop presents multiple technical challenges that often result in unconvincing composites. The process typically involves careful selection around hair (one of Photoshop’s most difficult tasks), accurate perspective adjustment to match the head’s angle, realistic shadow creation, and proper integration with existing lighting conditions. Even with tools like Content-Aware Fill or advanced selection techniques, the results frequently look artificial—with headbands appearing to float above hair rather than resting naturally, or with lighting that doesn’t match the original photo’s environment.
The Nano Banana Photoshop approach revolutionizes this process through intelligent AI understanding. Instead of treating accessory addition as a mechanical cutting-and-pasting exercise, the system analyzes both the portrait and the accessory image holistically, understanding facial structure, head orientation, and lighting conditions to place the Christmas headband with natural positioning and appropriate integration. This represents a fundamental shift from manual technical execution to AI-assisted creative enhancement.
Preparing for Your Holiday Transformation
- Software: Adobe Photoshop with the PsAide plugin installed
- Base Photo: A clear portrait with good lighting (the head should be reasonably visible)
- Accessory Image: A high-quality image of a Christmas headband on a plain background

- Skill Level: Beginner-friendly, no prior compositing experience needed
- Time Required: Approximately 2-3 minutes per image
The 3-Step Holiday Magic Process
Step 1: Gather and Prepare Your Images
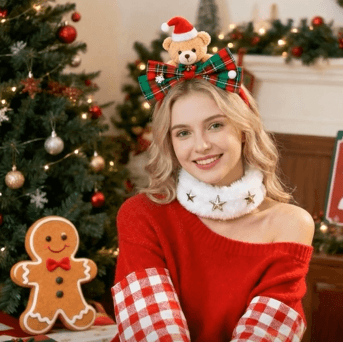
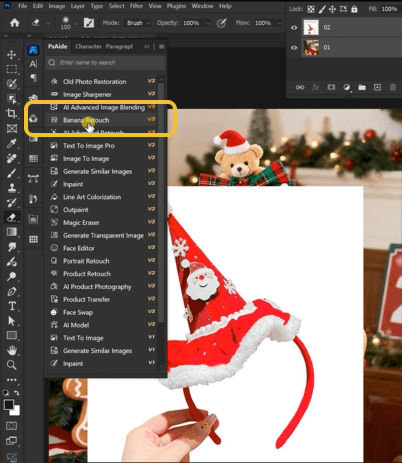
Begin by opening both your portrait photo and your Christmas headband image in Photoshop. For optimal results, choose a portrait where the subject’s head is clearly visible and not obstructed by hands or other objects. Your headband image should show the accessory against a contrasting background (white or transparent backgrounds work best) to help the AI distinguish it clearly. No preliminary editing or selection is necessary—the AI will work with your images as they are. Open the PsAide panel and launch the Nano Banana module to begin the AI process.
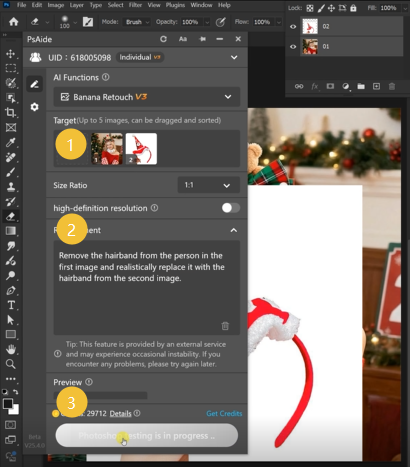
Step 2: Upload and Instruct with Clarity
Within the Nano Banana interface, upload your two images in this specific order:
- Figure 1: Your portrait photograph
- Figure 2: Your Christmas headband image
In the text prompt box, use this clear, direct instruction:
“Have the model in Figure 1 wear the Christmas headband shown in Figure 2.”
This straightforward command provides all necessary information to the AI: it identifies which image contains the subject, which contains the accessory, and specifies the desired action. The AI’s understanding of spatial relationships and facial features enables it to interpret this instruction intelligently, determining appropriate placement, size, and orientation for the headband.
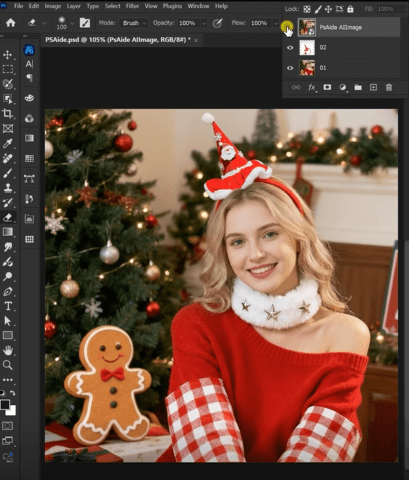
Step 3: Generate and Enjoy Your Festive Result
Click the “Generate” button and wait approximately 30-45 seconds for processing. Nano Banana will analyze both images, detect the subject’s head position and orientation in the portrait, then seamlessly integrate the Christmas headband with appropriate scaling, perspective adjustment, and lighting matching. The result is a naturally festive portrait where the headband appears as if it was worn during the original photo session—complete with realistic shadows and proper positioning relative to the hair and head shape.
Creative Applications for the Holiday Season
Once you master this basic technique, explore these seasonal applications:
- Family Christmas Cards: Add matching headbands to family portraits for cohesive holiday cards
- Pet Photos: Create adorable Christmas pet pictures (works with animal portraits too)
- Team Celebrations: Add festive elements to corporate team photos for holiday newsletters
- Social Media Series: Create “12 Days of Christmas” themed profile pictures
- Historical Photos: Add seasonal cheer to vintage family photographs
The same principle applies to other holiday accessories like Santa hats, reindeer antlers, or festive hair clips.
Common Questions
Q1: What if the headband doesn’t position correctly on the first try?
A: The AI generally positions headbands accurately, but you can improve results with better source images. Ensure your portrait shows the head clearly (not tilted extremely) and that your headband image is well-lit against a clean background. If needed, regenerate with the same prompt—AI results can vary slightly between generations, and a second attempt often produces perfection.
Q2: Can I add multiple accessories at once?
A: For complex multi-accessory additions, process one element at a time. Add the headband first, then use the resulting image as your new “Figure 1” to add another accessory like earrings or a necklace. This sequential approach maintains quality control and allows for individual adjustment of each element.
Q3: How do I make the headband look more natural if it appears too sharp or artificial?
A: Apply subtle post-processing in Photoshop. Add a slight Gaussian blur (0.3-0.8 pixels) to match the photo’s natural focus, adjust the headband layer’s opacity to 92-97% for better integration, or use a soft eraser brush to gently blend edges with the hair. These minor adjustments take seconds but significantly enhance realism.
Q4: What types of headband images work best?
A: Use clear, high-resolution images of headbands against plain backgrounds. Angled shots that show the headband’s three-dimensional shape (rather than flat product photos) yield more natural results. Images with simple, solid-color headbands typically integrate more easily than highly detailed or glittery ones, though the AI handles most variations reasonably well.
Q5: Can I use this technique with group photos?
A: Yes, but for best results with multiple subjects, process individuals separately then composite them back together, or use a prompt specifying “Add Christmas headbands to all people in Figure 1.” Group photos may require additional manual adjustment for perfect positioning on each subject, but the AI provides an excellent starting foundation that dramatically reduces total editing time.uiring millimeter precision (like passport photos), use the AI result as your foundation, then apply minor adjustments using Photoshop’s ruler and rotation tools. The AI typically achieves 90-95% perfect alignment, reducing manual correction time from minutes to seconds.
Download link
https://psaide.com/?sfrom=A86R4u
Invitation Code: A86R4u