Table of Contents
1. The Handbag Replacement Challenge & Practical Solutions
Q: Is handbag replacement really that difficult in Photoshop?
A: Surprisingly, yes. Even for experienced editors, replacing a handbag involves multiple challenges: complex selection around handles and straps, realistic integration with the model’s grip, proper perspective matching with arm position, and lighting adjustments that account for both material reflection and environmental shadows.
Q: Can AI handle these subtle details?
A: Absolutely—Nano Banana’s AI specifically understands how accessories interact with human poses. It recognizes grip points, calculates how bags naturally hang from hands or arms, and matches lighting conditions to create results that appear naturally photographed rather than digitally added.
2. Why Strategic Marking Improves AI Accuracy
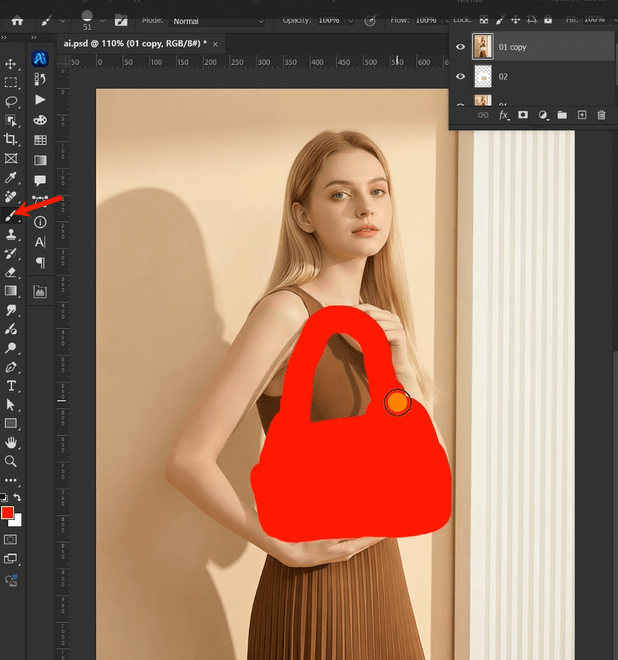
The simple step of marking the existing handbag with red serves two critical purposes: First, it provides clear visual guidance that helps the AI identify exactly what needs replacement, especially valuable when multiple bags or similar-colored objects appear in the image. Second, it reduces contextual confusion by isolating the target area, preventing the AI from being distracted by surrounding elements. This strategic preparation, taking just 20 seconds, dramatically increases replacement accuracy and produces more professional results.
3. What You’ll Need
- Adobe Photoshop(2015+) with PsAide plugin installed
- Click to get
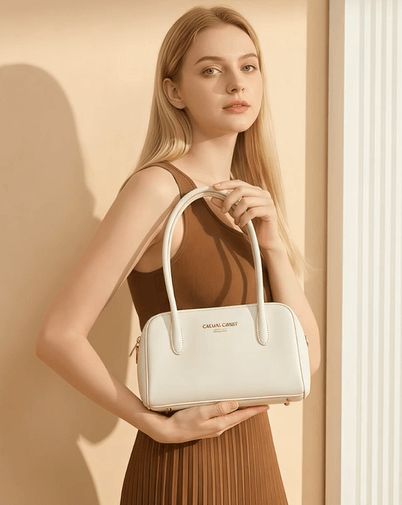
- Model photo showing clear handbag placement
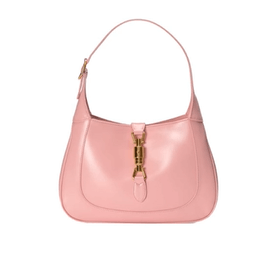
- Replacement handbag image (neutral background works best)
- 2-3 minutes total processing time
4. The 3-Step Handbag Replacement Process
Step 1: Prepare with Strategic Marking
Open both images in Photoshop. Create a duplicate layer of your model photo. Using a bright red brush (RGB: 255,0,0), carefully paint over the existing handbag. Focus on covering the main bag body while avoiding skin, clothing, and surrounding elements. Don’t worry about perfect edges—the AI will interpret the marked area intelligently. This visual guide ensures precise targeting and better results.
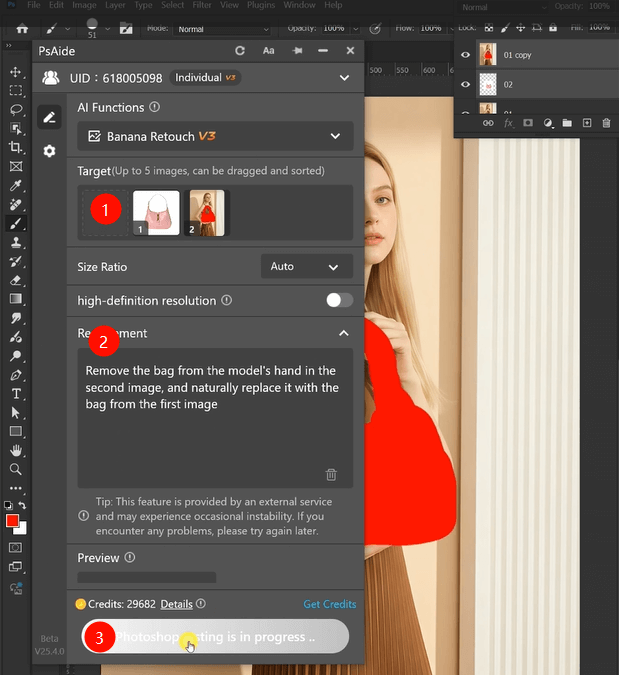
Step 2: Upload and Command with Clarity
Launch Nano Banana and upload your prepared images:
- Image 1: Your replacement handbag
- Image 2: Your model photo with red-marked bag
In the prompt box, enter this specific instruction:
“Remove the bag from the model’s hand in the second image, and naturally replace it with the bag from the first image.”
Step 3: Generate Natural Integration
Click “Generate” and wait 30-45 seconds. The AI analyzes both images, removes the red-marked handbag while preserving the model’s hand position, positions the new bag with correct grip alignment and hanging angle, matches lighting and shadows to the original environment, and blends everything seamlessly. The result shows your new handbag appearing as naturally held as the original.

5. Professional Applications & Tips
This technique excels for:
- Fashion E-commerce: Showcase multiple bag options with the same outfit
- Marketing Campaigns: Test different accessories in campaign images
- Product Visualization: Demonstrate how bags look when carried
- Portfolio Work: Create varied looks from limited photoshoots
Pro Tips: For best results, ensure your replacement bag image shows handles/straps clearly—this helps the AI understand how the bag should be held. If your model’s grip is unusual or the bag has complex straps, the red marking helps the AI focus specifically on the replacement area. The system works particularly well with structured bags where form and perspective are clearly defined.
Download link
https://psaide.com/?sfrom=A86R4u
Invitation Code: A86R4u