Table of Contents
The Christmas Design Integration Challenge
Q: Why does placing a product like a cup into a scene often look artificial?
A: Lighting and perspective mismatches. Manually blending images requires matching light direction, shadow intensity, color temperature, and perspective—a process demanding both technical skill and artistic eye. Even with correct placement, subtle differences in light quality make products appear pasted rather than part of the scene.
Q: How does AI solve this fundamental problem?
A: AI Advanced Image Blending analyzes both images at a perceptual level. It doesn’t just layer images; it understands the lighting environment of the background and the material properties of the product, then intelligently adjusts the product to appear naturally illuminated within the scene.
1.What Makes AI Advanced Blending Different
AI Advanced Image Blending performs context-aware integration—it recognizes that a ceramic mug should reflect light differently than a glass ornament, and that shadows should fall naturally based on scene lighting. This results in composites that maintain visual coherence that’s difficult to achieve manually.
2.What You’ll Need
- Adobe Photoshop with PsAide plugin installed
- Click to get
- Christmas-themed background scene

- Product photo of your mug/cup (clean background recommended)
- 30-60 seconds processing time
3.The Professional Blending Process
Step 1: Prepare Your Source Images
Open both your background scene and product photo in Photoshop. Place your cup image on a layer above the background.
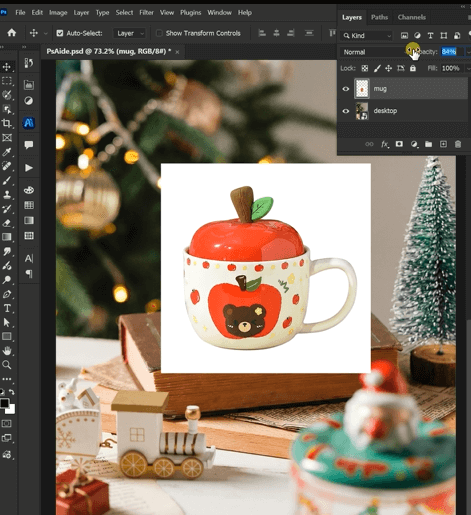
Step 2: Configure and Generate
With both layers prepared, navigate to the PsAide panel and select AI Advanced Image Blending. The intelligent interface will recognize your layered composition. Click the “Generate” button—no complex settings or prompts needed. The AI automatically analyzes both layers to determine the optimal integration strategy.
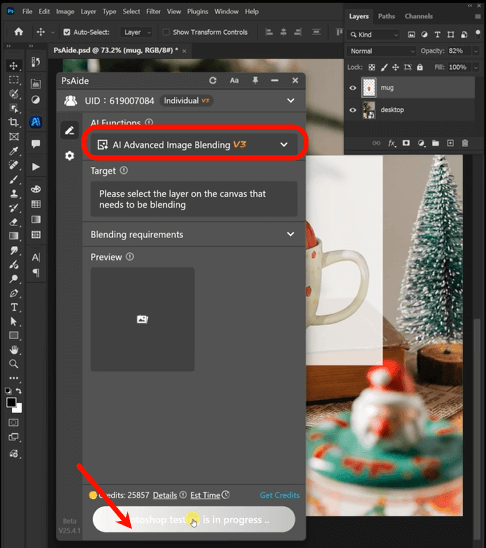
Step 3: Achieve Perfect Integration
Within 20-40 seconds, the AI processes your images, performing multiple sophisticated adjustments:
- Lighting Matching: Analyzes the background’s light sources and applies appropriate highlights/shadows to the cup
- Color Harmony: Adjusts the cup’s color temperature to match the scene’s atmosphere
- Shadow Generation: Creates realistic cast shadows based on the cup’s position and scene lighting
- Edge Refinement: Softens and blends edges for natural transition into the background
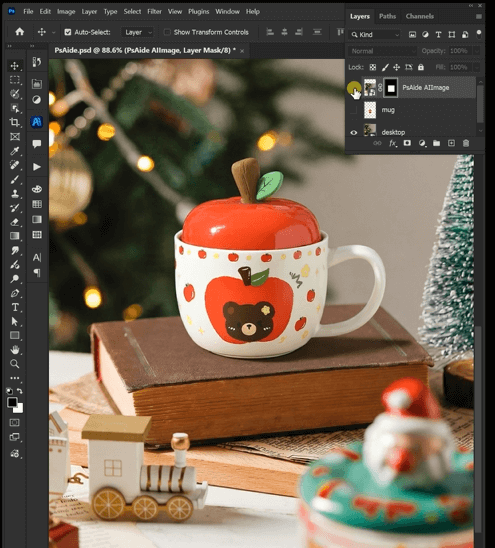
The result is a professionally integrated Christmas scene where your product appears naturally placed within the festive environment.
Pro Tips:
- For reflective surfaces like glossy mugs, ensure your product photo shows appropriate highlights—the AI will enhance these during blending
- Position your cup at a natural angle within the scene before blending
- If your initial result needs refinement, adjust the blended layer’s opacity or apply a slight Gaussian blur to edges for softer integration
This one-click AI solution transforms complex compositing into an effortless process, enabling designers to create professional holiday visuals in seconds rather than hours.ssional cutouts in minutes.
Download link
https://psaide.com/?sfrom=A86R4u
Invitation Code: A86R4u