Table of Contents
The Lip Color Editing Challenge
Q: Why does manually changing lip color often look fake?
A: Imperfect edge blending and texture loss. The human lip isn’t a flat shape; it has a complex, textured surface with subtle highlights, shadows, and a soft, irregular border. Simply using a color overlay or the Hue/Saturation tool flattens this texture and creates a harsh, unnatural line where the lips meet the skin.
Q: How does AI handle this better?
A: Nano Banana Pro is trained to understand facial anatomy. It recognizes the lip area as a distinct, three-dimensional form. When you command a color change, it doesn’t just paint over the lips; it recalculates highlights and shadows based on the new color and the original photo’s lighting, preserving the natural texture and ensuring the color blends seamlessly at the edges.
The Precision of Hex Code Instructions
Using a specific hex color code like #ff0000 (pure red) is a powerful feature of the Pro version. It provides the AI with exact, unambiguous color data, eliminating guesswork. This level of precision ensures you get the precise shade you want, whether it’s a classic red, a muted pink, or a bold berry, directly in your first generation.
What You’ll Need
- Adobe Photoshop with the PsAide plugin installed.
- Click to Download
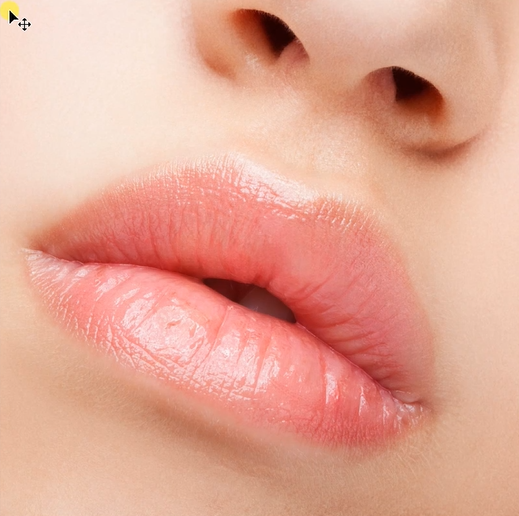
- A clear portrait photo with visible lips.
- Your target lipstick color (in Hex, RGB, or a descriptive name).
- About 1 minute total.
The 3-Step Lip Color Change Process
Step 1: Open Your Portrait
Open your chosen portrait in Photoshop. Ensure the lips are clearly visible and reasonably well-lit. No preliminary selections are needed—the AI will locate the lips automatically.
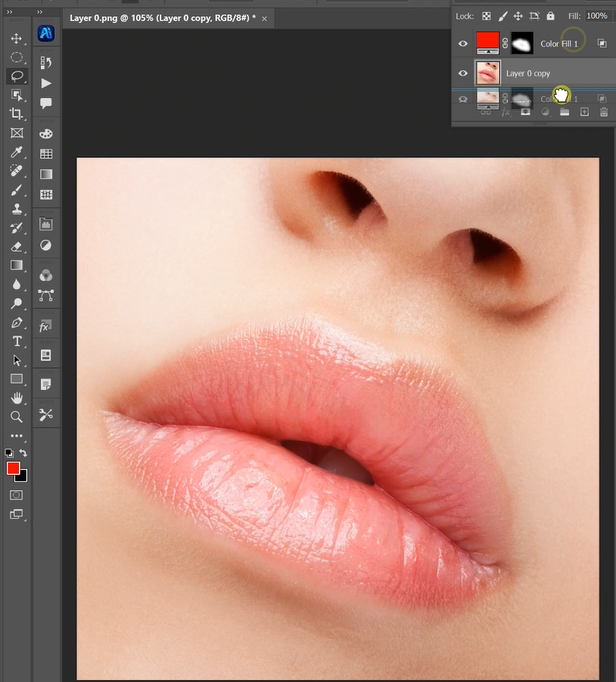
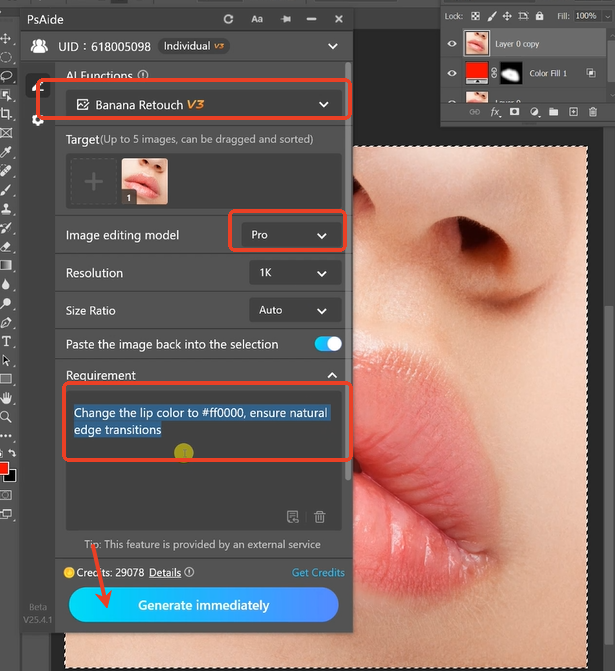
Step 2: Command the Pro AI with Precision
In the PsAide panel, open Nano Banana and select the Pro version. Upload your single portrait image. In the text prompt box, enter a detailed and precise instruction like:
“Change the lip color to a vibrant matte red (#ff0000). Ensure natural edge transitions and preserve lip texture and highlights.”
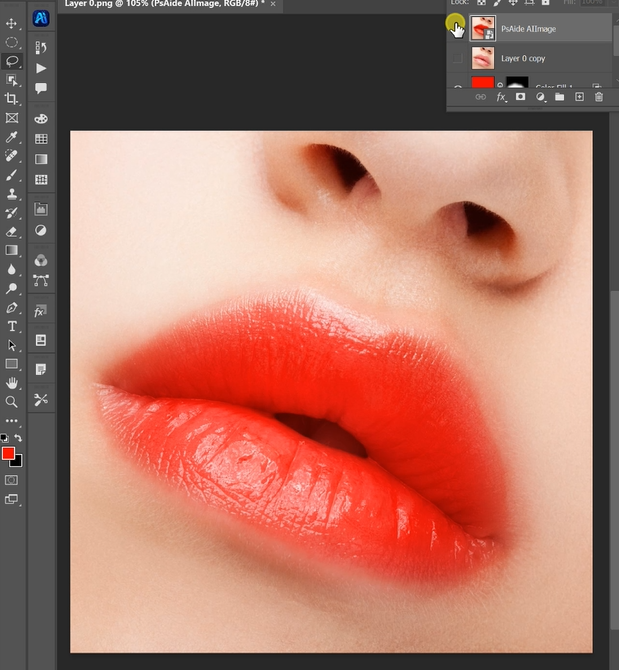
Step 3: Generate a Perfectly Natural Result
Click “Generate.” In about 30-45 seconds, the AI will: identify the lip area, replace the original color with your specified shade, adjust highlights and shadows to match the new color’s properties (e.g., a matte vs. glossy finish), and most importantly, create a soft, natural transition at the lip line that blends perfectly with the surrounding skin tone. The result looks as if the model applied the new lipstick.
Pro Tips for Flawless Lip Edits
- Be Descriptive: Beyond hex codes, describe the finish. Use prompts like “glossy berry color” or “soft, nude pink with satin finish.” This guides the AI’s texture rendering.
- Adjust Intensity: The generated result will be a new layer. If the color is too intense, simply lower the layer’s opacity for a more subtle, stained-lip effect.
- Lighting Consistency: For the most realistic look, the new lip color will automatically adapt to the photo’s existing lighting, maintaining a natural look under any condition.
This method transforms a technically demanding edit into a simple, three-step process, giving you studio-quality lip color changes in under a minute with complete creative control.
Download link
https://psaide.com/?sfrom=A86R4u
Invitation Code: A86R4u