Table of Contents
Q&A: The Necklace Compositing Challenge
Q: Why does placing a necklace on a model’s neck in Photoshop often look fake?
A: The problem is a lack of physical interaction. A simple copy-paste or overlay fails to account for how jewelry sits on skin. A real necklace follows the contours of the collarbone and neck, creates subtle shadows and skin indentations, and reflects light based on the scene. Manual methods struggle to simulate these subtle 3D effects convincingly.
Q: How does AI create a more natural, studio-quality look?
A: Nano Banana’s AI understands spatial relationships and material properties. It doesn’t just place the necklace on the image; it integrates it into the scene. The AI analyzes the model’s neck posture and lighting, then adjusts the necklace to lay naturally against the skin, generating appropriate highlights, shadows, and even slight skin contact effects, achieving a realism that mimics a studio shot.
1. What Makes This Method Superior to Simple Cut-and-Paste?
Traditional cut-and-paste leaves you with a flat graphic that appears to float. Nano Banana performs context-aware compositing. It recognizes that “necklace on the neck” involves draping, perspective following body curves, and lighting interaction. The result isn’t just a placed object—it’s an integrated element that respects the physics and lighting of the original portrait.
2. What You’ll Need
- Adobe Photoshop(2015+) with the PsAide plugin installed.
- Click to Download
- Model Photo: A clear portrait showing the neck and collarbone area.

- Necklace Image: A clean product shot of the necklace, preferably on a simple background.
- Time: Approximately 60 seconds.
3. The Studio-Quality Compositing Process
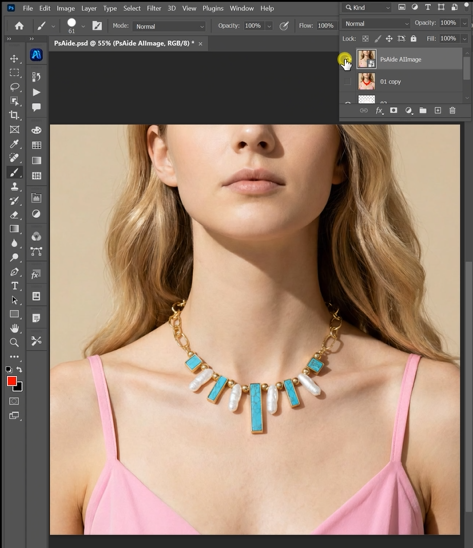
Step 1: Prepare Your Source Images
Open both your model photo and the necklace product shot in Photoshop. No need for preliminary masking or selection on the model—the AI will identify the neck area. If the necklace image has a busy background, a quick selection to remove it can help, but is not strictly required for the Pro version’s understanding.

Step 2: Configure and Command the AI
In the PsAide panel, launch Nano Banana. Upload your two images in the correct order:
- Figure 1: Your necklace product image.
- Figure 2: Your model photo.
In the prompt box, enter a clear, instructional command:
“Change the necklace on the person’s neck in Figure 2 to the necklace in Figure 1.”
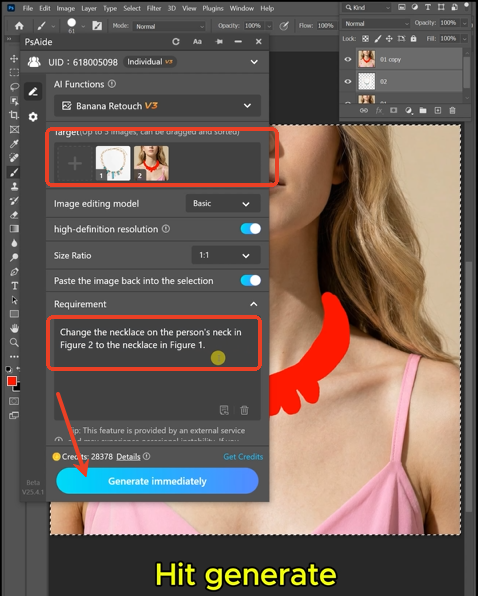
Step 3: Achieve a Photorealistic Composite
Click “Generate.” Within 30-60 seconds, the AI executes the complex task:
- Target Identification: Locates the existing necklace or neck area in the model photo.
- Perspective & Draping: Warps and positions the new necklace to follow the contour of the model’s neck and collarbone perfectly.
- Lighting Synthesis: Analyzes the light source in the model photo and applies matching highlights (on shiny metals) and shadows (where the chain touches the skin) to the necklace.
- Edge Blending: Softly blends the necklace edges to create the illusion of contact with the skin, avoiding harsh, digital lines.
The final result is a composite where the new necklace looks like it was photographed on the model in the original session, complete with naturalistic shading and perfect integration.
Pro Tips for Perfect Results:
- Lighting Matters: For the most seamless blend, try to use a necklace image lit from a similar direction as your model photo.
- Be Specific: If the necklace has a specific style (e.g., “choker” or “pendant”), include that in your prompt for even more accurate placement.
- Refine if Needed: The AI provides a fantastic foundation. You can use the layer opacity on the result to slightly soften the effect or use a soft eraser brush on a layer mask for minimal touch-ups.
This AI-powered method bypasses the tedious manual steps of masking, warping, and painting shadows, delivering a photorealistic jewelry composite that truly looks like a studio photograph, not a digital edit.
Download link
https://psaide.com/?sfrom=A86R4u
Invitation Code: A86R4u