Table of Contents
In job applications, exam registrations, and official document processing, ID photos with different background colors are often required. Many users rely on Photoshop (PS), but manual cutouts can be time-consuming and error-prone.
This guide provides a step-by-step Photoshop tutorial focused on Background Remover workflows, helping you cut out ID photos and change background colors efficiently. Whether you prefer traditional tools or AI assistance, Background Remover solutions can significantly improve accuracy and speed.
1. Two Ways to Cut Out an ID Photo and Change Background Color in Photoshop
(1)Quick Selection Tool + Edge Refinement
Best for solid-color background ID photos
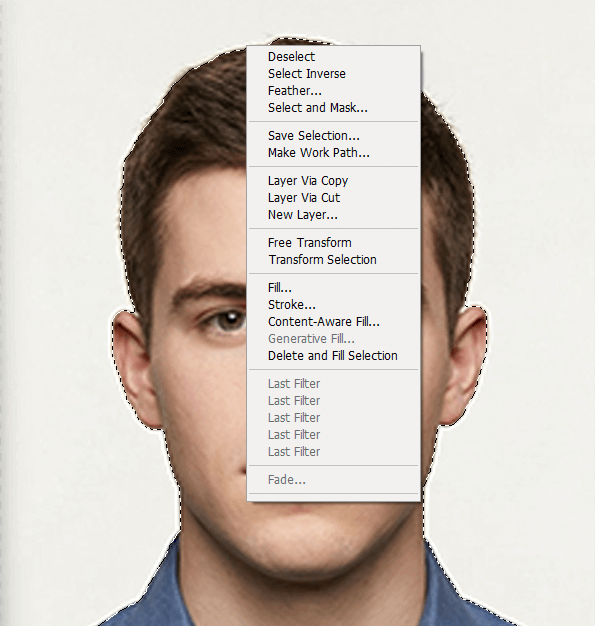
Select the Quick Selection Tool from the left toolbar (shortcut W). Gently brush over the subject, and Photoshop will automatically detect and select the person. The appearance of “marching ants” indicates a successful selection.
If extra background areas are selected, hold Alt (Windows) / Option (Mac) to remove them.
(2)To avoid rough edges, click Select and Mask in the top options bar:
① Enable Smart Radius (1–2 px)
② Adjust Smooth (2–3)
③ Increase Contrast (10–20)
④ Enable Decontaminate Colors to remove color fringing
Output the result to a Layer Mask. This manual method works as a basic Background Remover, but requires experience.
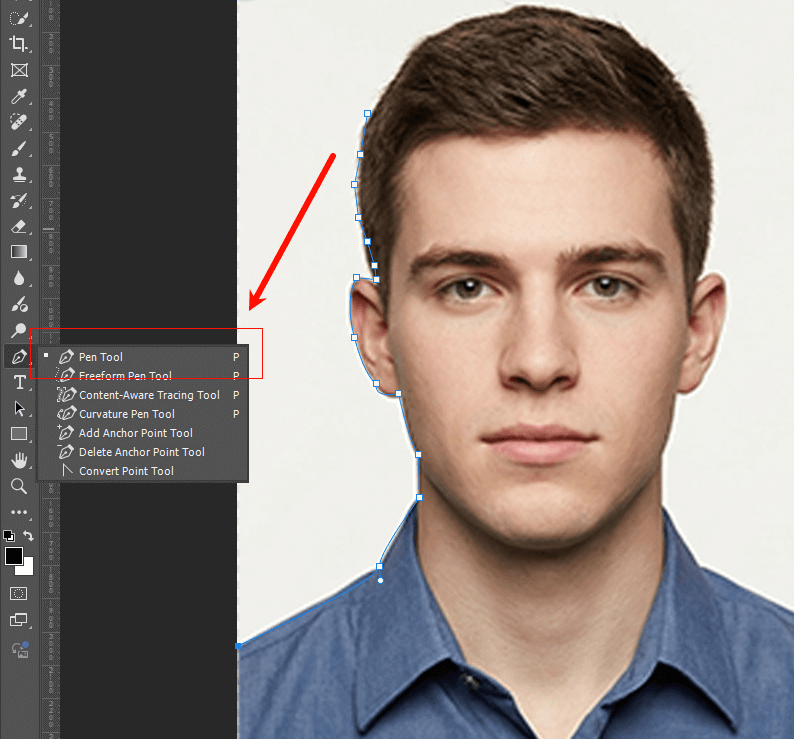
(2)Pen Tool Method
Suitable for complex backgrounds or high-precision requirements
Activate the Pen Tool (shortcut P) and switch to Path mode. Carefully trace the subject’s outline using anchor points. For curves, drag handles to match contours.
After completing the path, press Ctrl + Enter / Command + Enter to convert it into a selection. Use Select and Mask again to refine edges and output to a layer mask.
This method delivers precise results, but is slower than using a dedicated Background Remover.
2. Common Problems When Changing ID Photo Background Color
(1)Residual background color on edges
① Cause: Color decontamination not enabled
② Solution: Reopen Select and Mask and enable Decontaminate Colors
(2)Uneven background color or visible shadows
① Cause: Incorrect layer selected or original shadows remain
② Solution: Ensure the new background layer is active and use the Patch Tool (J) to remove shadows
These issues are common when not using a professional Background Remover.
3. PsAide Background Remover: One-Click ID Photo Cutout and Background Change
(1)Why Background Remover is ideal for ID photos
① Manual cutouts often leave halos or jagged edges
② Official ID photos require clean, uniform backgrounds
③ A dedicated Background Remover ensures accurate subject separation
PsAide Background Remover is a standalone AI feature, designed specifically for background removal and replacement. It has no relation to Banana or other retouching tools.
(2)Required tools
① Adobe Photoshop with PsAide installed
② Original ID photo (front-facing, simple background recommended)
③ Total processing time: under 1 min with Background Remover
(3)Step-by-step one-click workflow
① Prepare the ID photo
Open Photoshop and import the ID photo. No manual selection is required.
② Launch Background Remover
Open the PsAide plugin panel and select Background Remover.
Click Generate to start AI processing.
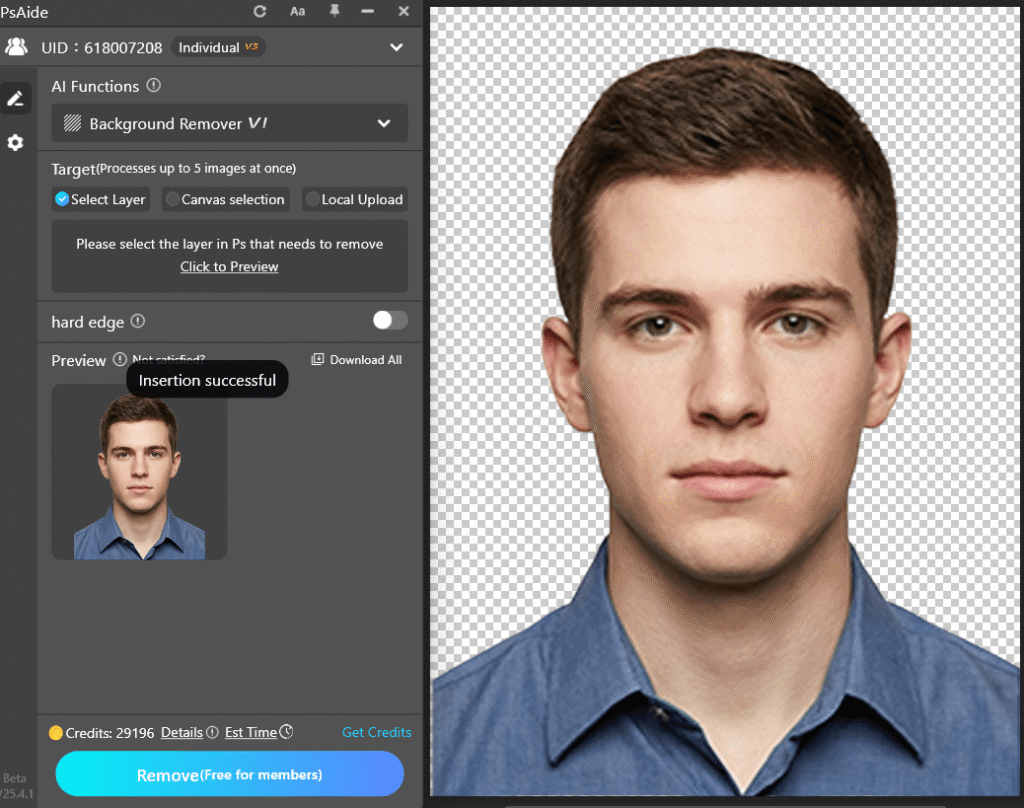
③ Add a new background color
The Background Remover generates a transparent subject layer.
Create a new layer below and fill it with the required background color (white, red, or blue).
Save the image as PNG (transparent) or JPG (with background).
4.Conclusion
Using a professional Background Remover dramatically simplifies the process of cutting out ID photos and changing background colors. Compared to manual Photoshop methods, PsAide Background Remover offers higher accuracy, cleaner edges, and faster results—making it ideal for beginners and professionals alike.

Download Link: https://psaide.com/?sfrom=ZfhxUK
Invitation Code: ZfhxUK