Table of Contents
For e-commerce copywriters, brand visual designers, and new media content creators, the visual presentation of text directly affects audience engagement and content dissemination. In traditional methods, creating a plush effect for text using manual PS tools is not only challenging but often leads to problems. New designers often struggle with selecting precise areas and managing light-shadow overlays, resulting in messy textures and unnatural edges.
Even for seasoned designers, achieving the perfect plush effect can take hours, and it’s difficult to ensure a consistent result. The rapid development of AI advanced retouch technology, coupled with professional PS plugins, simplifies these traditional methods while ensuring accurate text plush effect creation.
1. AI Advanced Retouch Function: Creating a Plush Effect for Text
Before using the AI retouch plugin, it’s essential to perform some basic PS operations to ensure optimal results. Here are two core tips to help you get the best effect:
① Precisely Select Text Area: Open the image with the target text and first use the “Quick Selection Tool + Refine Edge” feature to select the text area. This avoids the harsh edges that can result from using the Marquee Tool alone. If the text and background colors are too similar, start by using the “Color Range” function to locate the text, then fine-tune the selection to ensure the text outline is clean without any background pixels.
② Uniform Text Background: After selecting the text, press Ctrl+J to duplicate the text layer and fill it with a solid color background (suggested color should be similar to the expected plush effect). This minimizes background color interference, allowing the AI to focus on the text itself during the plush effect generation.
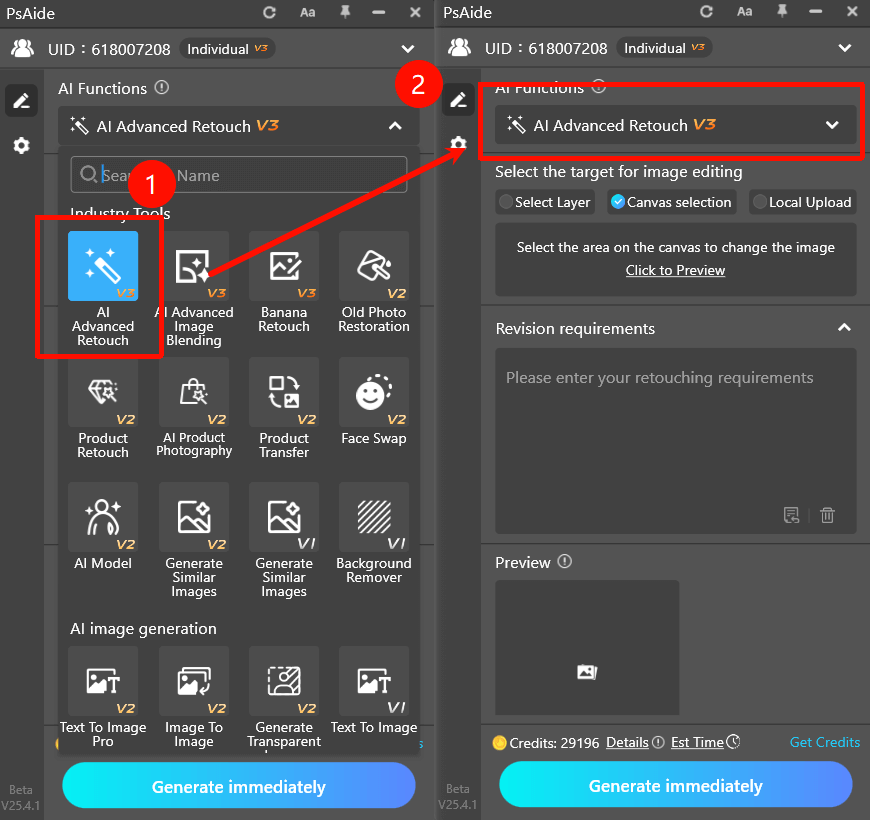
2. PsAide Plugin: Effortlessly Create Perfect Plush Effects for Text
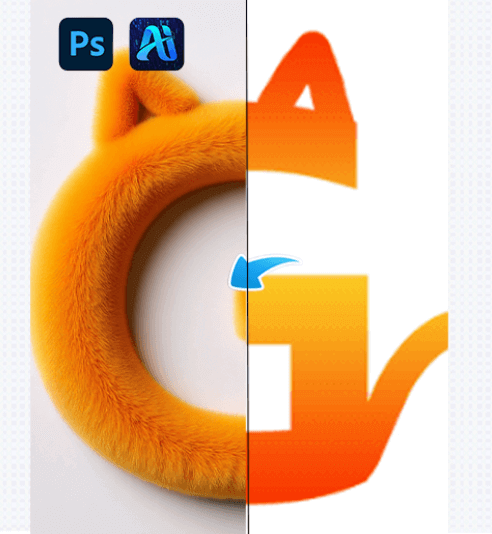
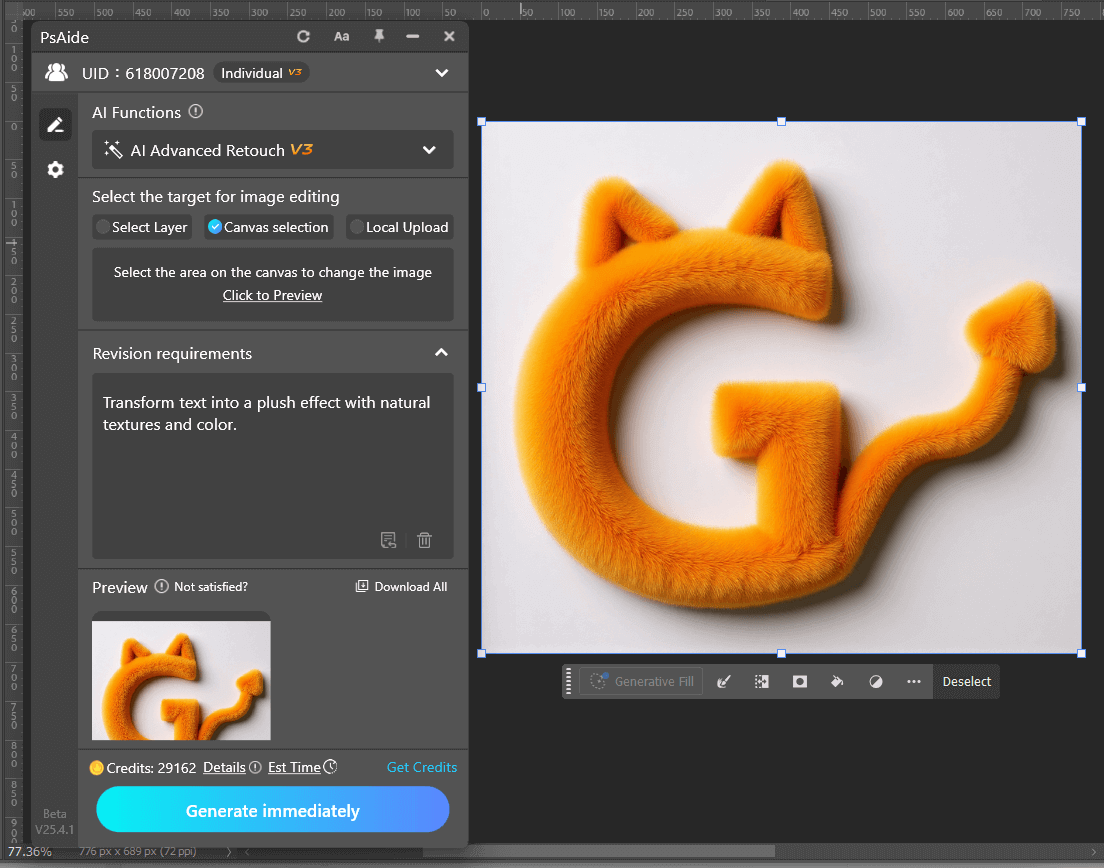
(1) AI Advanced Retouch Functionality: Text Plush Effect Demonstration
The results of this AI retouch plugin are beyond expectations. As shown in the case, using the PsAide plugin’s AI retouching capabilities, you can transform ordinary printed text into a text with a rich plush effect. Not only does it perfectly retain the font outline, layout, and structure, but it also restores the fluffy texture, soft touch, and color layers of the plush material. The plush curvature of the text edges and the texture density match a real plush feel, and the transition of light and shadow is natural. It appears as though the text is made entirely of plush material, with no visible traces of AI retouching.
(2) Key Advantages of Creating Plush Text Effects
The key advantages of using AI retouching for plush text effect creation meet the visual design industry’s needs for precision and creativity:
① Significant Time and Cost Savings:
No need for manual drawing of plush textures. AI retouching can generate the plush effect for text, eliminating the need for material layering, light-shadow adjustments, and detail refinements. What typically takes several hours can now be completed in just a few minutes, drastically increasing design efficiency.
② Highly Accurate Detail Restoration:
The AI can precisely match different styles of plush materials, whether it’s short hair, long hair, curly, or faux fur. It accurately reflects texture details during the transformation, adjusting for the text’s font shape and stroke width to create a natural plush effect. There’s no texture disorder or imbalance.
3. Simple Steps to Create Plush Text Effects Using PsAide
This PS plugin for plush text effect creation simplifies the operation process using AI retouching technology. The process is incredibly easy, and even beginners can get excellent results in just 3 steps:
(1) Step 1: Import the Image into PS
Import the image containing the text that you want to modify into Photoshop.
(2) Step 2: Fill in the Prompt
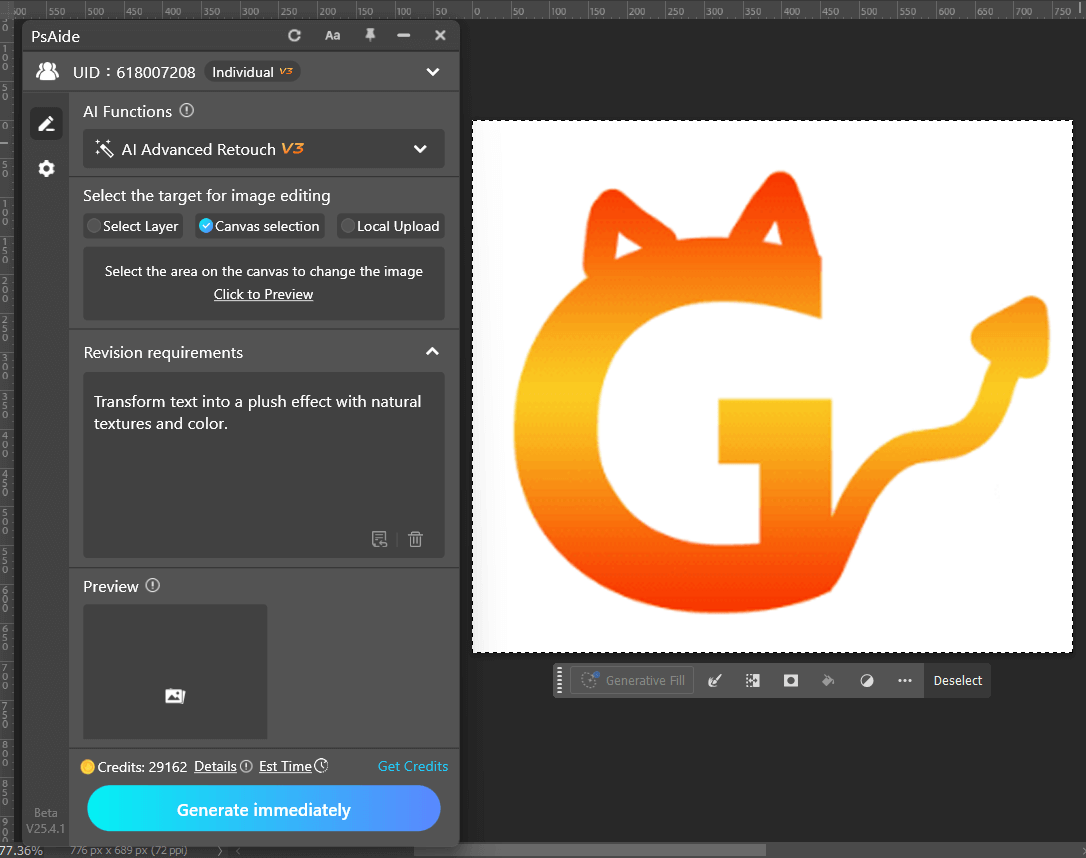
Clearly specify the desired plush text effect in the prompt. For example,
“Transform text into a plush effect with natural textures and color.”
(3) Step 3: Click “Generate”
Click the “Generate” button and wait a few seconds for the AI to process the image and complete the plush text effect.
With the PsAide plugin, e-commerce copywriters, brand designers, and other professionals no longer have to deal with the tedious process of creating plush text effects manually. Thanks to the AI’s efficiency and precision, they can complete visual material creation and content design much faster and more effectively, giving a competitive edge to their work.
4.Summary
In this article, we explore how AI retouch technology, combined with the PsAide plugin, allows designers to easily create plush text effects with high precision. The plugin simplifies traditional methods and significantly reduces time and effort, allowing for quicker and more effective results. It’s a game-changer for e-commerce, branding, and creative design professionals.

Download Link: https://psaide.com/?sfrom=ZfhxUK
Invitation Code: ZfhxUK
More Tutorial:https://www.youtube.com/@psaidexl/shorts