Table of Contents
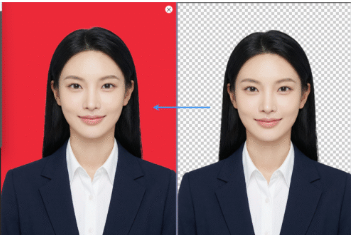
Changing ID photo backgrounds is a frequent need—scenarios like job applications or registrations often require switching between red, blue, and white backgrounds. However, manual processing easily leads to tedious cropping, residual background in hair strands, and non-compliant background colors. Below are 3 practical methods, from traditional operations to AI-efficient solutions, suitable for different skill levels to solve background change pain points.
1. Traditional PS Crop + Layer Fill: Precise but Time-Consuming
Ideal for users with basic PS skills, requiring manual cropping for precise edges—controllable but tedious.
- Steps: Open the ID photo in PS and press Ctrl+J to duplicate the layer. Use the Quick Selection Tool (shortcut W) with “Auto-Enhance” enabled to select the subject, refine hair edges with “Select and Mask”, invert the selection, and delete the original background. Create a new layer below the subject and fill it with the target color (standard blue: #438EDB) using the Paint Bucket Tool. Fine-tune edges with a low-hardness brush to remove residual background.
- Pain Points: Takes 15–20 minutes. Beginners often get stiff edges and color deviations, failing strict reviews.
2. Psaide Crop + PS Fill: Efficient & Precise
Avoids traditional cropping troubles with Psaide’s one-click crop, paired with PS fill for standard backgrounds.
- Steps: Open the ID photo in PS, launch the Psaide plugin, and use the “Background Remover” function to generate a crop with a transparent background (hair-strand precision, no residue) in under 1 minute. Return to PS, create a new layer filled with the required color (e.g., red: #ED2939, white: #FFFFFF) below the crop layer. Adjust background brightness with PS’s “Curves” tool for harmony with skin tone.

- Advantages: Balances efficiency and compliance, with precise matching of official background colors.
3. Nano Banana No-Crop One-Click Background Change: Beginner-Friendly
Psaide’s built-in Nano Banana function enables background change via prompts—no manual cropping, extremely simple.
Step-by-Step Process
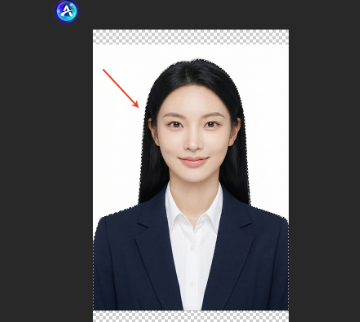
- Import ID Photo to PS: Launch PS, click “File > Open” to import the ID photo. Keep the original layer without preprocessing to avoid modifying the source image.

- Launch Nano Banana & Set Up: Locate the Psaide plugin panel in PS, expand the function list, and click “Nano Banana”. Select standard ID photo sizes (recommended 1-inch/2-inch). Enter the prompt in the text box: “Change the background of Figure 1’s ID photo to a standard blue background”. No extra parameters needed—AI automatically matches official blue color values.
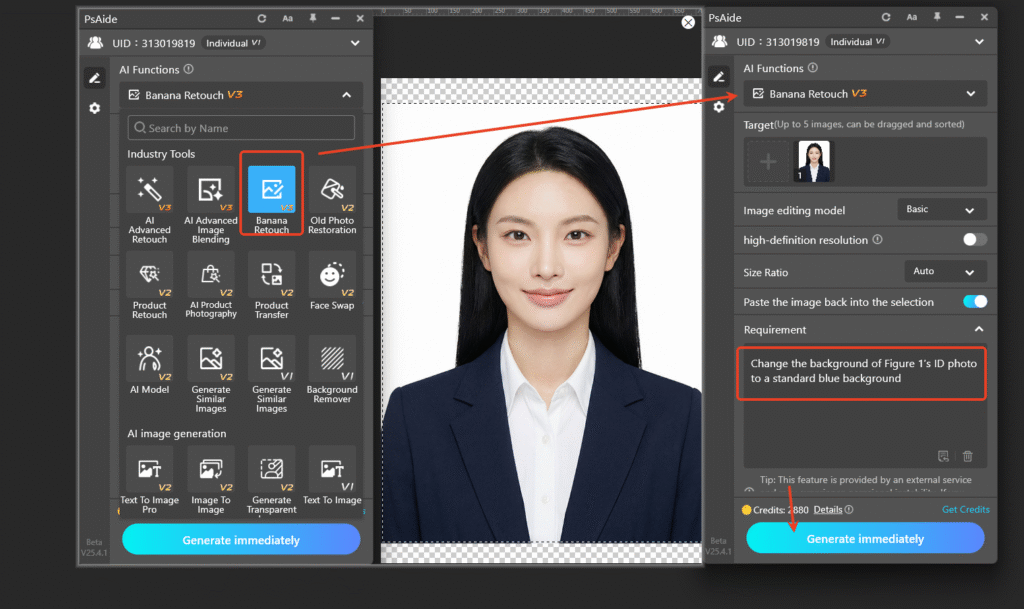
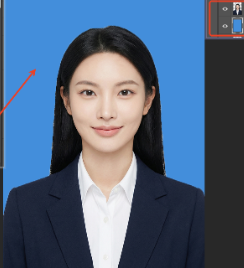
- One-Click Generate & Preview: Click “Generate” in the plugin. The AI processes in 10–15 seconds, and PS automatically creates a new layer. The result features a standard blue background, clean edges/hair strands, and consistent subject posture—ready for applications and printing without further PS tweaks.

Core Comparison of 3 Methods
| Method | Key Traits |
|---|---|
| Traditional PS | Precise but time-consuming, high threshold |
| Psaide Crop + PS Fill | Efficient, precise, compliant |
| Nano Banana | No cropping, one-click, beginner-friendly |
Prioritize the latter two for daily use. Choose Nano Banana for ultimate efficiency to avoid cropping and color deviation issues.
Pro Tips
- Confirm background color requirements in advance—use standard color values for government-related applications.
- Create a new layer when filling colors in PS for easy subsequent modifications.
- Add “preserve subject details” to the prompt in Nano Banana to optimize hair edge effects.
Master these 3 methods to easily solve “PS ID photo background change” problems. Psaide’s Nano Banana realizes one-click no-crop background change, paired with PS for auxiliary optimization—balancing efficiency and professionalism, making ID photo background changes hassle-free.nal principles and leverage intelligent tools to turn light and shadow retouching from a technical bottleneck into a creative catalyst.
Download link

https://psaide.com/?sfrom=A86R4u
Invitation Code: A86R4u