Table of Contents
Embedding one image into another and creating a natural blend is a high-frequency need in daily photo retouching and design—such as placing a clay pot image into a scene or a product shot into a background. The core is to match the embedded image’s light and shadow with the background and ensure seamless edge blending with no compositing traces. However, traditional PS methods often involve tedious steps, stiff blending, and mismatched light and shadow, which are especially hard for beginners to master. Below are 2 traditional PS embedding and blending methods, followed by the more efficient Psaide Nano Banana Pro solution.
Method 1: PS Move Tool + Layer Mask Blending – For Simple Scenes
Ideal for simple backgrounds and embedded objects with clear edges. The operation is basic but requires repeated fine-tuning for the blending effect.
Steps:
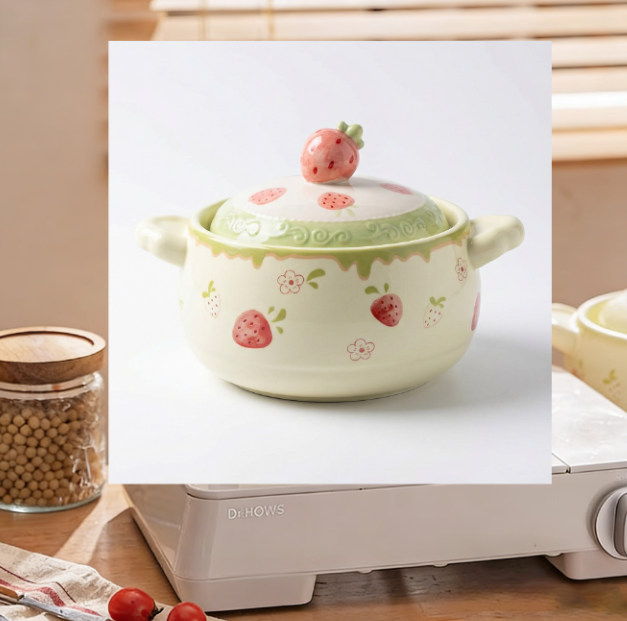
- Open PS, import the background image (with the original clay pot) and the clay pot image to embed (Figure 1) separately. Press Ctrl+J to duplicate both background layers to protect the original images.
- Select the Move Tool (shortcut V), drag the clay pot from Figure 1 into the background canvas, and press Ctrl+T to adjust its size and angle to match the position and proportion of the original clay pot in the background.
- Select the clay pot layer, add a black layer mask, and gently paint along the clay pot’s edges with a soft white brush (10%-20% hardness) to hide excess parts for initial blending.
- Go to Image > Adjustments > Curves and Color Balance to fine-tune the embedded clay pot’s light, shadow and hue for background matching.
- Lightly brush the clay pot’s edges with the Blur Tool to soften stiff traces and finish the embedding.Pain Points: Time-consuming edge blending, uneven brushing for beginners, hard to precisely match light and shadow, and easily creates a disjointed look in complex backgrounds.
Method 2: PS Pen Tool Cutout + Color Matching Blending – For High-Precision Scenes
Suitable for embedded objects with complex edges that require high-precision blending. The operation is tedious but offers controllable blending quality, ideal for users with basic PS skills.
Steps:
- Open PS, import both material images and duplicate their layers.
- Select the Pen Tool (shortcut P), zoom in on the clay pot in Figure 1 to 200%, click along its edge to draw a closed path, and adjust anchor points with the Alt key for a precise outline.
- Right-click the path, select Make Selection, set the feather radius to 0.5 pixels, copy the selection and drag it into the background image, then adjust its size and position.
- Select the embedded clay pot layer, go to Image > Adjustments > Match Color, select the background image as the reference in the pop-up window, and adjust brightness and color intensity to unify the clay pot’s hue with the background.
- Add a layer mask to refine edge blending, and use the Dodge/Burn Tool to fine-tune the clay pot’s local light and shadow to simulate ambient light effects and complete the blending.Pain Points: Tedious steps, taking 20-25 minutes for a single composite; high threshold for Pen Tool cutout, making precise outlining hard for beginners; easy color matching deviations.
Method 3: Psaide Nano Banana Pro – The Best Choice for Image Embedding (Zero Threshold for Beginners)
Psaide’s built-in Nano Banana Pro leverages AI intelligent recognition and light-shadow fusion algorithms, perfectly avoiding the pain points of traditional PS methods. No complex cutout or color grading is needed—achieve seamless image embedding and blending in just 3 steps.
Step 1: Mark the Replacement Area on the Background in PS
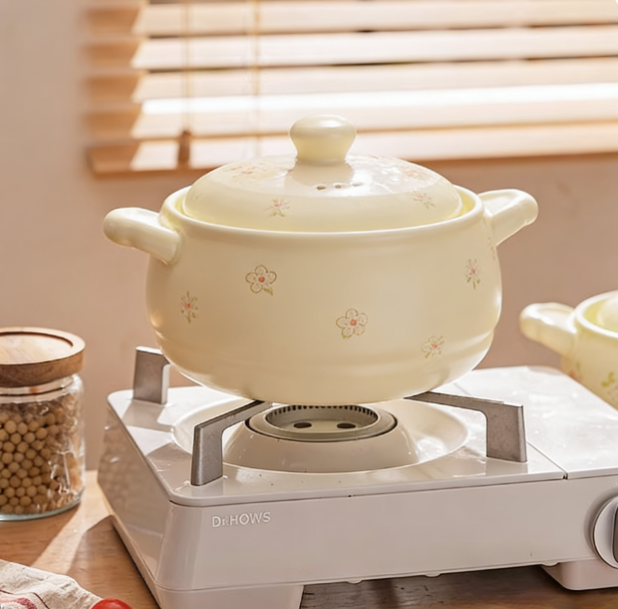
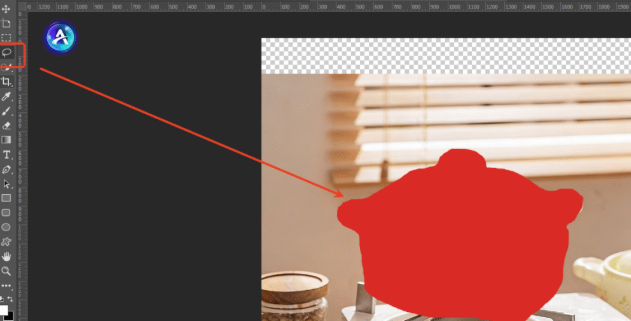
Launch PS, click File > Open to import the background image (with the original clay pot), and press Ctrl+J to duplicate the background layer. Select the Lasso Tool (shortcut L) on the left, precisely outline the original clay pot area on the background (following the clay pot’s contour as closely as possible). After selection, press ALT+DEL to fill the area with red, clearly marking the area to replace (embed) for accurate AI recognition.
Step 2: Launch Nano Banana Pro and Set the Prompt
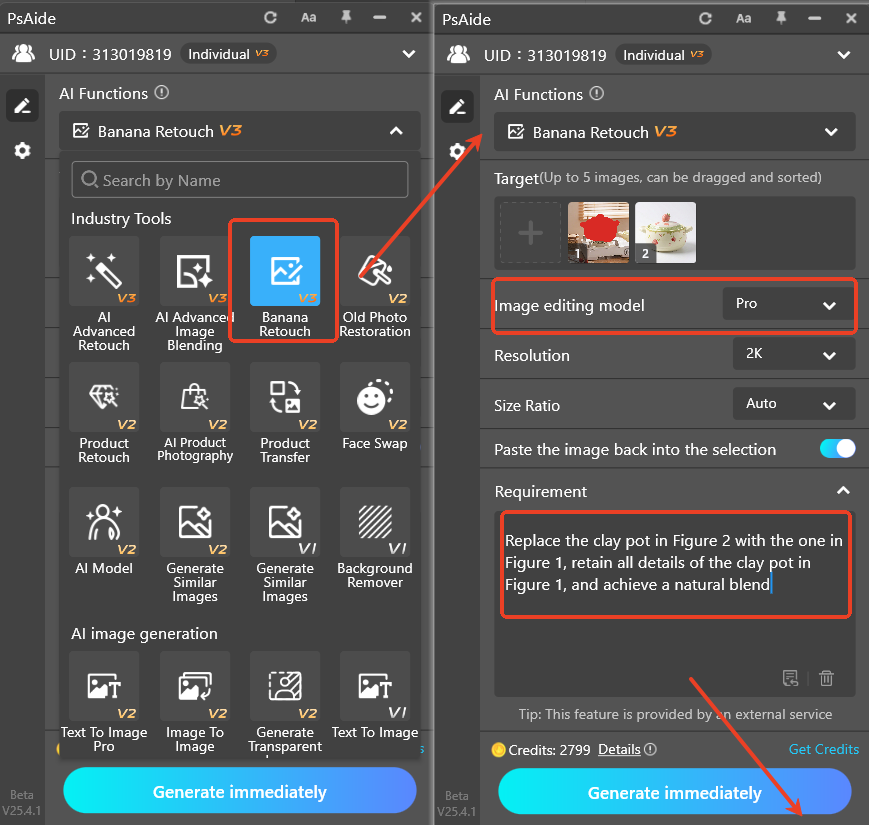
Locate the installed Psaide plugin panel in PS (compatible with PS CC2015+, Windows & Mac), expand the function list, click Nano Banana, and select the Pro Version (improves blending precision and optimizes light/shadow and edge details). Upload the background image (with the red-marked area) and the clay pot image to embed (Figure 1), then enter the precise prompt in the text box: “Replace the clay pot in Figure 2 with the one in Figure 1, retain all details of the clay pot in Figure 1, and achieve a natural blend”. This ensures the AI accurately executes the embedding, preserves the embedded object’s details and adapts it to the background.
Step 3: One-Click Generate and Preview the Seamless Blending Effect
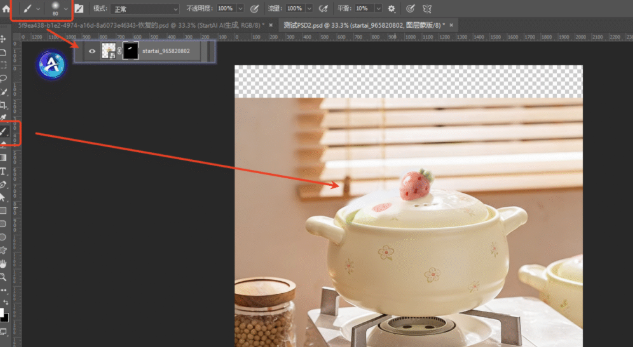
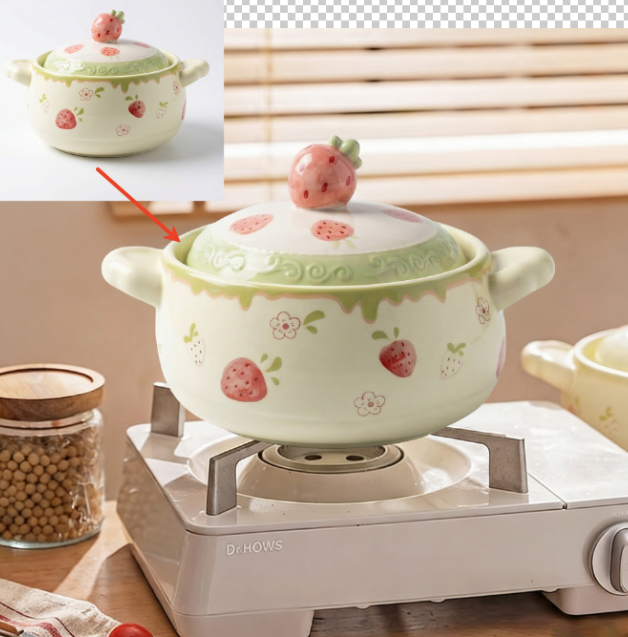
Confirm the materials and prompt are correct, then click the Generate button on the plugin panel. The AI completes processing in 15-20 seconds, automatically identifying the red-marked area, embedding the clay pot from Figure 1 into the background, and creating a natural blend with auto-adjusted light and shadow and optimized edge blending—all while retaining the clay pot’s original details. PS will automatically add a new processed layer; preview the effect to see a perfectly embedded clay pot with matching size and angle, unified light and shadow, seamless edges and no compositing traces. It is ready for direct use with no further PS fine-tuning.
Core Comparison of the 3 Methods
- PS Move Tool + Layer Mask: Basic operation but low blending quality and time-consuming
- PS Pen Tool Cutout + Color Matching: High precision but high threshold and tedious steps, unsuitable for beginners
- Nano Banana Pro: One-click operation, ultra-efficient, AI auto-matches light/shadow and edges, zero learning curve with natural results. It solves all core pain points of traditional PS embedding and is suitable for all scenarios.
Pro Tips
- Ensure both material images are high-definition before embedding to help the AI recognize details accurately and enhance the blending effect.
- When marking the red area in PS, follow the contour of the object to replace as closely as possible to avoid excessive background coverage.
- Add “adapt to background light and shadow” to the prompt to further optimize the naturalness of the blend.
Struggling with “how to embed and blend an image into another in PS” and tired of the tedious steps and disjointed results of traditional PS operations? Try PS paired with Psaide’s Nano Banana Pro! No professional retouching skills are needed—achieve seamless image embedding and blending in 3 steps, balance efficiency and professionalism, and greatly boost your retouching and design productivity.essional effects for e-commerce, posters, outfit design, and other scenarios.
Download link
https://psaide.com/?sfrom=A86R4u
Invitation Code: A86R4u