Table of Contents
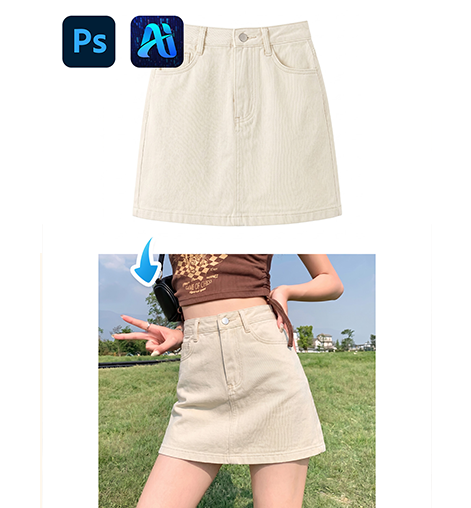
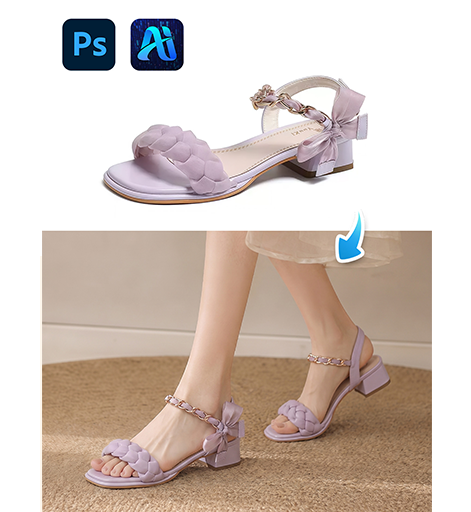
In Amazon ecommerce operations, high-quality ecommerce images (main images, product detail images, model wearing images) are key to improving click-through and conversion rates. Especially product detail images, which need to clearly show product angles, materials and craftsmanship to eliminate consumer concerns.
Method 1: Traditional PS Retouching + Stitching
Suitable for basic ecommerce image production, it has a certain operational threshold and requires repeated retouching and stitching to meet Amazon’s requirements. The specific steps are practical and actionable:
- Open PS, click “File > Open” to import the pre-shot multi-angle original images of the backpack (back, bottom, fabric material, etc.). Press Ctrl+J to duplicate the background layer of all images to protect the original images from accidental modification.
- Select each original image one by one, use the Quick Selection Tool (shortcut W) to cut out the backpack main body, remove the cluttered background, press Ctrl+Shift+I to invert and delete the background, then use the Healing Brush Tool to fine-tune the edges, remove burrs and impurities, and retain the fabric texture details.
- Go to “Image > Adjustments > Brightness/Contrast” and “Levels” to unify the brightness and tone of all detail images, ensuring a consistent style that meets Amazon’s requirements for high-definition and clean images.
- Create a new 1:1 canvas (a common ratio for Amazon main images/detail images), use the Move Tool to drag the processed multiple backpack detail images to the new canvas one by one, press Ctrl+T to adjust the size and position of each image, arrange them in a 2*2 layout, and ensure uniform spacing and alignment.
- Finally, check the details, use the Crop Tool to fine-tune the canvas, remove excess blank space, save it as PNG format, and complete the production of Amazon product detail images.
Pain Points: Tedious operation and time-consuming (it takes 20-30 minutes to make a set of detail images); multiple original images need to be taken manually, and the angle is difficult to control; beginners are prone to stitching misalignment, inconsistent tones, blurred details and other problems, making it difficult to mass-produce quickly.
Method 2: Psaide Nano Banana Pro
Compared with traditional PS production methods, Psaide’s built-in Nano Banana Pro relies on AI intelligent generation algorithms, perfectly avoiding pain points such as tedious operations, poor details and inconsistent styles. No manual shooting, cutout or stitching is needed; high-standard Amazon ecommerce detail images can be generated in 3 steps, and main images and model images can also be flexibly generated. The specific operation steps are as follows:
Step 1: Open a White Background Ecommerce Image in PS to Lay the Foundation
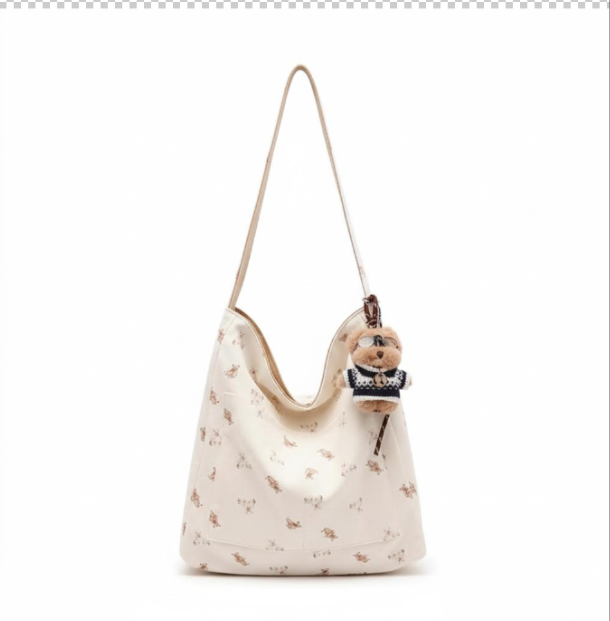
Launch PS, click “File > Open” to import the prepared white background ecommerce image of the backpack (it can be used as the basic material for AI generation to ensure the backpack main body is clear and details are complete). Press Ctrl+J to duplicate the background layer to protect the original image, and provide accurate product outline and detail reference for AI generation to avoid generation deviation.
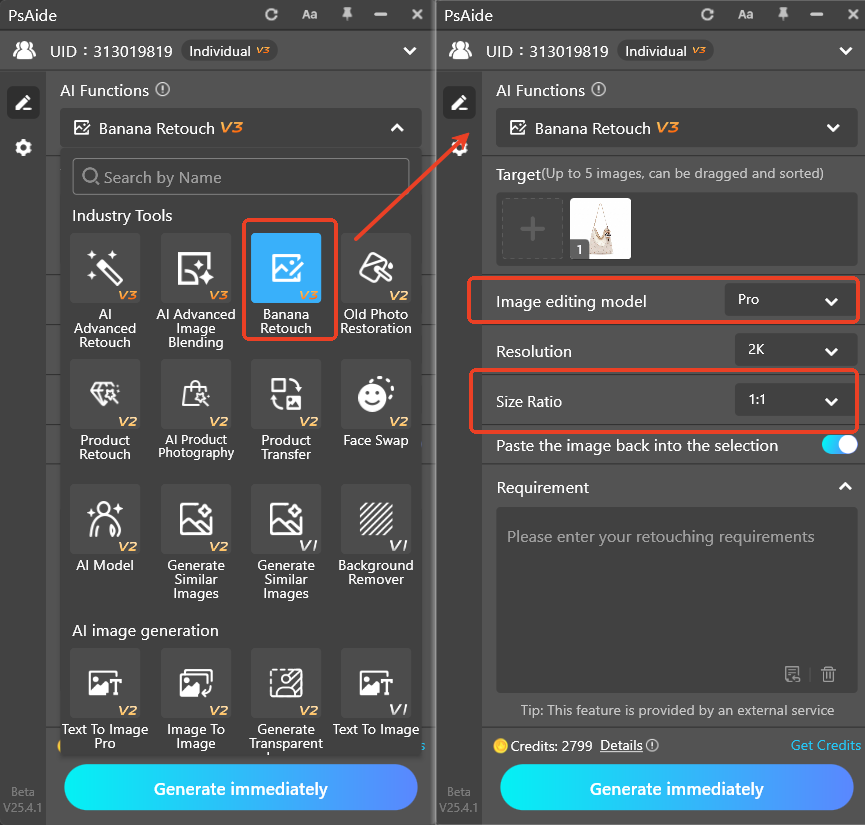
Step 2: Launch Nano Banana Pro and Set Adaptive Parameters
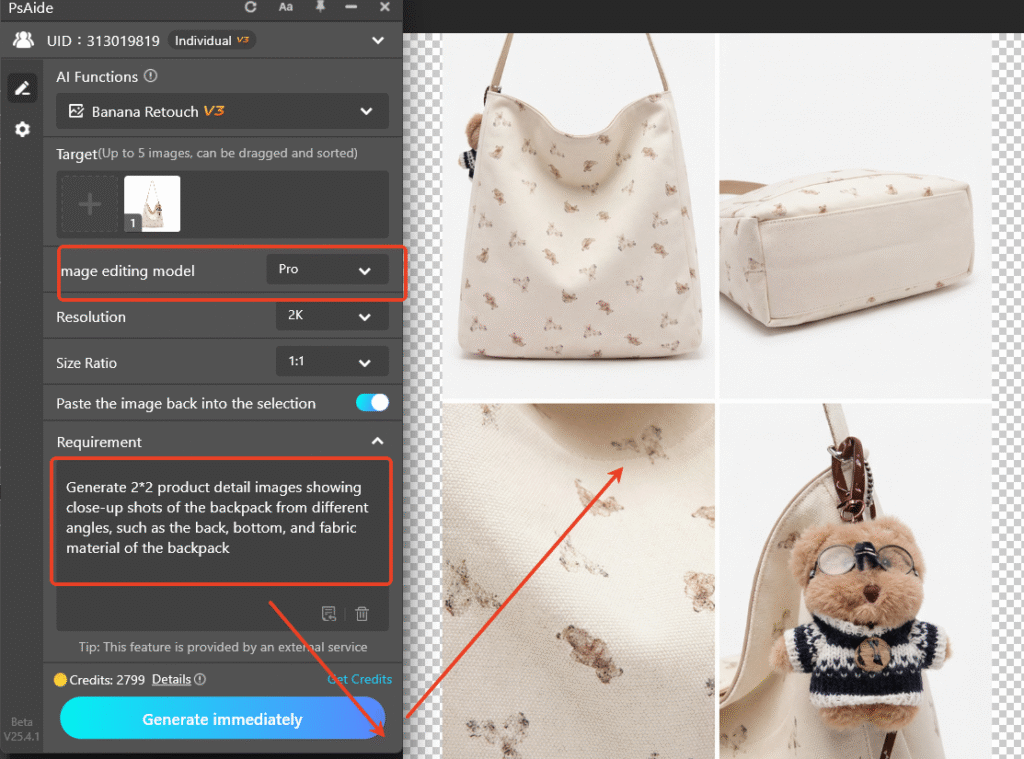
Locate the installed Psaide plugin panel in PS (compatible with PS CC2015+, Windows/Mac), expand the function list, click “Nano Banana” accurately, and select “Pro Version” – improve generation accuracy, clearly restore backpack fabric, craftsmanship and other details, and adapt to Amazon’s high-definition requirements for ecommerce images. In the plugin’s generation ratio setting, select the common 1:1 ratio for Amazon ecommerce images to ensure the generated detail images can be directly used as main images or detail page images without secondary ratio adjustment.
Step 3: Set Prompts and One-Click Generate 2*2 Product Detail Images
Enter the precise prompt in the plugin’s prompt box: *”Generate 2*2 product detail images showing close-up shots of the backpack from different angles, such as the back, bottom, and fabric material of the backpack”*.
Clarify the generation requirements of Amazon ecommerce detail images to ensure AI accurately generates multi-angle, high-definition detail close-ups and completely retains the original details of the backpack. After confirming the parameter settings are correct, click the “Generate” button on the plugin interface. The AI will complete the calculation in 15-20 seconds. After generation, PS will automatically add a new processed layer. Check the effect: the 2*2 layout backpack detail images have been generated, each angle close-up is clear, the fabric texture and backpack structure are clear at a glance, the tone is uniform and the style is clean, fully meeting Amazon’s requirements for ecommerce images, and can be directly uploaded and used without secondary PS fine-tuning; if you need to generate model wearing images, you can quickly achieve it by only modifying the prompt.
Core Comparison of the Two Methods
- Traditional PS Retouching + Stitching: Tedious operation, time-consuming, requires manual shooting and retouching, high threshold for beginners, prone to problems such as blurred details and inconsistent styles.
- Nano Banana Pro: One-click operation, ultra-efficient, no manual shooting, cutout or stitching needed; AI automatically generates high-definition detail images, zero threshold to get started, clear details and consistent style; it can also flexibly generate main images and model images, perfectly solving the core pain points of traditional PS ecommerce image production, and adapting to Amazon’s batch image production needs.
Struggling with “how to make Amazon ecommerce main images in PS” and tired of the tedious and inefficient traditional PS operations? Try PS paired with Psaide’s Nano Banana Pro! No professional retouching skills are needed; high-standard Amazon ecommerce detail images can be generated in 3 steps, balancing efficiency and professionalism. Easily create main images, detail images and model images, helping Amazon stores improve visual quality and conversion rates, and beginners can get started quickly.
Download link
https://psaide.com/?sfrom=A86R4u
Invitation Code: A86R4u