Table of Contents
You have a model photo. The shoes are wrong. Maybe they’re last season’s style, the wrong color, or you just want to test different options before a photoshoot.
Traditional solution: 20-30 minutes of manual work.
- Masking each shoe
- Warping perspectives
- Painting shadows
- Praying it looks real
The result? Usually still off.
1、Why Shoes Are Hard (And Why AI Fixes It)
Three things make shoe replacement painful:
1. Different angles. Left foot points left. Right foot points right. Your new shoes need to match both angles perfectly.
2. Floor contact. The sole needs to touch the ground naturally. One pixel off and it floats.
3. Real shadows. The new shoes need shadows that match your original lighting. Not too dark. Not too light. Just right.
Manual editing struggles with all three. AI handles them automatically.
2、What You Need
- Photoshop (any recent version)
- PsAide plugin with Nano Banana Pro
- Your model photo
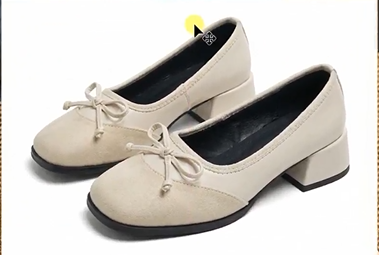
- Your new shoe product image
- 60 seconds
3、The 3-Step Workflow
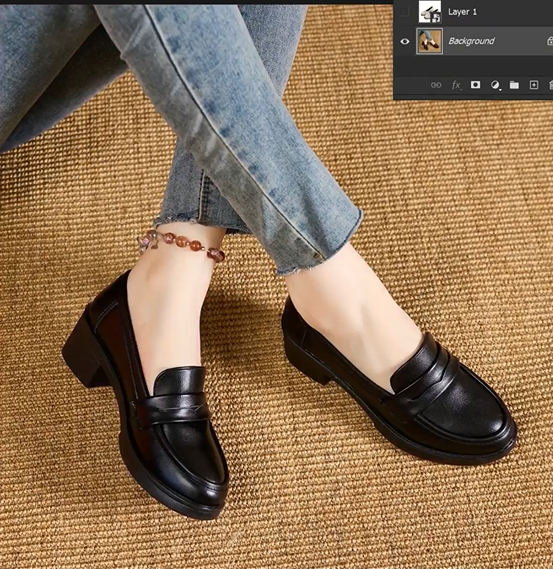
Step 1: Mark in Red
Open your model photo in Photoshop. Grab the Lasso Tool. Draw a rough selection around each shoe. Fill with bright red (R=255, G=0, B=0).
That’s it. No perfect edges needed. Just cover the shoes.
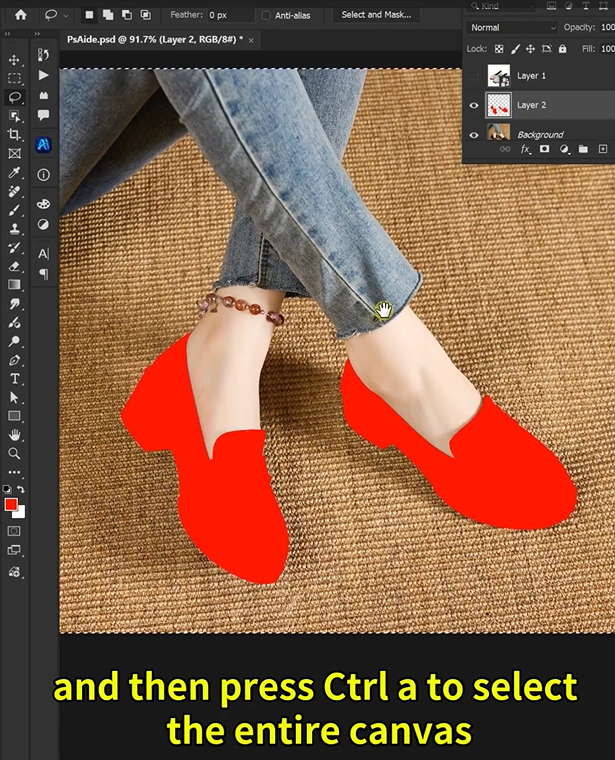
Why this works: Red is a color that rarely appears naturally in photos. The AI sees it as a clear instruction: “Replace exactly this area.”
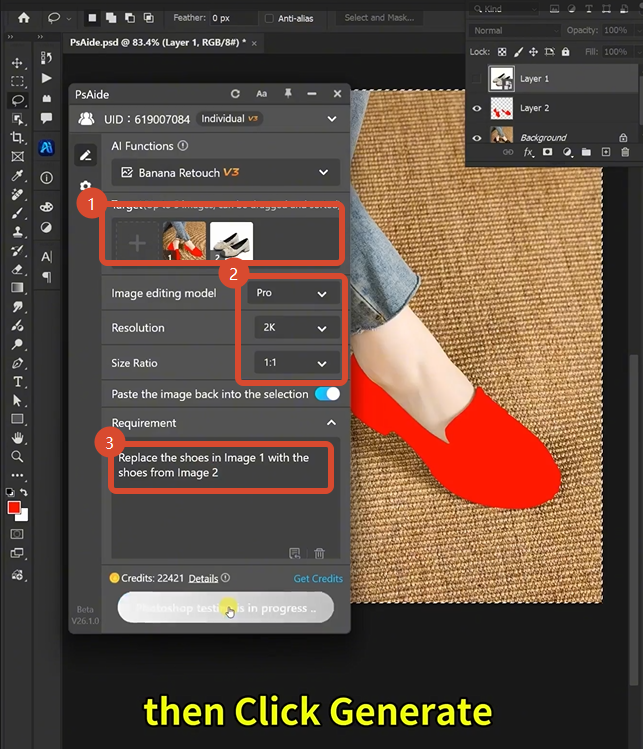
Step 2: Write One Prompt
Open Nano Banana. Select Pro version. Set aspect ratio to 1:1 and resolution to 2K. Upload your two images.
Then type:
“Replace the shoes in Image 1 with the shoes from Image 2”
Click Generate.
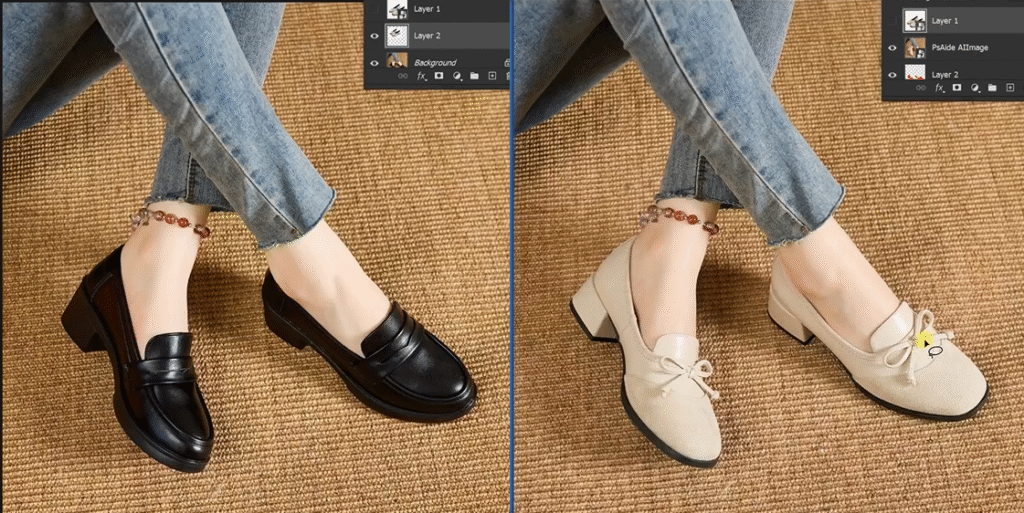
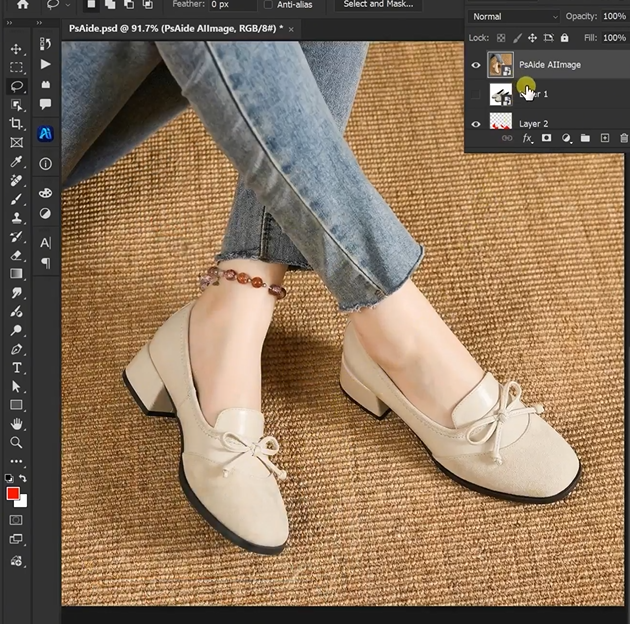
Step 3: Get Your Result
Wait 45-60 seconds. The AI delivers a new image where the model is wearing your new shoes. The angles match. The shadows are right. The fit looks natural.
4、What The AI Does Behind The Scenes
While you wait, three things happen:
| Your Concern | AI’s Solution |
|---|---|
| Different foot angles | Maps each foot separately, aligns each shoe individually |
| Floor contact | Positions soles to sit naturally on the ground |
| Missing shadows | Creates new shadows that match your original lighting |
| Ankle fit | Blends the shoe opening with the leg edge |
You don’t see this happen. You just get the result.
5、Pro Tips From Real Use
- Mark each shoe separately for better results. Different angles need different handling.
- 2K resolution is enough for most e-commerce. 4K is overkill unless you’re printing large.
- Keep your original file. Save the AI result as a new layer so you can go back if needed.
- One prompt works. You don’t need to write “please” or complex descriptions. Simple and direct is better.
6、Download link
https://psaide.com/?sfrom=A86R4u
Invitation Code: A86R4u