Table of Contents
You have a beautiful model photo. The lighting is soft. The pose is perfect. The composition works. But the embroidered vest is wrong. It’s last season’s style. The client launched a new collection. Or you simply need to test different options before committing to production.
Reshoot? That means rebooking the model, the photographer, the studio. Thousands of dollars. Days of waiting. Manual editing in Photoshop? An embroidered vest has delicate threadwork, intricate patterns, and structured fabric that must drape naturally over the body. The embroidery details need to remain sharp while matching the scene’s lighting. The vest must follow the model’s posture—shoulders, chest, waist—without looking pasted on.
This is where AI-powered fashion editing transforms the workflow. Instead of spending 30-45 minutes on manual masking and warping, you can achieve professional results in seconds .
1、The Solution: Nano Banana Pro in 3 Steps
What You Need
- Adobe Photoshop with PsAide plugin
- One model photo (wearing original vest)
- One product photo (your new embroidered vest)
- 60 seconds
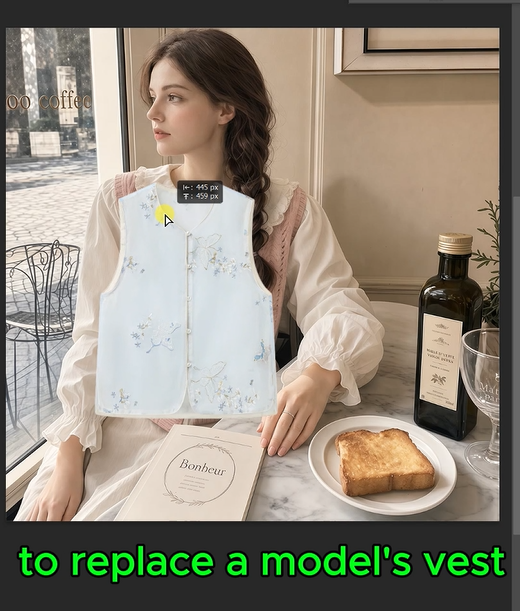
Step 1: Open Your Images
Launch Photoshop. Open both your model photo and your new vest product image. No red marking or selection needed—the AI handles everything automatically. This streamlined process eliminates the need for manual masking that traditionally takes the most time in fashion editing workflows .
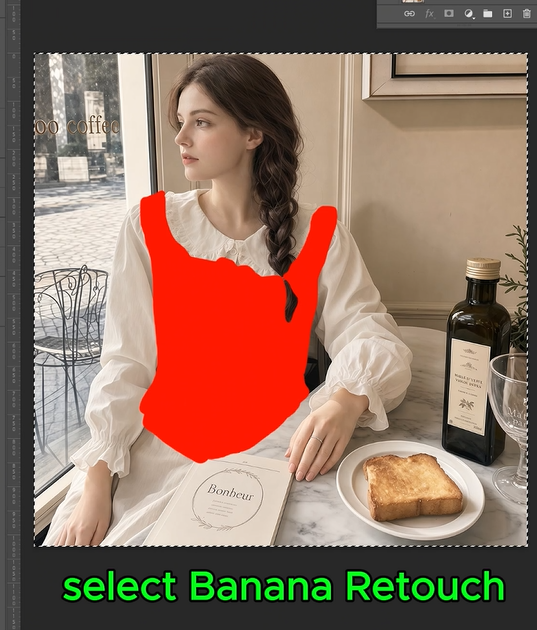
Step 2: Write Your Prompt
Open the PsAide panel. Launch Nano Banana and select the Pro version for the strongest image understanding and detail preservation . Set output resolution to 4K—essential for preserving fine embroidery details like threadwork, beadwork, and fabric textures.
Upload your two images in the correct order:
- Figure 1: Your model photo
- Figure 2: Your new vest product photo
Type this prompt:
“Replace the pink vest worn by the model in Figure 1 with the one in Figure 2.”
Click Generate. Wait 45-60 seconds.
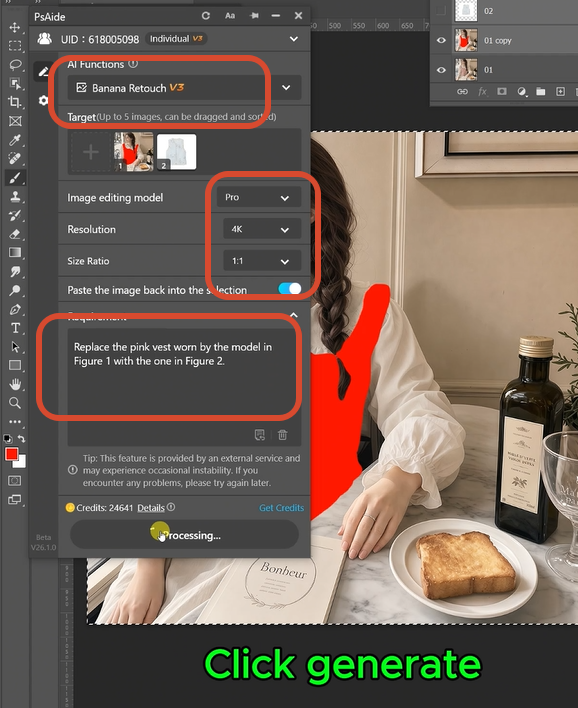
Step 3: Get Your Professional Result
The AI processes your images. It analyzes the model’s posture and the vest’s shape. It removes the original garment. It positions the new vest, automatically adapting to the model’s shoulder width, chest contour, and waist position. It preserves the embroidery details while matching the scene’s lighting and shadows. It blends all edges seamlessly .
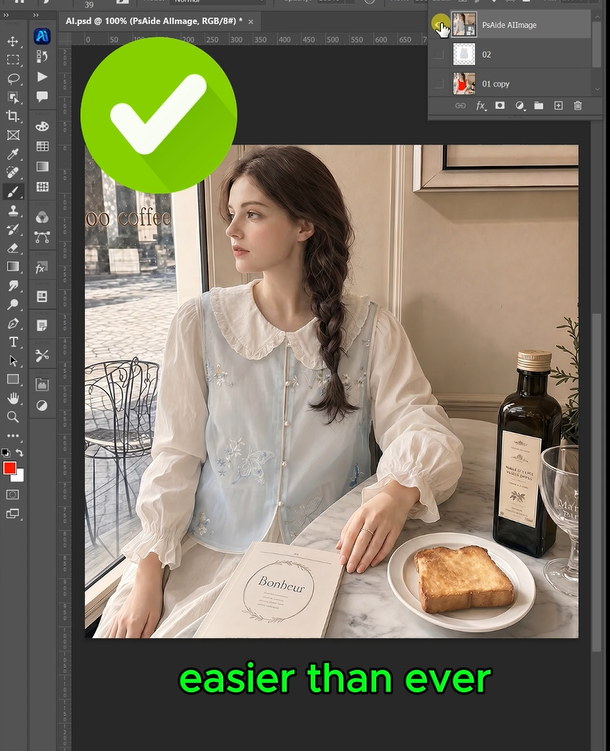
Your model is now wearing the new embroidered vest. Same pose. Same photo. Different product.
2、Pro Tips for Perfect Vest Replacement
1. Use high-resolution product images. Embroidery has fine details. Start with a sharp photo of the vest to ensure the AI preserves intricate patterns.
2. 4K resolution is ideal for embroidered garments. Threadwork, beadwork, and fabric texture require high resolution to look natural. 4K preserves these details where lower resolutions might blur them .
3. Consider the embroidery style. If your new vest has heavy beadwork, add “with detailed embroidery and beadwork” to your prompt. If it has delicate floral stitching, specify that as well.
4. Choose similar lighting. The AI automatically adjusts the vest to match the scene’s lighting. However, starting with product photos that have similar light direction yields cleaner results .
3、Download link
https://psaide.com/?sfrom=A86R4u
Invitation Code: A86R4u