Table of Contents
The Jewelry Photography Integration Challenge
For photographers, jewelry brands, and e-commerce sellers, creating realistic product images presents a significant technical hurdle. When adding jewelry like necklaces to model photos, traditional methods often result in obvious composites where accessories appear to float unnaturally above the skin or fail to interact properly with existing lighting conditions. The challenge lies not in simply placing jewelry onto a photo, but in achieving perfect integration where the item appears naturally worn—with appropriate shadows, skin contact points, and lighting reflections that match the original photograph’s environment. This complexity forces many businesses to rely on expensive reshoots or settle for unconvincing images that undermine product credibility.
What if you could transform basic jewelry placement into perfectly integrated results with a single AI command? This guide demonstrates how to use AI Advanced Image Blending in Photoshop through the PsAide plugin, a specialized tool for achieving natural composites in fashion photography. This advanced technique moves beyond simple layering to intelligent integration, analyzing lighting, skin textures, and spatial relationships to create jewelry images that look authentically worn rather than digitally added.
Why Traditional Jewelry Compositing Looks Artificial
Manually adding jewelry to photos in Photoshop typically involves multiple technical steps that rarely produce convincing results. Even with careful selection and placement, traditional methods struggle with several critical aspects: matching the jewelry’s lighting to the model’s existing light sources, creating realistic shadows that fall naturally on the skin, adjusting the jewelry’s color temperature to blend with the environment, and simulating how accessories actually rest on and interact with the body. The result is often jewelry that appears flat, improperly lit, or clearly pasted onto the image—problems particularly noticeable with reflective materials like metals and pearls that require sophisticated light interaction.
The AI Advanced Image Blending feature addresses these limitations through intelligent analysis and adaptation. Instead of treating compositing as a mechanical layering process, the AI examines both the jewelry and model images holistically, understanding lighting direction, intensity, and quality, then adjusting the jewelry’s appearance accordingly. It simulates how light would naturally interact with the accessory in that specific environment, creates appropriate shadows based on the jewelry’s three-dimensional form, and blends colors seamlessly with the surrounding skin tones and background elements.
Preparing for Professional Jewelry Integration
- Software: Adobe Photoshop with the PsAide plugin installed
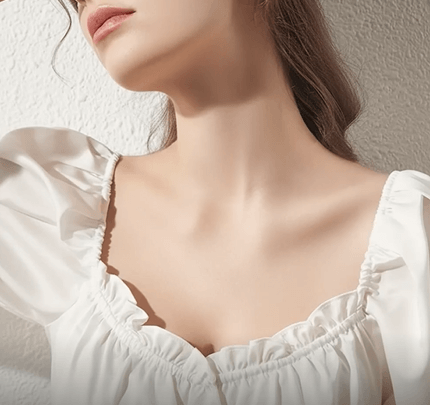
- Base Image: High-quality model photograph with clear neck/shoulder area
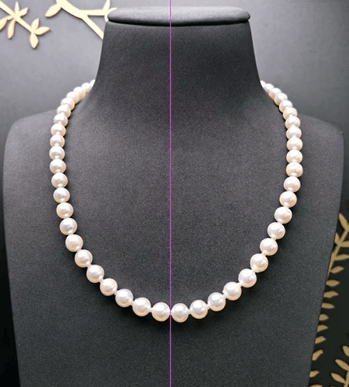
- Jewelry Image: Well-lit product shot of the necklace (preferably against a contrasting background)
- Technical Preparation: Basic Photoshop skills for initial placement
- Time Investment: 3-5 minutes for complete integration
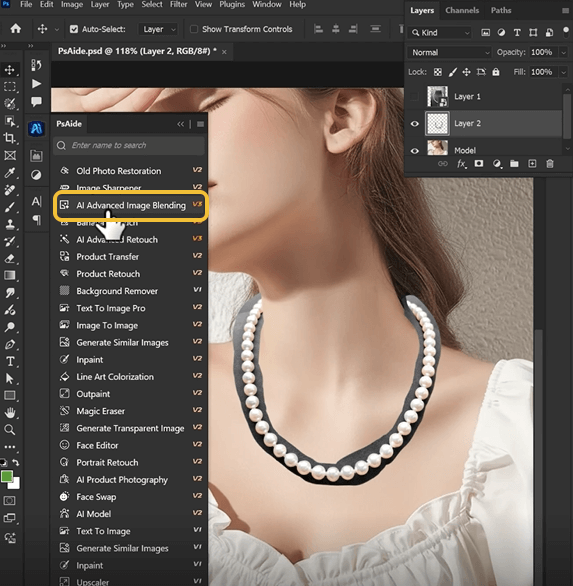
The 3-Step AI Blending Process
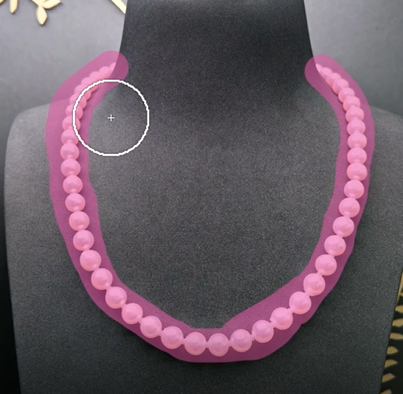
Step 1: Initial Placement with Basic Selection
Begin by opening both your model photograph and jewelry image in Photoshop. Using selection tools like the Quick Selection Tool or Pen Tool, isolate the necklace from its background. For pearl necklaces or complex jewelry items, focus on creating a clean selection around the main elements—perfect edges are less critical since the AI will handle final blending. Position the selected necklace onto your model photograph, roughly aligning it with the neckline. Adjust the size and perspective using Free Transform (Ctrl+T/Cmd+T) to match the model’s posture and body proportions. This initial placement doesn’t need to be perfect but should position the jewelry in approximately the right location and orientation.
Step 2: Activate AI-Powered Blending
With both layers prepared (model as background layer, jewelry as top layer), navigate to the PsAide panel and select AI Advanced Image Blending. This specialized tool is designed specifically for challenging composites where lighting matching and natural integration are crucial. Unlike standard blending modes or opacity adjustments, this AI feature analyzes the content of both layers to create intelligent transformations rather than simple mathematical combinations.
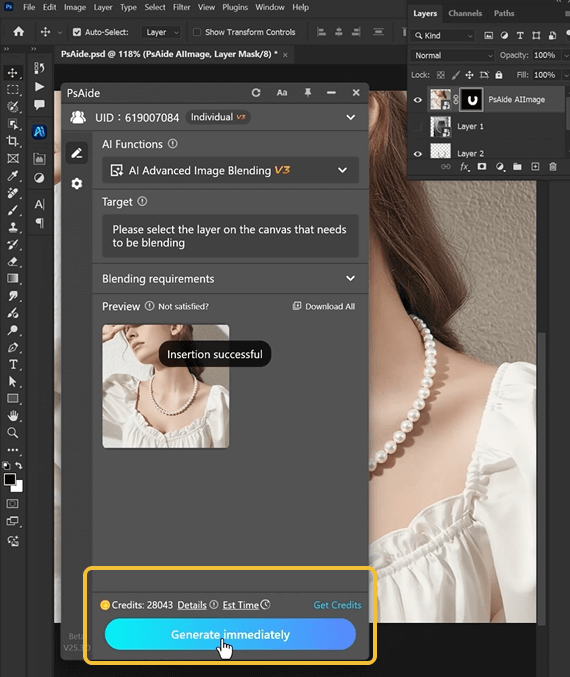
Step 3: Generate Perfect Integration
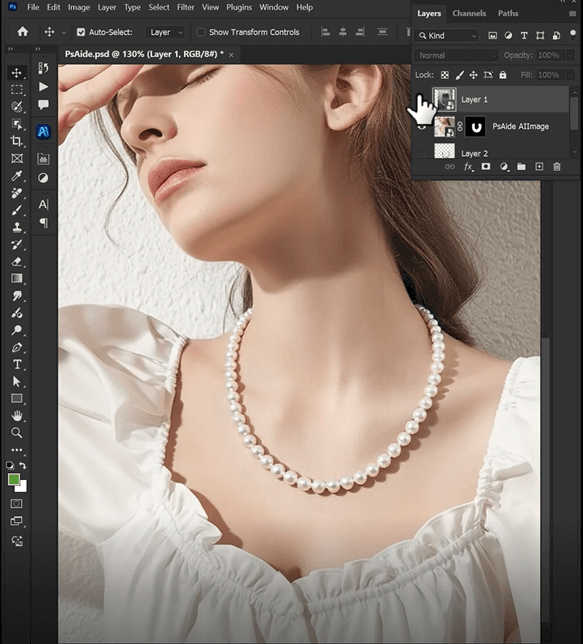
Click the “Blend” or “Generate” button within the AI Advanced Image Blending interface. The system will process both layers, typically taking 20-40 seconds depending on image complexity. During this process, the AI performs multiple sophisticated operations: it analyzes the lighting conditions in the model photograph, adjusts the jewelry’s highlights and shadows to match, blends colors to create natural harmony, simulates how the necklace would actually rest on and interact with the skin, and creates appropriate reflections and contact shadows. The result is a seamlessly integrated image where the jewelry appears naturally worn, with perfect lighting matching and realistic physical interaction with the model’s skin and clothing.
Commercial Applications for Jewelry Professionals
Master this technique for numerous industry applications:
- E-commerce Product Visualization: Show customers how jewelry looks when worn without model photoshoots for every item
- Jewelry Design Prototyping: Visualize new designs on different models and skin tones
- Marketing Campaigns: Create varied jewelry combinations from limited model photos
- Personalized Retail: Show clients how specific pieces would look with their features
- Catalog Production: Efficiently create multiple product images from single model sessions
Jewelry Compositing Technical Guide
Q1: What types of jewelry work best with this AI blending technique?
A: The technology handles various jewelry types effectively, but works particularly well with items that have clear three-dimensional forms and material characteristics. Pearl necklaces, metal chains, gemstone pieces, and structured jewelry items yield excellent results. For very delicate chains or extremely reflective surfaces, ensure your source jewelry image has good lighting that clearly shows details and material properties.
Q2: How do I handle jewelry that needs to appear under or over clothing?
A: For jewelry that should interact with clothing (like a necklace over a collar or under a shirt), use layer masks before applying AI blending. Create a mask on the jewelry layer to hide portions that should be behind clothing elements. The AI will then blend only the visible portions naturally with both skin and fabric textures. For complex clothing interactions, consider breaking the jewelry into segments and blending each separately.
Q3: Can I adjust the blending intensity or make corrections after AI processing?
A: Yes, the AI blending typically creates a new layer or group. You can adjust the opacity of this result to control intensity or use layer masks to refine specific areas. For color corrections, add adjustment layers (like Hue/Saturation or Color Balance) clipped to the blended jewelry layer. These non-destructive adjustments allow fine-tuning while preserving the AI’s natural integration foundation.
Q4: How does this compare to manual blending with layer modes and opacity?
A: Traditional manual blending relies on mathematical combinations (Multiply, Screen, Overlay modes) that don’t understand image content. AI Advanced Image Blending analyzes the actual visual information—recognizing skin textures, jewelry materials, lighting conditions—and makes intelligent adjustments specific to the content. This results in much more natural integration where jewelry appears to properly interact with the environment rather than simply overlaying it.ntegrating real garment photographs into existing scenes, whereas 3D simulation creates garments digitally from scratch—different tools for different stages of the fashion workflow.
Download link
https://psaide.com/?sfrom=A86R4u
Invitation Code: A86R4u