Table of Contents
1.The E-commerce Image Challenge: From White Box to Storytelling
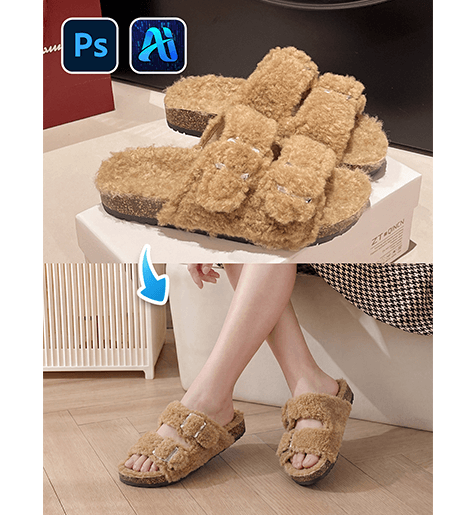
A product on a pure white background is standard, but it often fails to connect. It shows what you sell, but not how it fits into a customer’s life. For a toaster, that’s the difference between a sterile product shot and an image of warm toast and coffee in a sunny kitchen—a scene that sells comfort and morning routines. Manually creating these scenes is expensive (requiring photography studios, props, and sets) or technically demanding in Photoshop, involving complex compositing, perspective matching, and realistic lighting that takes hours to perfect.
This is where Nano Banana Pro in Photoshop becomes a marketing powerhouse. It allows you to take an existing white-background product shot and intelligently generate a brand-new, custom background around it. The AI understands context, allowing you to place your product in aspirational, story-driven environments with a simple text description.
2.Why AI-Generated Backgrounds Beat Generic Stock Photos
Using stock photos for backgrounds often leads to mismatched lighting, awkward perspectives, and a generic look that doesn’t feel unique to your brand. Nano Banana Pro creates a cohesive, custom scene.
- Lighting Unity: The AI analyzes your product’s existing lighting and generates a background that matches the light direction, intensity, and color temperature, making the product look like it was photographed there.
- Perspective Consistency: It understands the product’s angle and constructs the scene (like a countertop or table) to match that exact viewpoint.
- Contextual Intelligence: When you describe “cozy kitchen,” it doesn’t just add a kitchen; it adds contextually appropriate elements like warm wood tones, soft morning light, and complementary props, all styled to make your product the hero.
3.The 3-Step AI Scene Generation Process
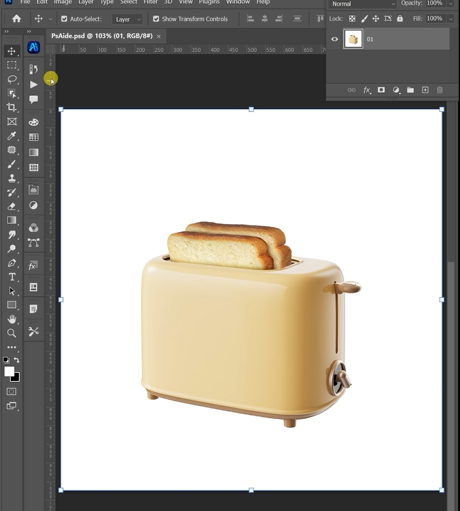
Step 1: Prepare Your Product Cutout
Open your product image (e.g., a toaster) in Photoshop. For the cleanest results, first use Photoshop’s tools (like Select Subject or the Pen Tool) to carefully cut out your product, removing the white background. Place this cutout on its own layer. This gives the AI a clean subject to build a scene around.
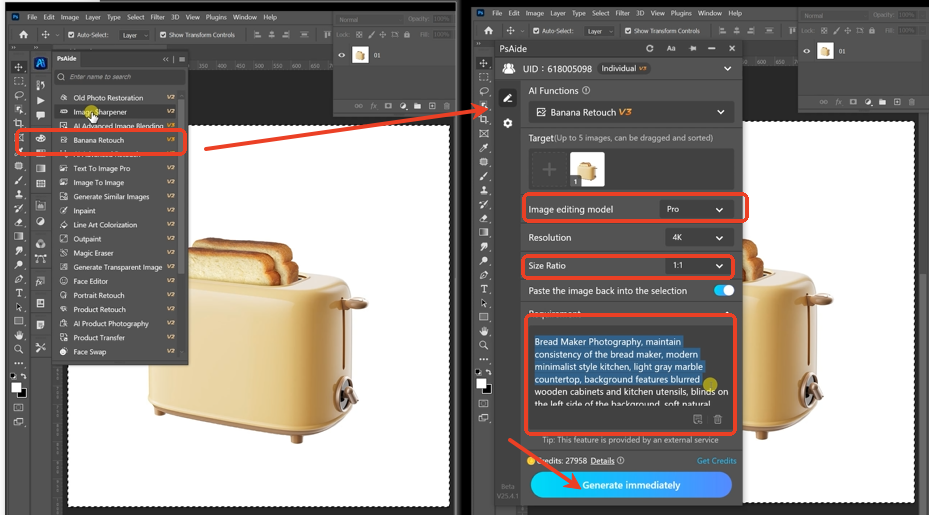
Step 2: Command the AI to Build Your Scene
In the PsAide panel, launch Nano Banana and select the Pro version. Choose your desired output aspect ratio (e.g., 1:1 for Instagram or product catalog squares). Upload your product cutout image. Now, in the prompt box, write a detailed scene description. Be specific about the environment, mood, and product placement:
“Generate a cozy, well-lit home kitchen background for this toaster. Show it placed on a clean wooden countertop next to a loaf of fresh bread and a mug of coffee, with soft morning light coming from a window. Keep the scene warm and inviting.”
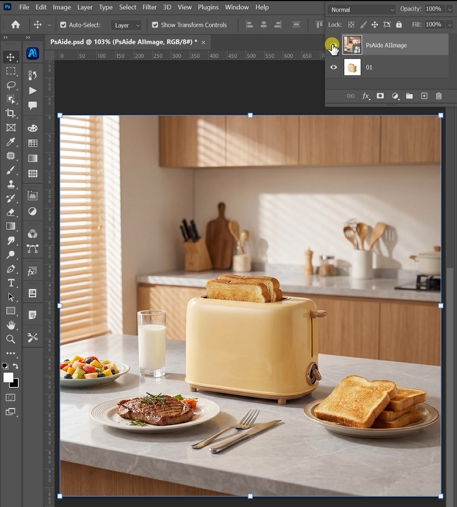
Step 3: Generate the Complete Lifestyle Image
Click “Generate.” The Pro version’s AI will now:
- Interpret the Scene: Understands “cozy kitchen,” “wooden countertop,” “morning light.”
- Composite Intelligently: Seamlessly integrates your product cutout into the new scene, adjusting its base to sit naturally on the generated surface.
- Match Lighting & Shadows: Renders the background light to shine consistently on your product and casts believable shadows beneath it.
- Create a Cohesive Image: Outputs a complete, ready-to-use lifestyle photo where your product looks authentically at home in the new environment.
Pro-Tip for Best Results: The quality of your initial product cutout is crucial. Sharp edges yield better integrations. In your prompt, the more descriptive you are about the mood (“bright and airy,” “moody and dramatic”) and specific elements (“marble surface,” “rustic kitchen shelf”), the more tailored and effective the result will be.
Download link
Stop showcasing products in a vacuum. With Nano Banana Pro, you can embed them into the desirable lifestyles your customers dream of, creating powerful, conversion-ready imagery directly within Photoshop in three simple steps.
https://psaide.com/?sfrom=A86R4u
Invitation Code: A86R4u