Table of Contents
Changing colors of sweaters, knits, etc., is a high-frequency demand in design and e-commerce retouching. It requires natural, undistorted results and precise control over target areas to avoid color bleeding. Traditional PS color changes often face issues like blurry edges, color deviation, and tedious operations. Below are 3 practical methods—from manual to AI precision—to fit different scenarios.
1. PS Hue/Saturation: For Large Solid-Color Sweaters
Suitable for sweaters with uniform color and no complex textures—simple but low precision.
- Steps: Open the sweater image in PS and press Ctrl+J to duplicate the layer. Use the Quick Selection Tool (with “Auto-Enhance”) to select the sweater; refine edges with a layer mask if needed. Go to “Image > Adjustments > Hue/Saturation”, check “Colorize”, drag the Hue slider to select the target color, and adjust Saturation/Brightness to match the sweater’s texture.
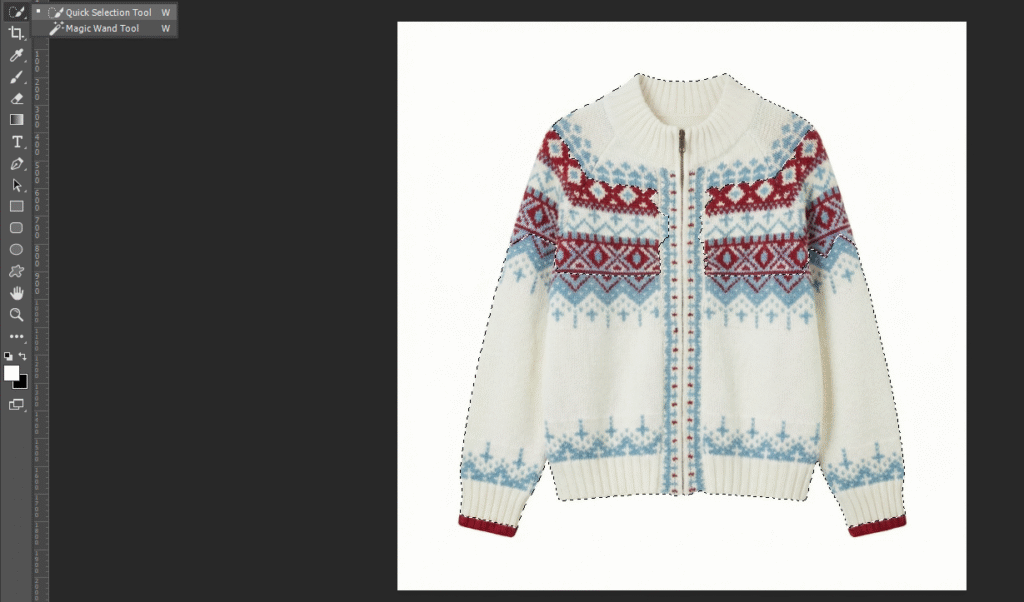

- Pain Points: Destroys knit textures easily, causes color bleeding to the background, and can’t precisely target specific areas (e.g., changing the body without altering the neckline).
2. PS Color Replacement Tool: For Small Local Adjustments
Flexible for partial changes but prone to distortion.
- Steps: Open the image in PS and duplicate the background layer. Select the Color Replacement Tool (long-press J to switch), set “Color” mode and “Continuous” sampling in the options bar. Sample the sweater’s original beige color, set the foreground color to white, and gently paint the sweater with a low-hardness brush—adjust brush size and opacity repeatedly.
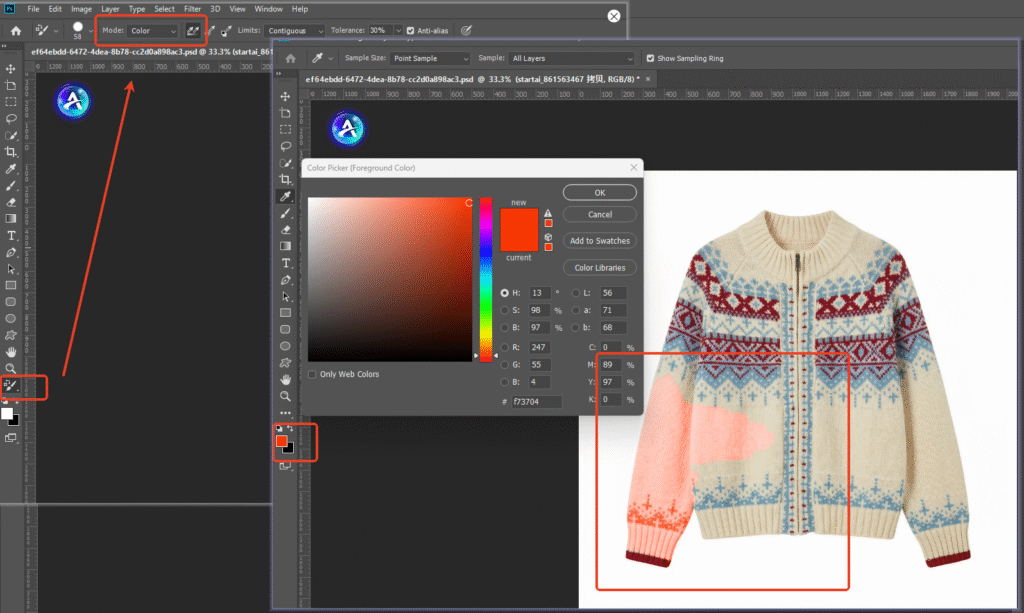
- Pain Points: Color banding in dense knit areas, difficult edge control, and easy overpainting for beginners.
3. Nano Banana AI Color Change: Precise Area Targeting, One-Click Solution
Psaide’s built-in Nano Banana accurately identifies target areas (e.g., beige parts of a sweater) without color bleeding or texture damage—no manual cropping.
Step-by-Step Process
- Import Sweater Image to PS: Launch PS, click “File > Open” to import the image. Press Ctrl+J to duplicate the layer and hide the original to avoid irreversible mistakes while preserving texture.
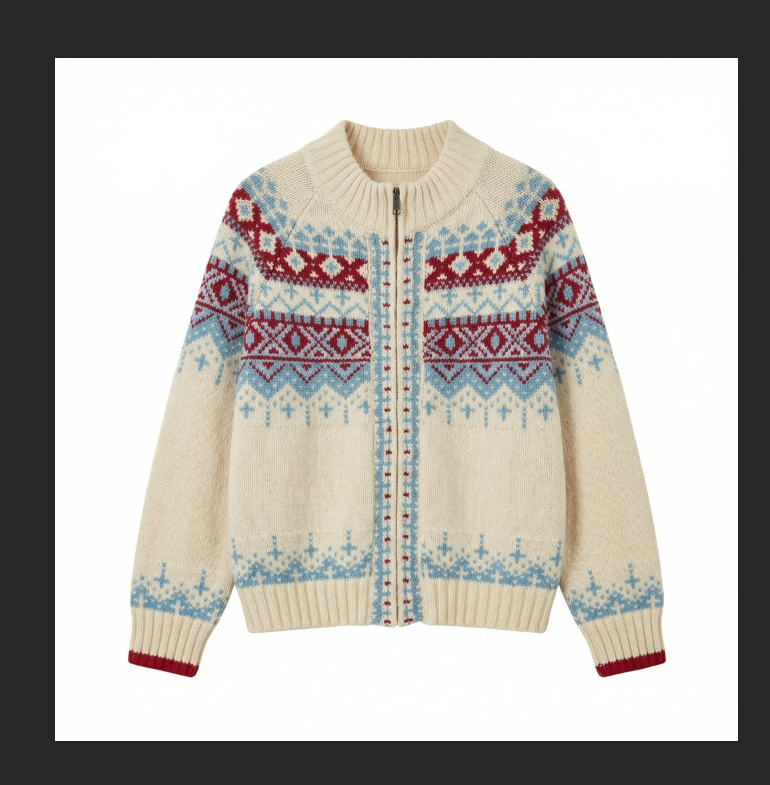
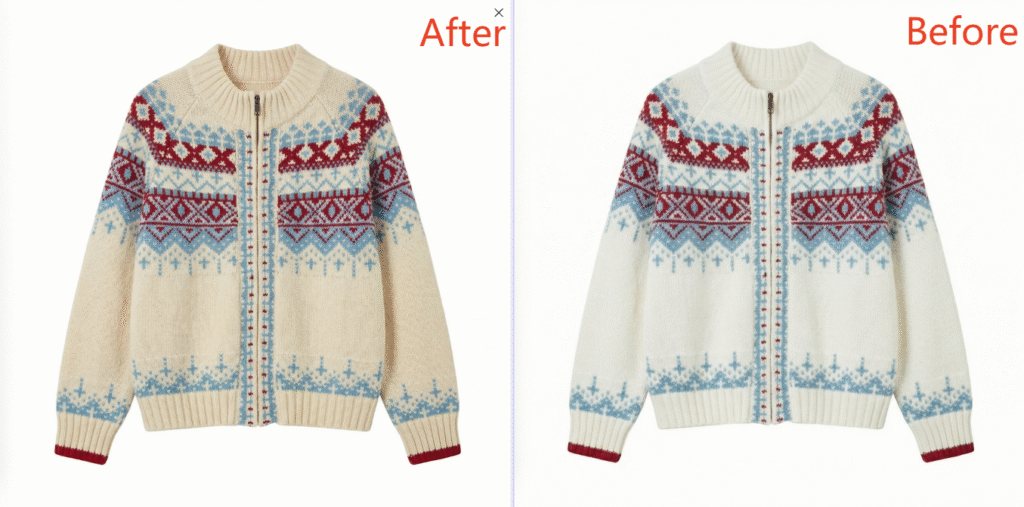
- Launch Nano Banana & Set Prompt: Locate the Psaide plugin panel in PS, expand the list, and click “Nano Banana”. No extra selection needed—AI auto-identifies the item. Enter the prompt: “Change the beige areas in Figure 1 to white” to specify the target area and color, ensuring no impact on other parts or the background.
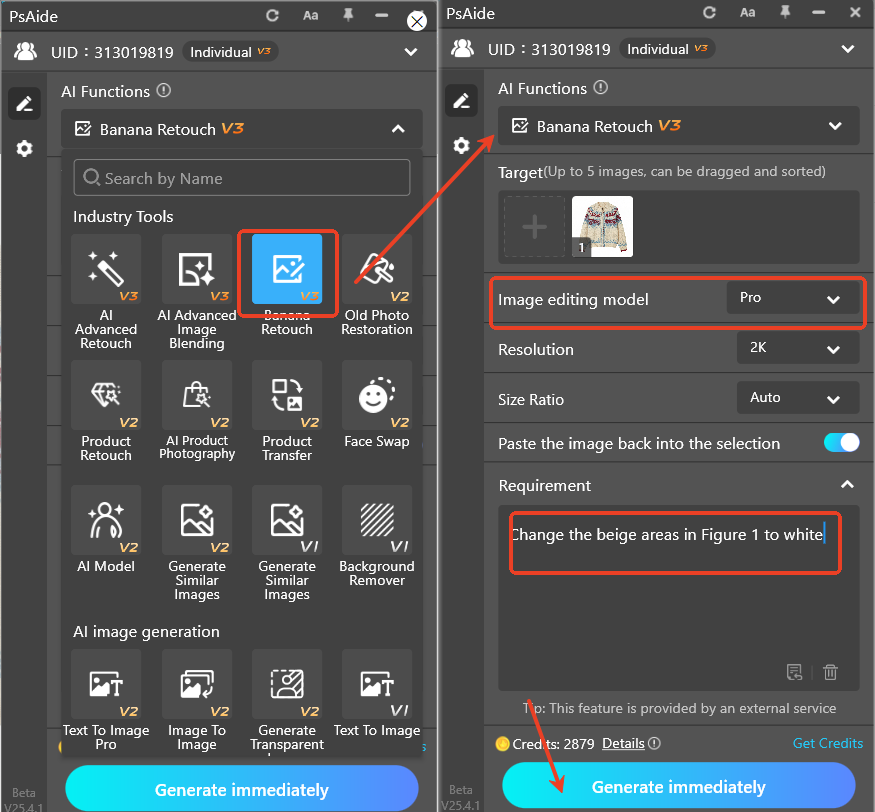
- One-Click Generate & Preview: Click “Generate”. The AI processes in 10–15 seconds, replacing the beige areas with white. A new layer is created automatically—check the result: precise color replacement, intact knit textures, no edge bleeding, and natural color. Ready for use without further PS tweaks; adjust any area as needed.
4.Core Comparison of 3 Methods
| Method | Key Traits |
|---|---|
| PS Hue/Saturation | Simple but low precision |
| PS Color Replacement Tool | Flexible for local tweaks but prone to distortion |
| Nano Banana AI | Precise area targeting, texture preservation, no bleeding, beginner-friendly |
Prioritize Nano Banana for knitwear color changes to avoid traditional pain points.
5.Pro Tips
- Use high-definition images for better AI area recognition.
- Add “preserve knit texture” to the prompt for enhanced quality.
- Fine-tune color with PS Hue/Saturation if needed—no texture damage.
Struggling with “how to change item color in PS”? Try PS + Psaide’s Nano Banana! AI ensures precise area control, one-click color change, and texture preservation—boosting retouching efficiency and professionalism.
Download link

https://psaide.com/?sfrom=A86R4u
Invitation Code: A86R4u