Table of Contents
Seal extraction is a high-frequency demand in daily office work and document processing. Whether it’s scanned electronic documents or photos of paper files, it’s essential to extract seals precisely with clear edges, no background residue and true-to-color tones. However, extracting seals with traditional PS cutout methods often involves tedious operations, stiff edges and stubborn background residue—especially challenging for beginners. Below are 2 traditional PS extraction methods, followed by the more efficient Psaide Background Remover solution.
Method 1: PS Color Range – For Seals with Strong Color Contrast
Ideal for seals (e.g., red official seals) with sharp color contrast against the document background and no overlapping complex text. The steps are detailed but require repeated fine-tuning.
Steps:
- Open the document image in PS, press Ctrl+J to duplicate the background layer to protect the original.
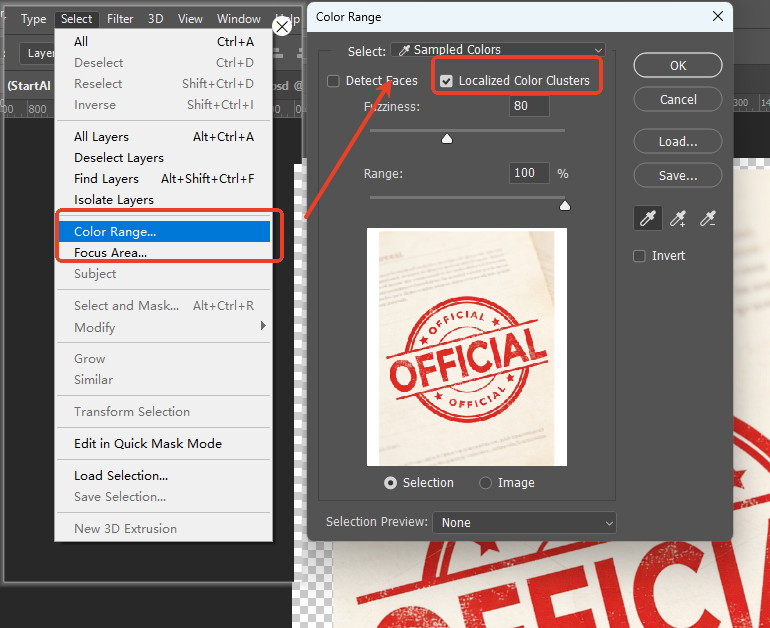
- Go to Select > Color Range, use the Eyedropper Tool to click the seal’s main color in the pop-up window and check “Localized Color Clusters”.
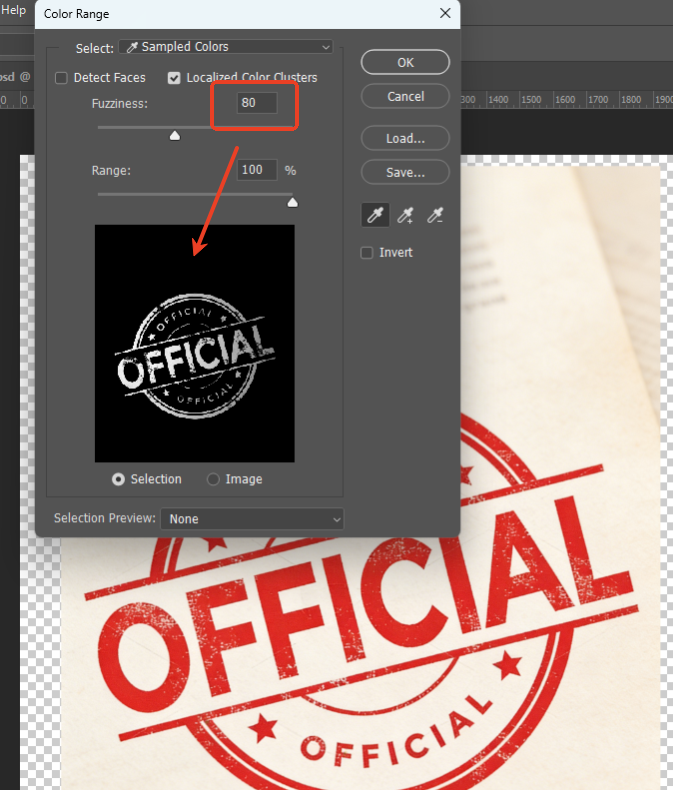
- Adjust the Fuzziness (70-80 for initial value) until the seal is fully white and the background is black in the preview; use the Add to Sample eyedropper to select missed areas.
- Click OK to create a selection, press Ctrl+Shift+I to invert, hit Delete to remove the background, then press Ctrl+J to copy the seal to a new layer.
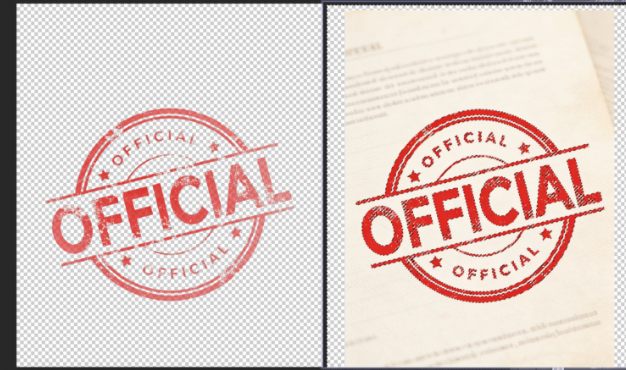
- Fine-tune edges with a low-hardness PS Brush Tool to remove residual background noise.Pain Points: Easy to miss selection with complex backgrounds/overlapping text; improper Fuzziness adjustment causes blurry seal edges or color distortion.
Method 2: PS Pen Tool – For High-Precision Extraction
Suitable for scenes requiring high-precision extraction of seals with clear edges. Tedious to operate but controllable in precision, ideal for users with basic PS skills.
Steps:
- Open the document image in PS and duplicate the background layer.
- Select the Pen Tool (shortcut P), zoom the image to 200%, click along the seal’s edge to draw a closed path, adjust anchor points with the Alt key to fit the seal’s outline and avoid document text.
- Right-click the path, select Make Selection, set Feather Radius to 0.5 pixels and click OK.
- Invert the selection, delete the background and copy the seal to a new layer.
- Enable Select and Mask, refine seal edges with the Refine Edge Brush to remove tiny residue.Pain Points: Extremely time-consuming (15-20 minutes per seal), hard for beginners to draw precise paths, prone to edge breaks and stiff connections.
Method 3: Psaide Background Remover – Best for Seal Extraction (Beginner-Friendly)
Psaide’s built-in Background Remover perfectly avoids the pain points of traditional PS methods. Powered by AI intelligent recognition, it locks onto the seal area precisely with no complex parameter adjustments—achieve seamless extraction in 3 simple steps.
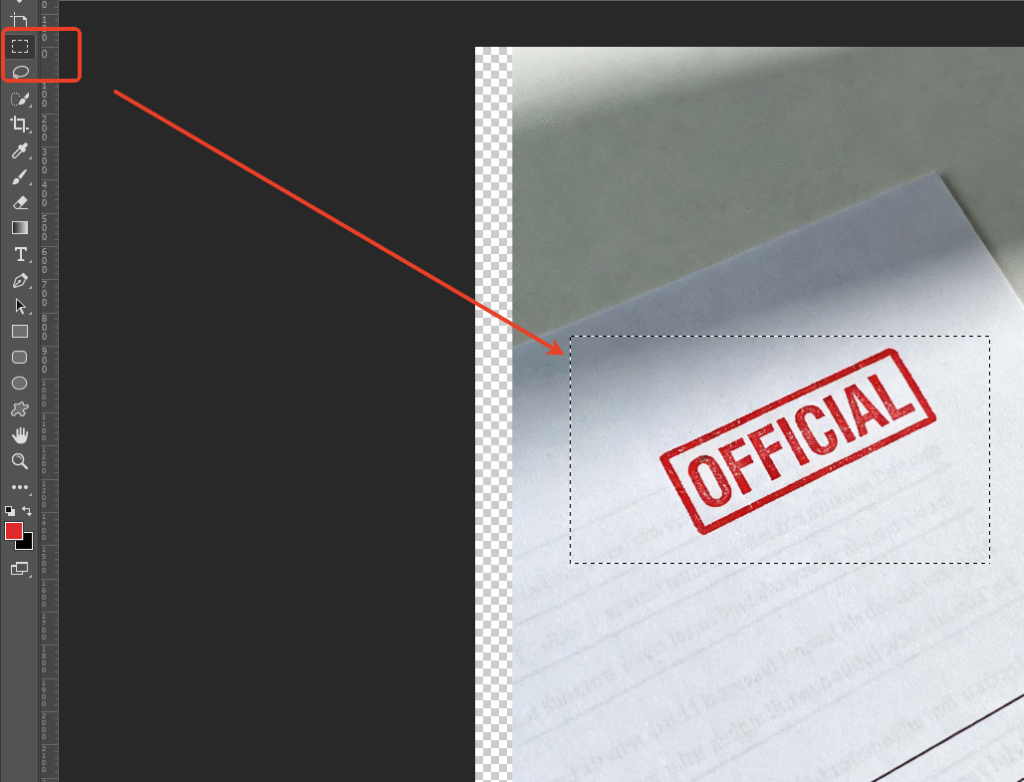
Step 1: Open the Image in PS and Roughly Select the Seal Area
Launch PS, click File > Open to import the document image, press Ctrl+J to duplicate the background layer. Use the Rectangular Marquee Tool (shortcut M) to roughly select the seal area (no precise tracing needed, just full coverage) for AI accurate target recognition.
Step 2: Launch Psaide and Enable Background Remover (Canvas Selection)
Locate the installed Psaide plugin panel in PS (compatible with PS CC2015+, Windows & Mac), expand the function list and click Background Remover. In the plugin interface, check the Canvas Selection option—the plugin will automatically recognize the seal area selected in PS with no extra material uploads, eliminating repetitive operations.
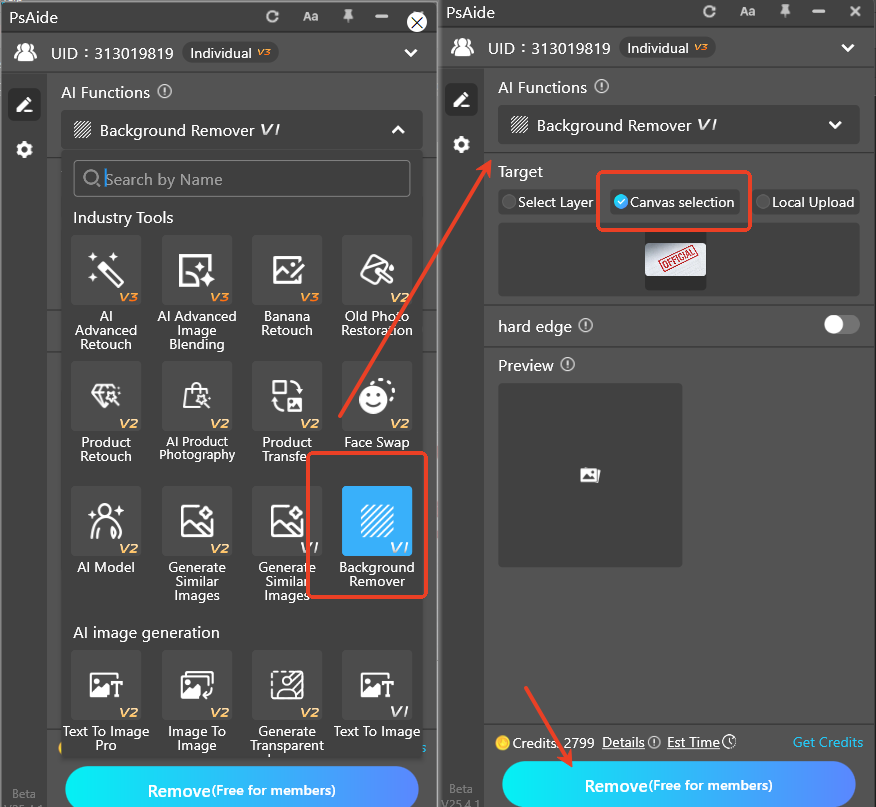
Step 3: One-Click Generate and Preview Seamless Extraction
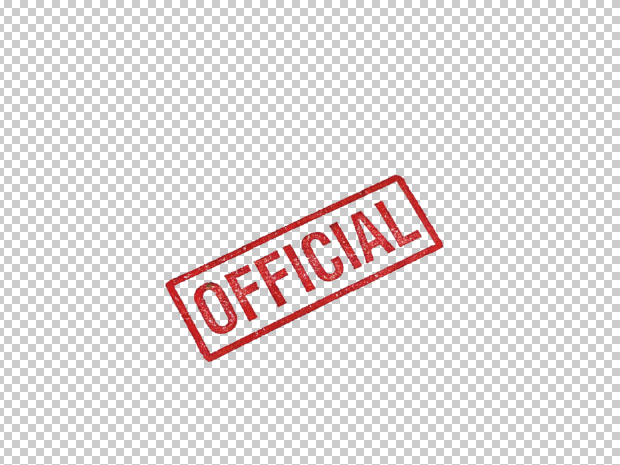
Confirm the selection settings and click the Generate button in the plugin. The AI completes intelligent recognition and cutout in 10-15 seconds. PS will automatically create a new extracted seal layer; hide the original background layer to preview: crisp, clean seal edges, no document background residue, true-to-original color—ready for direct use with no secondary PS tweaks.
Core Comparison of the 3 Methods
- PS Color Range: For simple scenes, easily disturbed by background, imprecise edges
- PS Pen Tool: High precision but time-consuming and high-threshold, unsuitable for beginners
- Psaide Background Remover: One-click operation, fast and efficient, suitable for all scenes, seamless extraction with zero learning curve—the optimal choice for document seal extraction, solving all core pain points of traditional PS cutout.
Pro Tips
- Ensure high-definition document images before extraction to avoid incomplete seal extraction due to blurriness.
- Roughly select an area slightly larger than the seal in PS for full AI recognition.
- Save the extracted seal in PNG format via PS Save As to retain a transparent background for easy insertion into other documents later.
Whether you have basic PS skills or are a complete beginner, struggling with “how to extract seals in PS” and tired of tedious traditional cutout? Try PS paired with Psaide’s Background Remover! No professional cutout skills needed, achieve seamless seal extraction in 3 steps, balance efficiency and precision, and greatly boost office productivity.ro! No professional retouching skills needed—one-click AI outfit swaps, seamless model outfit changes, and efficient production of natural, professional effects for e-commerce, posters, outfit design, and other scenarios.
Download link

https://psaide.com/?sfrom=A86R4u
Invitation Code: A86R4u