Table of Contents
1. The 30-Second Coat Swap: From Manual Hours to AI Seconds
Q: Is it really possible to swap a complex garment like a shearling coat in under a minute?
A: Absolutely. Traditional coat replacement requires precise masking around fur textures, arm positions, and collars—a process taking 15-30 minutes even for professionals. The AI in Nano Banana understands garment structure and body contours, automating what was once expert-level work.
Q: How can AI handle materials like shearling fluff or wool texture?
A: The algorithm is trained on diverse material databases. When you mark the target area in red, it recognizes you want to replace a coat and specifically applies texture-aware processing to maintain the fluffy, dimensional quality of materials like shearling in the final composite.
2.Why Red Marking is Your Secret Weapon
That quick red fill does more than mark a spot—it creates a high-contrast instruction layer for the AI. This simple step eliminates ambiguity, telling the AI exactly what to replace (the red coat) and where to place the new item. It bypasses the need for the AI to guess garment boundaries against complex backgrounds, leading to faster processing and more accurate results in those critical 30 seconds.
3.What You Need
- Adobe Photoshop with PsAide
- Click to get
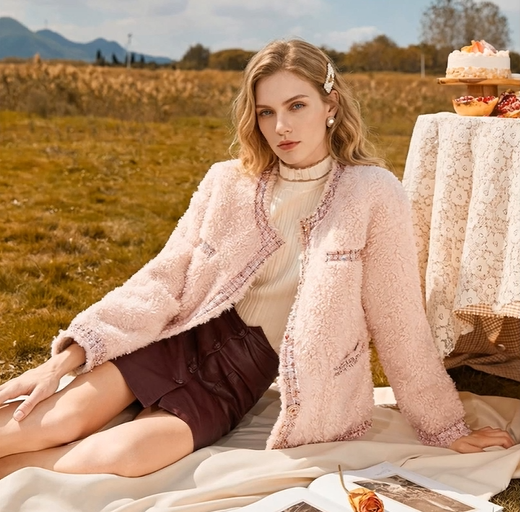
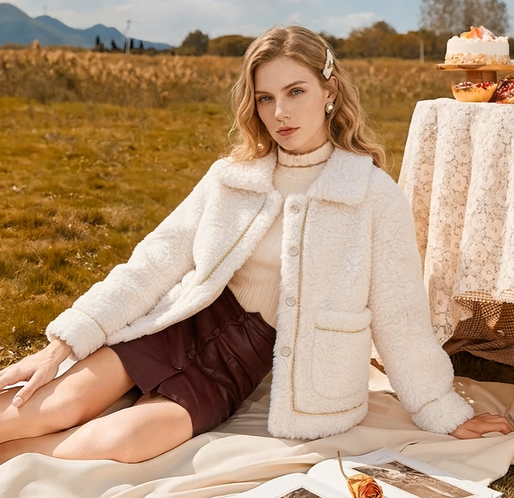
- Model photo (clear view of the coat)
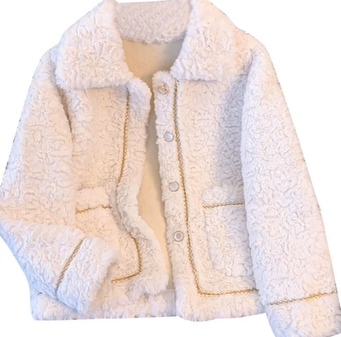
- New shearling coat image (neutral background ideal)
- 30 seconds processing time
4.The 30-Second Workflow
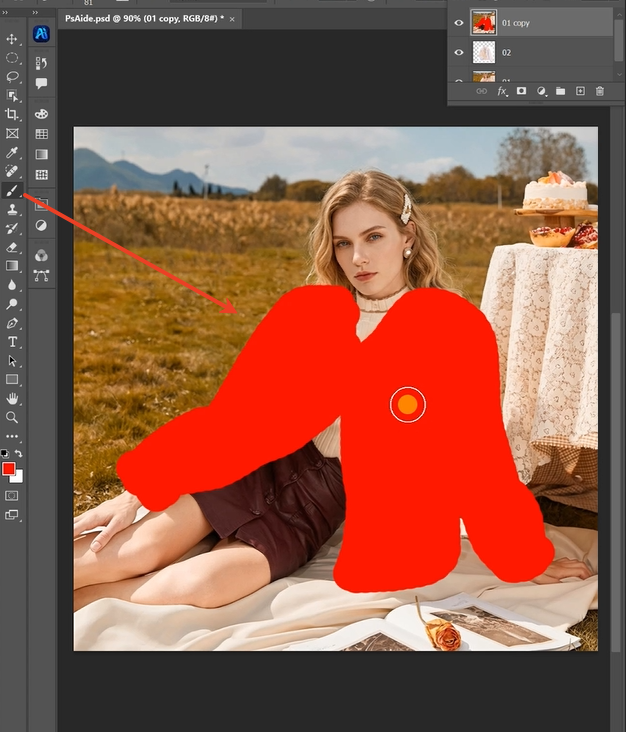
Step 1: Mark the Target Coat
Open both images in Photoshop. On a duplicate layer of your model photo, use the Lasso Tool to select the current coat. Don’t aim for hair-perfect edges. Fill the selection with solid red (RGB 255,0,0). This is your visual command for the AI.
Step 2: Command the AI
Open Nano Banana. Upload your images:
- Figure 1: Your new shearling coat image.
- Figure 2: Your model photo with the red-marked coat.
Enter this direct prompt:
“Replace the coat worn by the model in Figure 2 with the coat in Figure 1, maintaining natural fit and fabric texture.”
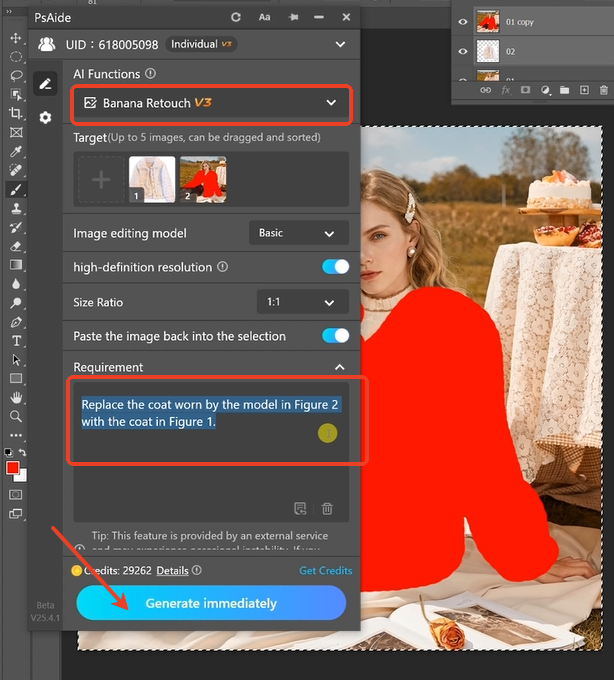
Step 3: Generate the Result
Click “Generate.” In roughly 30 seconds, the AI will remove the red area, position the new coat to match the model’s pose, adapt its lighting and shadows, and crucially, preserve the textured look of shearling or wool. The output is a seamlessly edited photo.
5.Pro Tips for Flawless Results
Quick Refinement: If the fit isn’t perfect, use Photoshop’s Warp Tool (Ctrl+T > Right-click > Warp) on the result layer for minor adjustments.
For Textured Fabrics: Ensure your replacement coat image clearly shows the material’s detail (e.g., shearling’s fluff). The AI uses this reference.
Lighting Matters: For the most natural blend, try to use a replacement coat image lit from a similar direction as your model photo.
Download link
https://psaide.com/?sfrom=A86R4u
Invitation Code: A86R4u
Click here to discover more usage tips and in-depth information on Nano Banana Pro!