Table of Contents
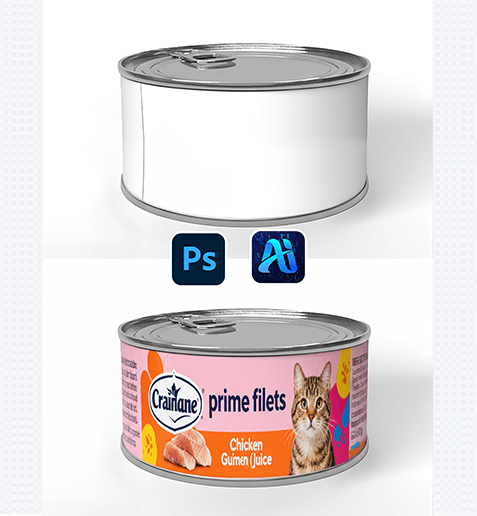
Nano Banana simplifies packaging design by letting you add custom graphics to while preserving the can’s texture, lighting, and curved shape. Here’s how to create realistic, professional can mockups :
1. Pro Tip for Curved Surface Compatibility
Before editing: Prepare your graphic (e.g., a logo or label design) as a high-resolution file with a transparent background. For best results, use a graphic with a flexible aspect ratio—this helps Nano Banana wrap it smoothly around the can’s curved body.
2. Key Benefits of Nano Banana for Can Graphic Application
① Wraps Graphics to Curved Surfaces Naturally: Unlike basic “paste” tools , Nano Banana analyzes the can’s 3D shape to adjust the graphic—making it look printed directly on the can.
② Matches Lighting & Shadows Automatically: The tool detects the can’s existing highlights (e.g., metallic sheen) and shadows, then adjusts the graphic to blend with these details—no manual shading required.
3. 3-Step Workflow: Nano Banana + Photoshop
① Import Assets: Open your original image and your target product image in Photoshop.
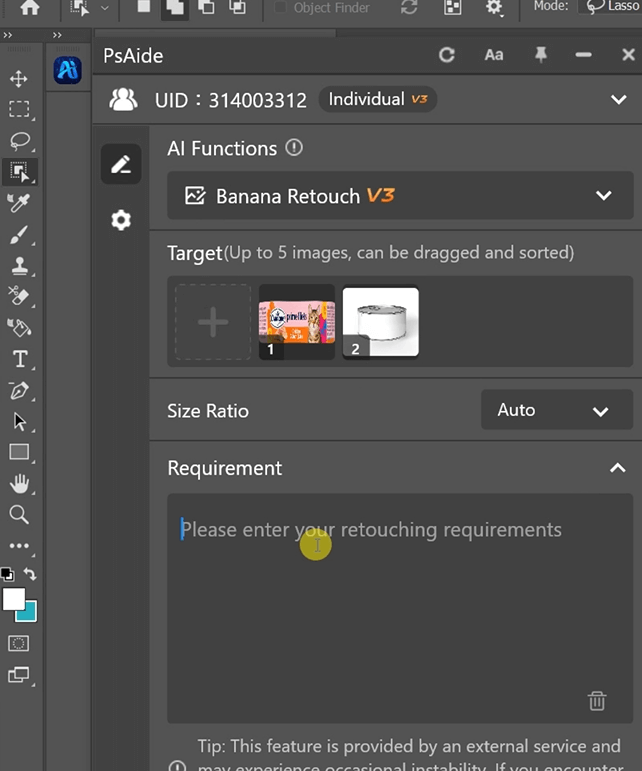
② Define the Application: In the plugin panel, upload both assets . Enter a prompt:
Place Figure 1 onto the can in Figure 2.
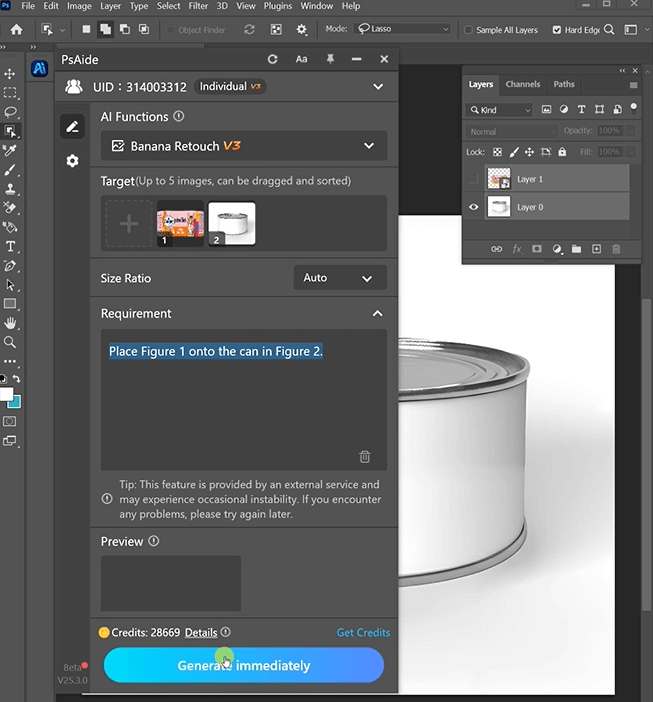
③ Generate & Finalize: Click “Generate Immediately” in Nano Banana.

4. Tool Access & Download
Nano Banana is a must-have for packaging designers, brands, and marketers needing fast, high-quality can mockups.
Download Link: https://psaide.com/?sfrom=ZfhxUK
Invitation Code: ZfhxUK