Table of Contents
1.Transform Fashion Photos Instantly with AI
For fashion photographers, e-commerce managers, and content creators, time is everything. Manually changing a model’s dress in Photoshop involves complex selections, perspective adjustments, and lighting matching that can take 30 minutes or more—even for professionals. The traditional process requires masking around delicate edges like hair and arms, warping patterns to fit body contours, and color-matching fabrics to original lighting conditions.
What if you could accomplish this entire transformation in under a minute? This guide demonstrates how to use Nano Banana in Photoshop to instantly swap dresses while maintaining perfect integration with the original photo.
2.What You’ll Need for 60-Second Transformations
- Adobe Photoshop(2015+) with PsAide plugin installed
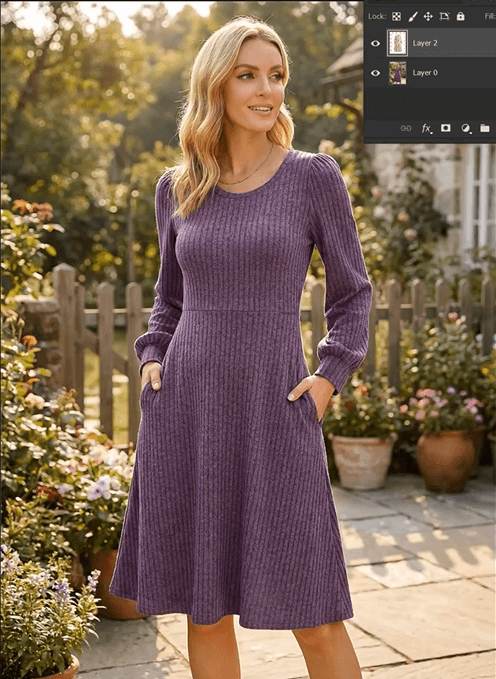
- Model photograph
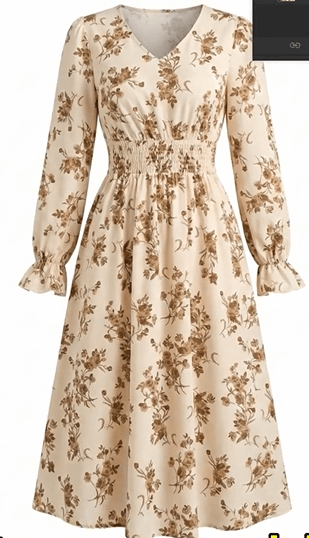
- Target dress image (preferably on clean background)
- Basic selection tool for initial marking
3.Steps to Perfect Dress Replacement
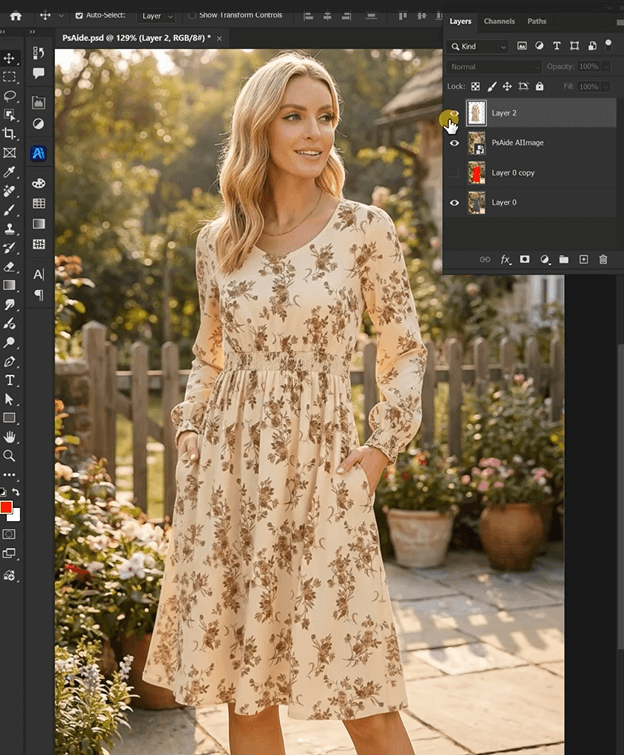
Step 1: Mark and Prepare Your Images
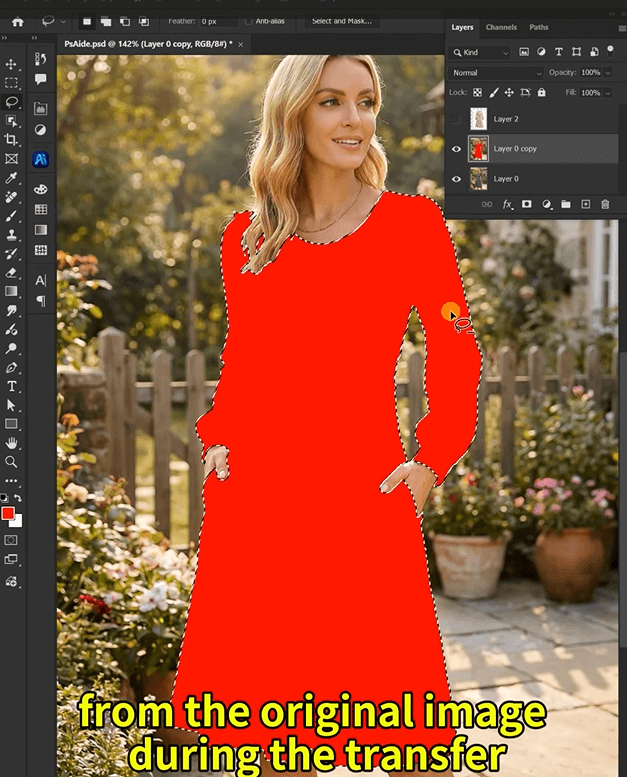
Open both your model photo and target dress image in Photoshop. Create a duplicate layer of your model photo. Using the Brush Tool with a bright red color, paint over the dress area you want to replace. This color marking creates a clear visual guide for the AI, indicating exactly what needs transformation. Don’t worry about perfect edges—focus on covering the main clothing area while avoiding skin, hair, and background elements. This simple preparation takes just 15 seconds but dramatically improves the AI’s accuracy.
Step 2: Upload and Command with AI Precision
Launch Nano Banana from the PsAide panel. Upload your two prepared images:
- Image 1: Your target floral dress
- Image 2: Your model photo with red-marked clothing area
In the prompt box, enter this clear instruction:
“Model from image 2 wearing the dress from image 1 with natural fit and lighting.”

Step 3: Generate Your Professional Result
Click “Generate” and wait approximately 30 seconds. The AI analyzes both images, replaces the marked area with your floral dress, automatically adjusts perspective to match body contours, matches lighting conditions, and blends the new dress seamlessly into the original photo. The result appears as if the model wore the floral dress during the original photoshoot.
4.Frequently Asked Questions
Q1: How do I handle complex floral patterns during replacement?
A: The AI preserves pattern details effectively. For best results with intricate florals, ensure your dress image has good lighting that clearly shows the pattern. The system maintains pattern integrity while adapting it to the model’s pose and body contours naturally.
Download link
https://psaide.com/?sfrom=A86R4u
Invitation Code: A86R4u