Table of Contents
The Christmas Photo Challenge
Every December, individuals and businesses face the same festive dilemma: how to create engaging Christmas-themed photos without expensive PS or complex editing skills. Whether you’re a small business wanting to add holiday cheer to marketing materials, a family looking to create personalized Christmas cards, or a social media user wanting to join the seasonal fun, traditional methods require either costly studio sessions or advanced Photoshop expertise. The manual process of adding Christmas elements—like Santa hats, elf costumes, or festive sweaters—involves tedious selections, careful masking, and challenging lighting adjustments that often result in obvious, awkward composites.
What if you could transform any portrait into a festive masterpiece with just a simple color mark and a single AI command? This holiday season, discover how to use Nano Banana in Photoshop, the groundbreaking AI feature within the PsAide plugin, to add Christmas outfits and accessories to your photos. This technique uses smart color tagging to guide AI-powered costume replacement, turning ordinary photos into festive celebrations without the traditional complexity of manual compositing.
Why Manual Christmas Editing Steals the Holiday Joy
Traditional holiday photo editing in Photoshop presents multiple challenges that dampen the festive spirit. Adding Christmas elements requires precise selections around hair and clothing edges, realistic shadow creation, and careful color matching to make new elements appear natural. The process becomes particularly frustrating when dealing with complex items like Santa’s furry hat trim or patterned Christmas sweaters. Even experienced users can spend 30-45 minutes on a single image, often producing results that look obviously photoshopped rather than magically festive.
The Nano Banana Photoshop method revolutionizes this process by using intelligent color recognition as a guide system. Instead of wrestling with detailed masks and blend modes, you simply mark the areas you want to transform with a distinctive color (like bright red), then let the AI handle the complex task of identifying clothing boundaries, matching textures, and integrating lighting. This approach maintains the original photo’s natural qualities while seamlessly introducing festive elements.
What You’ll Need
- Software: Adobe Photoshop with PsAide plugin installed
- Base Image: A clear portrait photo (individual or group)

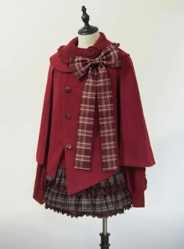
- Christmas Elements: High-quality images of Christmas clothing or accessories
- Time Investment: 3-5 minutes per transformation
- Creative Level: Perfect for beginners seeking professional results
The Festive Transformation Workflow
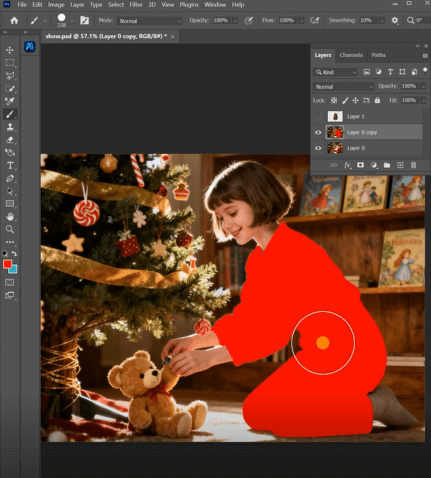
Step 1: Prepare Your Images with Color Guidance
Begin by opening both your portrait photo and your Christmas clothing image in Photoshop. Create a duplicate layer of your portrait. Using the Lasso Tool, carefully select the clothing area you want to replace—this could be a shirt for a Christmas sweater, or the head area for a Santa hat. Once selected, press Alt+Delete (or Option+Delete on Mac) to fill the selection with solid red. This red marking serves as a clear visual guide for the AI, indicating exactly where you want the transformation to occur. The brighter and more distinct the red, the better the AI can identify the target area.
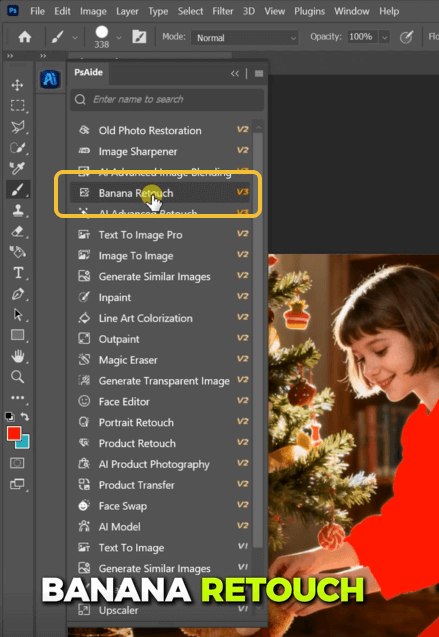
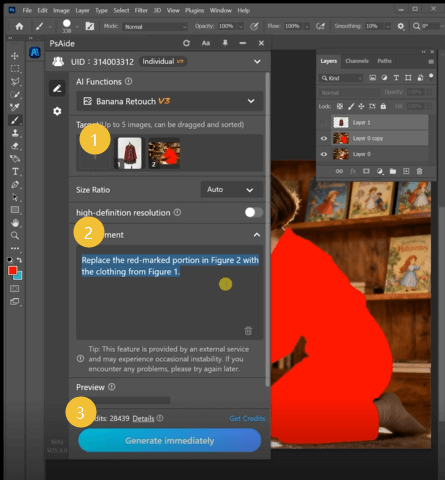
Step 2: Upload and Command with Precision
Open the PsAide panel and launch Nano Banana. Upload your two prepared images:
- Figure 1: Your Christmas clothing/source element
- Figure 2: Your portrait with red-marked areas
In the command prompt, use this specific instruction:
“Replace the red-marked portion in Figure 2 with the clothing from Figure 1, maintaining original lighting and proportions.”
This enhanced prompt adds crucial parameters that ensure natural-looking results. The “maintaining original lighting” instruction helps the AI adapt the Christmas element to match your photo’s illumination, while “proportions” ensures the new clothing fits naturally on your subject.
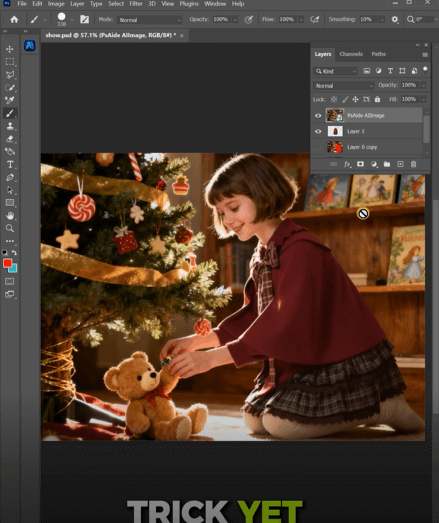
Step 3: Generate Your Christmas Miracle
Click “Generate” and watch the holiday magic happen. Within 30-60 seconds, Nano Banana will process your request. The AI performs several sophisticated operations: it recognizes the red-marked areas as transformation targets, extracts the Christmas clothing from your source image, adjusts it to fit the marked areas perfectly, matches lighting conditions, and blends everything seamlessly. The result is a naturally festive portrait where the Christmas elements appear as if they were part of the original photograph.
Creative Variations for Maximum Holiday Spirit
Once you master this basic technique, explore these creative applications:
- Family Portraits: Add matching Christmas pajamas to your family photo
- Pet Photos: Give your pets festive antlers or Santa hats
- Business Team Photos: Add subtle holiday elements to professional head shots
- Social Media Series: Create a sequence of “12 Days of Christmas” themed portraits
- Historical Photos: Add Christmas cheer to vintage family pictures
The method works equally well for single accessories (like Santa hats) or complete outfit changes (traditional Christmas sweaters).
Frequently Asked Questions
Q1: What if the red marking isn’t perfectly precise around hair or edges?
A: The AI is surprisingly forgiving with marking precision. Focus on covering the main area you want to replace rather than pixel-perfect edges. The AI will naturally blend boundaries. For hair areas, include a bit of the background in your red marking—the AI will replace only the clothing while preserving hair details.
Q2: Can I use different colors for marking?
A: While red works exceptionally well as it contrasts with most skin tones and clothing, you can experiment with other bright, unnatural colors like neon green or electric blue. The key is consistency—use the same color for all markings in a single project, and mention the color specifically in your prompt if you change from red.
Q3: How do I ensure the Christmas clothing looks seasonally appropriate?
A: Choose source images with traditional Christmas colors (red, green, white, gold) and patterns (snowflakes, reindeer, candy canes). The AI will transfer these seasonal characteristics while adapting them to your photo’s specific lighting and perspective.
Q4: Can I add multiple Christmas elements at once?
A: Yes, by marking multiple areas with red. For example, mark both a shirt area and a hat area, then use a Christmas image containing both a sweater and Santa hat. The AI will intelligently apply the appropriate elements to each marked area. For complex multi-element transformations, consider doing them in stages for optimal control.
Download link
https://psaide.com/?sfrom=A86R4u
Invitation Code: A86R4u