Table of Contents
1. The 2D-to-3D Transformation Challenge
For illustrators, game developers, and digital artists, bridging the gap between 2D artwork and 3D visualization has traditionally required complex software and specialized skills. Creating dimension, volume, and realistic lighting from a flat illustration typically involves time-consuming processes in dedicated 3D applications like Blender or Maya, with a steep learning curve that puts it out of reach for many 2D artists.
What if you could add professional 3D qualities to your 2D artwork without leaving Photoshop or learning complex modeling software? This guide demonstrates how to use Nano Banana Pro in Photoshop, the advanced AI tool that intelligently interprets and transforms flat illustrations into dimensional renders.
2. Preparing Your Artwork for 3D Transformation
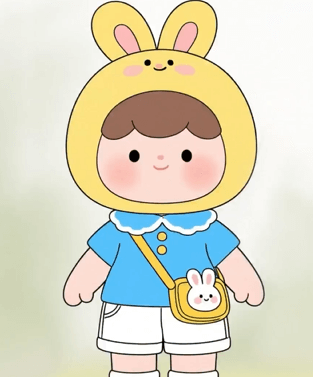
Begin with a clean, well-defined 2D character illustration opened in Photoshop. For optimal results with the Pro version, ensure your artwork has clear outlines, distinct color areas, and sufficient resolution to preserve details during transformation.
3. The Professional 3-Step 3D Conversion Process
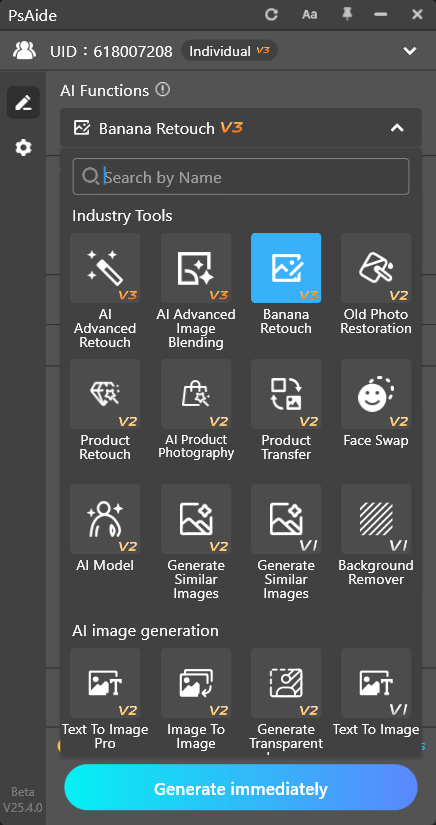
Step 1: Access Advanced AI Processing
With your illustration open in Photoshop, navigate to the PsAide panel and launch Nano Banana. The Pro version’s advanced algorithms can interpret artistic intent and spatial relationships that the standard version might miss, making it ideal for dimensional conversions requiring nuanced understanding of form and lighting.
Step 2: Upload and Instruct with Professional Parameters
Upload your single illustration file to the Pro interface. In the prompt box, enter this specific, professional instruction:
“3D character render, soft lighting, white background, consistent colors.”
This carefully crafted prompt provides multiple clear directives to the AI. “3D character render” establishes the primary conversion goal, “soft lighting” ensures natural illumination without harsh shadows, “white background” creates professional presentation conditions, and “consistent colors” is crucial—it instructs the AI to maintain your original artwork’s color palette while adding dimensional shading rather than altering the fundamental color scheme.

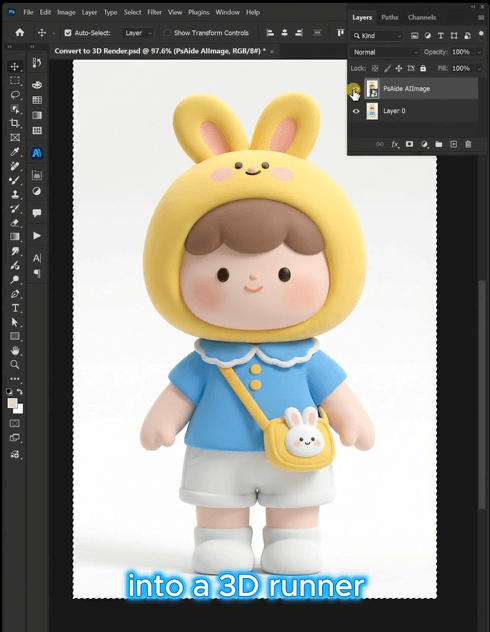
Step 3: Generate Your Dimensional Transformation
Click “Generate” and allow 60-90 seconds for processing. The Pro version performs sophisticated analysis of your 2D artwork, interpreting shapes, forms, and implied volumes to reconstruct a three-dimensional representation. It adds appropriate shading based on the “soft lighting” direction, creates dimensional depth while preserving character proportions, maintains your original colors through intelligent tinting of shadows and highlights, and renders the final result on a clean white background perfect for presentations or further compositing.
4. Professional Results and Applications
This technique is particularly valuable for:
- Character Design Presentations: Show designs with dimension to clients or teams
- Concept Art Enhancement: Add depth to conceptual artwork for pitches
- Game Asset Preparation: Create dimensional reference from 2D character designs
- Marketing Materials: Generate more dynamic promotional images
- Portfolio Development: Showcase artwork with professional presentation quality
5. Technical Guide: Key Considerations
Q1: What types of 2D illustrations work best for this 3D conversion?
A: The Pro version handles various styles from cartoon to semi-realistic effectively. For best outcomes, ensure your original has sufficient contrast between elements and avoid overly busy backgrounds that might confuse the AI’s spatial analysis.
Q2: How does the Pro version maintain my original colors while adding 3D effects?
A: The Pro version utilizes advanced color mapping that separates hue preservation from value adjustment. When it adds dimensional shading, it darkens or lightens your original colors rather than replacing them with different hues. The “consistent colors” directive specifically reinforces this behavior.
Download link
https://psaide.com/?sfrom=A86R4u
Invitation Code: A86R4u