Table of Contents
1. The Sneaker Replacement Challenge & Lighting Solutions
Q: Why does sneaker replacement often look fake in Photoshop?
A: Lighting mismatch is the main culprit. When shoes are replaced manually, the new footwear rarely matches the original photo’s light direction, intensity, and shadow quality. This creates visual inconsistency that viewers notice immediately.
Q: Can AI truly understand and replicate complex lighting conditions?
A: Yes—Nano Banana’s AI analyzes the original image’s lighting environment, including light source direction, shadow softness, and reflection patterns. It then applies this lighting data to the new sneakers, creating shadows and highlights that appear naturally integrated rather than artificially added.
2. The Power of Targeted Red Marking
Marking existing sneakers with bright red serves multiple purposes: First, it creates a clear visual boundary that tells the AI exactly what to replace, preventing confusion with similar-colored elements like socks or pants. Second, it preserves surrounding details like shoelaces, shadows, and floor textures that the AI can reference for realistic integration. Third, this method reduces processing errors by focusing the AI’s attention on specific areas rather than making it guess what needs replacement.
3. What You’ll Need
- Adobe Photoshop(2015+) with PsAide plugin installed
- Click to get
- Full-body or lower-body photo showing sneakers clearly
- Replacement sneaker image (angled similarly for best results)
- 2-3 minutes total editing time
4. The Natural Lighting Replacement Process
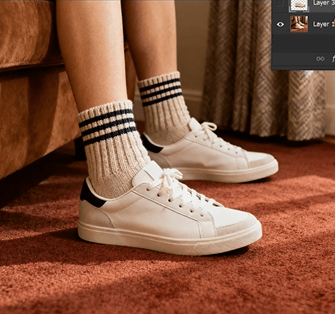
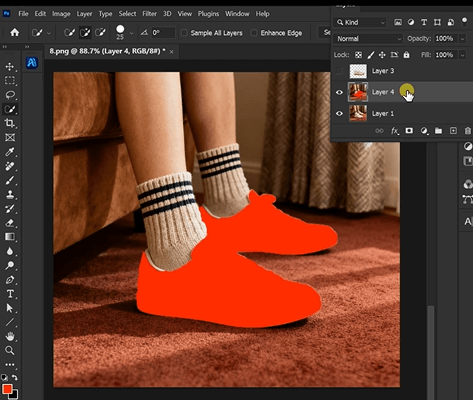
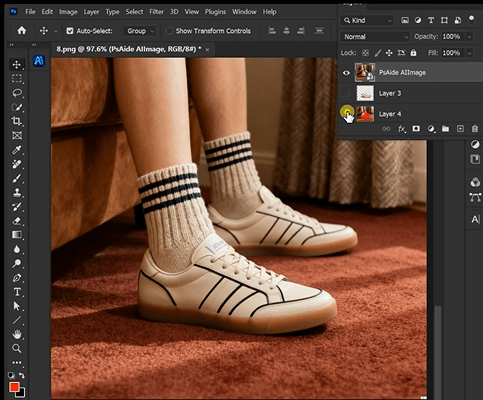
Step 1: Prepare with Precise Marking
Open both images in Photoshop. Create a duplicate layer of your model photo. Using a solid red brush (RGB 255,0,0), carefully paint over both sneakers. Cover the entire shoe area while avoiding socks, skin, and surrounding floor space. This marking doesn’t need to be perfect but should clearly define what needs replacement. The red color provides maximum contrast against most backgrounds for easy AI recognition.
Step 2: Upload and Command for Natural Results
Launch Nano Banana and upload your prepared images:
- Figure 1: Your replacement sneakers
- Figure 2: Your model photo with red-marked shoes
Enter this enhanced prompt in the command box:
“Have the model in Figure 2 put on the shoes from Figure 1, matching original lighting and shadow direction.”
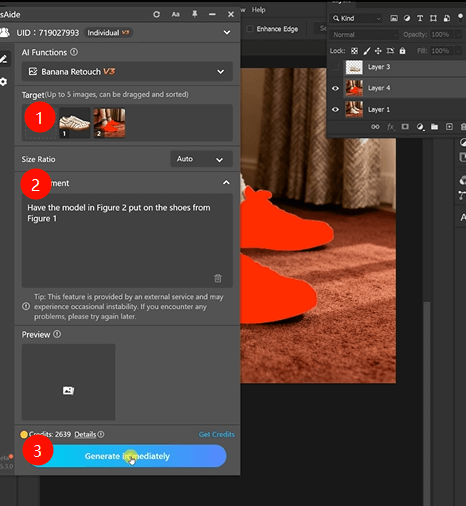
Step 3: Generate Perfectly Lit Results
Click “Generate” and wait 30-50 seconds. The AI performs comprehensive analysis: it identifies the red-marked areas for replacement, removes existing sneakers while preserving surrounding details, positions new shoes with correct perspective and foot angles, analyzes original lighting conditions to recreate appropriate highlights and shadows, and blends everything with natural color matching. The result shows sneakers that appear naturally worn with lighting consistent throughout the image.
5. Professional Applications & Tips
This technique is ideal for:
- Athletic Brands: Showcase different sneaker models on the same athlete
- E-commerce: Create multiple product variations from single photos
- Marketing Campaigns: Test different colorways in campaign imagery
- Product Photography: Update inventory images without reshoots
Pro Tips: For athletic sneakers with complex textures and materials, ensure your replacement image clearly shows these details. The AI preserves material characteristics while adjusting them to match the original lighting. If your photo has strong directional lighting (like sunlight), the AI will recreate appropriate shadows based on shoe shape and light angle. For best results with performance footwear, make sure the replacement image shows shoes from a similar angle to your model’s foot position. Where form and perspective are clearly defined.
Download link
https://psaide.com/?sfrom=A86R4u
Invitation Code: A86R4u