Table of Contents
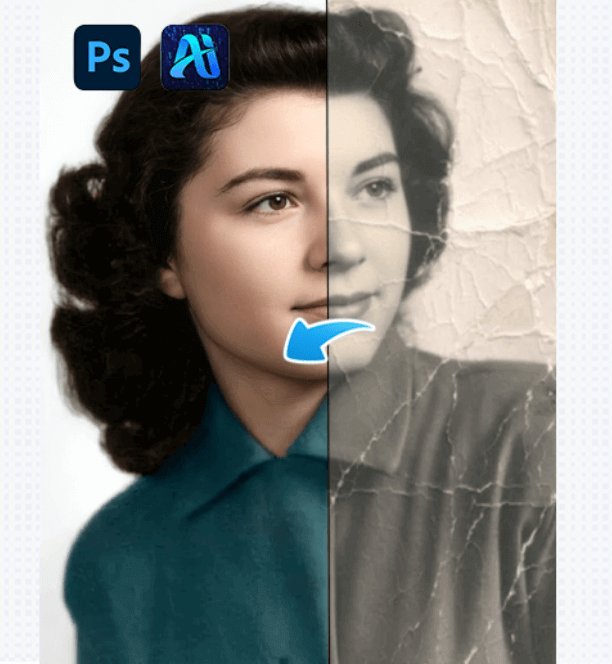
For Photoshop users, old photo restoration is not about complex operations, but about whether the workflow is clear and the results are controllable.
Compared with “one-click” AI restoration tools, using Nano Banana for old photo restoration inside Photoshop emphasizes a step-by-step process where changes are visible and adjustable, rather than accepting an irreversible final output.
Below is a real Nano Banana old photo restoration case, demonstrating a simple and stable Photoshop-based restoration workflow.
1、Using Nano Banana in Photoshop for Base Clarity Restoration (Key Step)
After importing the old photo into Photoshop, open Nano Banana Retouch (Nano Banana Pro) inside the PsAide plugin and follow the steps below.
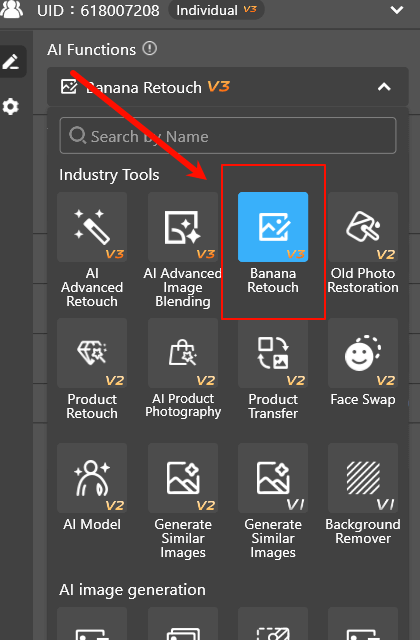
(1)Upload the photo to the Nano Banana plugin
Launch PsAide inside Photoshop, enter the Nano Banana Retouch interface, and select the old photo that needs restoration.
(2)Enter basic restoration requirements
Based on the condition of the photo, input simple restoration needs such as
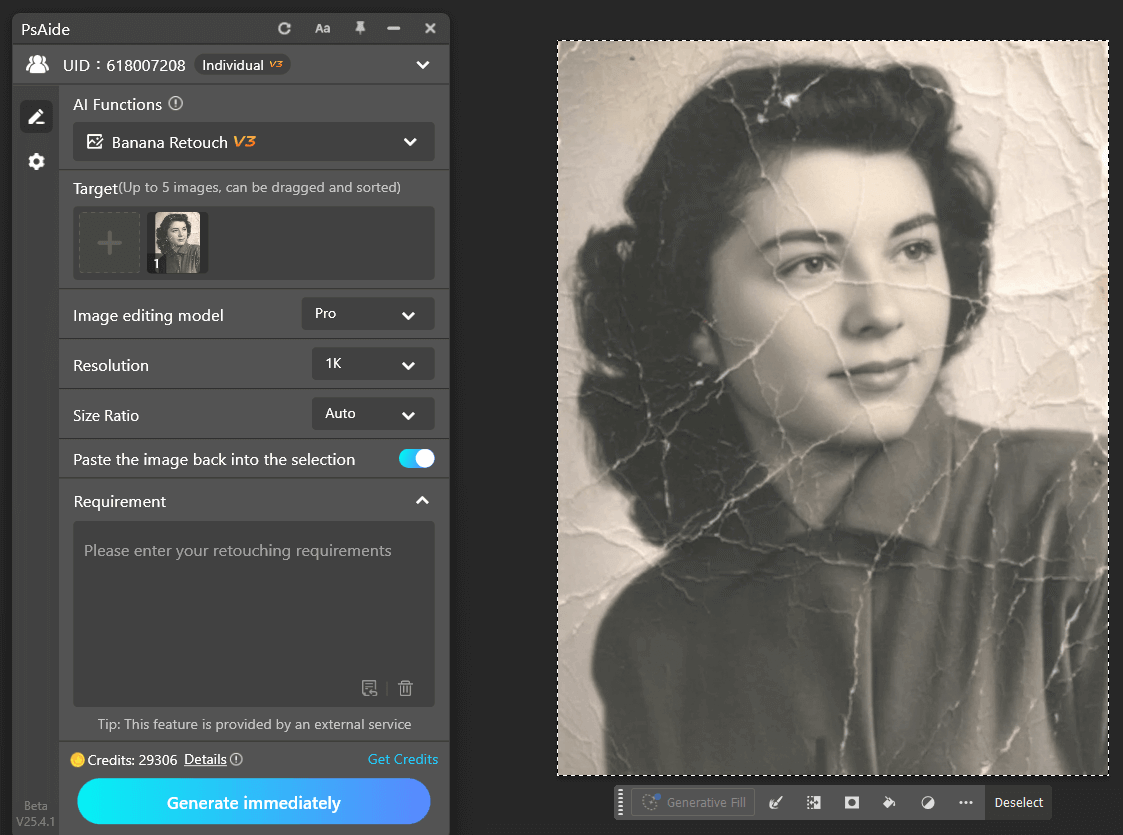
Restore this old photo and add color, removing all scratches, blemishes, fading, mold spots, and reflections. Recover clear facial features and more details. No over-sharpening; the image should be clean and natural. Change the background to white without altering the person’s details, resulting in a high-quality modern photo.
(3)Click Generate to obtain the AI restoration result
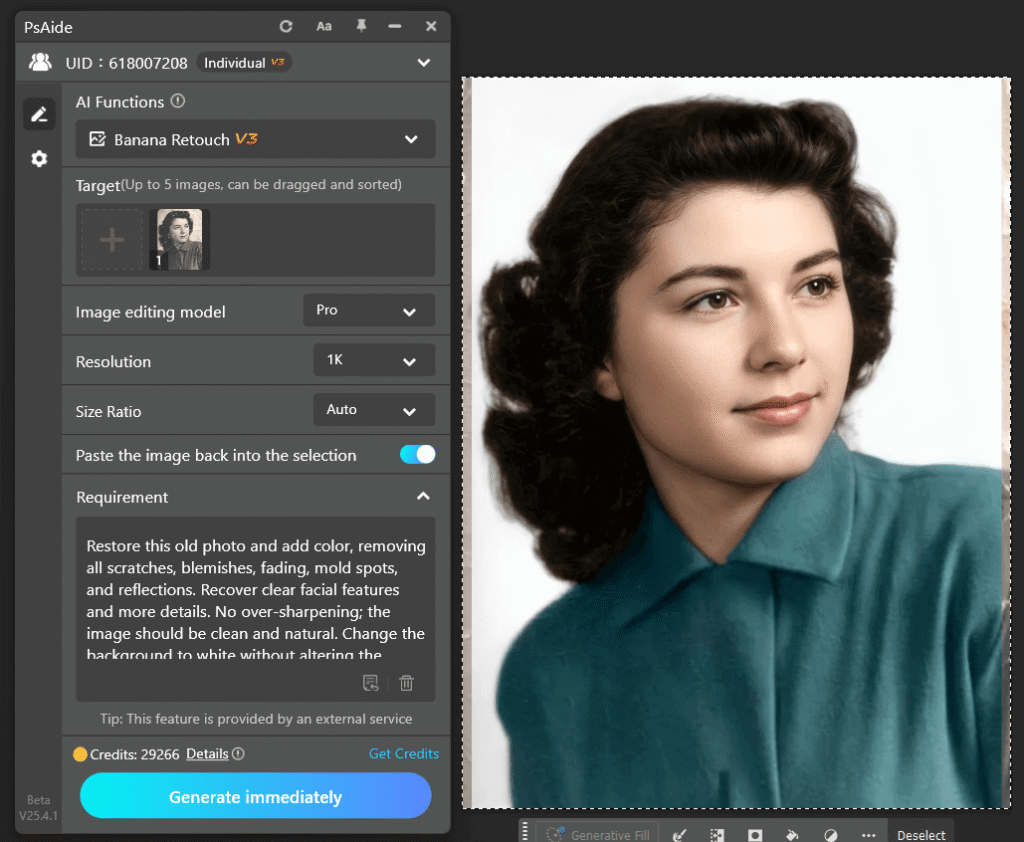
Nano Banana analyzes the photo and generates a restoration result, which is automatically added to Photoshop as a separate layer.
The purpose of this step is not to make the photo “look perfect,” but to create an AI restoration base layer that can still be manually controlled.
The key to professional old photo restoration is not achieving everything in one step, but being able to adjust and roll back at any time.
2、Controlling Nano Banana Restoration Results Through Photoshop Layers
Once Nano Banana completes the base restoration, Photoshop becomes the deciding factor for the final result.
At this stage, control is achieved by:
(1)Lowering the opacity of the Nano Banana restoration layer so clarity blends naturally into the original photo
(2)Using masks to apply Nano Banana effects only to key areas such as faces
(3)Avoiding excessive enhancement of the background to preserve the original historical texture
Usually, only minor adjustments are needed to significantly improve naturalness.
3、Final Result Analysis of the Nano Banana Old Photo Restoration Case
In this Nano Banana old photo restoration case, the final result shows:
(1)Clearer facial structure with improved readability
(2)Preserved grain and film texture typical of old photographs
(3)No obvious “AI-generated” appearance or over-modernization
The restored image is closer to how the photo should have originally appeared under historical conditions.
4、Conclusion: The Core Logic of Nano Banana + Photoshop Old Photo Restoration
For Photoshop users, the core principles of restoring old photos with Nano Banana can be summarized as:
(1)Analyze the problem before applying AI
(2)Let Nano Banana provide a reconstruction foundation, not final decisions
(3)Use Photoshop layers to decide when restoration is “just right”
This workflow is simple, stable, and highly controllable, and it represents the true value of Nano Banana in Photoshop-based old photo restoration.

Download Link: https://psaide.com/?sfrom=ZfhxUK
Invitation Code: ZfhxUK