Table of Contents
The Fashion Retailer’s Dilemma: The Mannequin Problem
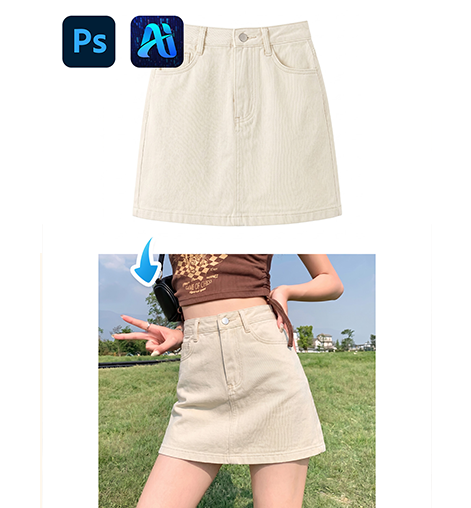
You have a beautiful new dress displayed perfectly on a store mannequin or a product shot from your supplier. But customers don’t see themselves in a mannequin. They need to visualize how the garment drapes, moves, and fits on a real human body. Traditional solutions require organizing expensive model photoshoots for every new arrival or skillfully compositing the garment onto a model in Photoshop—a task involving hours of complex warping, shadow matching, and edge blending that demands expert-level skills. This creates a bottleneck that delays product launches and inflates marketing budgets.
1.Why “Outfit Transfer” Is More Than Just Copy and Paste
Manually pasting a dress from a mannequin onto a model is notoriously difficult because:
- Perspective & Pose: The dress must warp and fold to match the model’s unique pose and body shape.
- Lighting Consistency: The garment’s highlights and shadows must be completely re-rendered to match the lighting in the model photo.
- Fit & Drape: The AI must understand how fabric naturally falls, creating realistic wrinkles and contours at the waist, shoulders, and hips.
- Accessory Placement: Items like belts, necklaces, or scarves must be positioned correctly relative to the model’s anatomy.
Nano Banana Pro’s advanced AI is trained to understand these spatial and physical relationships, executing this complex transformation with a single command.
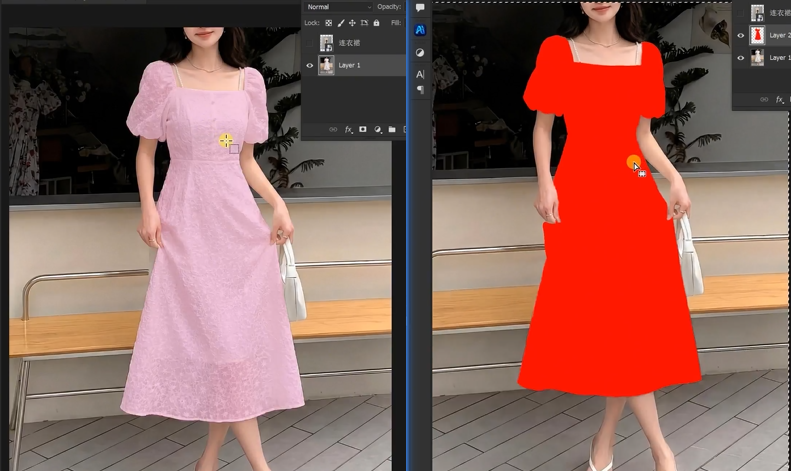
2.The “Red Marker” Method for Precision Targeting
The crucial step of filling the reference outfit with red provides the AI with an unambiguous visual target. This bright marker tells the AI:
- Exactly what to extract: It separates the garment from any background or other elements in the reference photo.
- The complete ensemble: It ensures all parts of the outfit (dress, belt, accessories) are treated as one cohesive unit to be transferred.
This simple preparation eliminates guesswork and dramatically improves the accuracy and speed of the AI’s generation.
3.The 3-Step AI Fashion Visualization Process
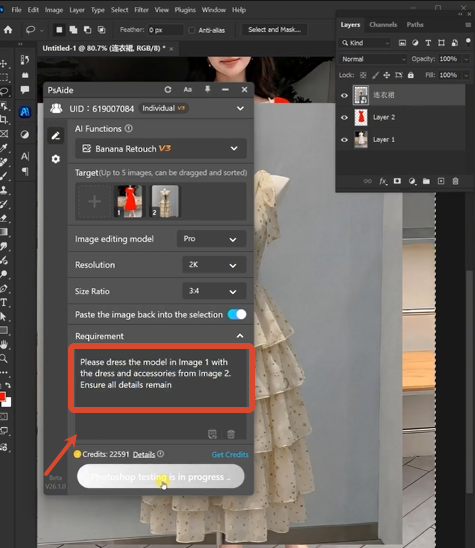
Step 1: Prepare Your Source Images with Red Marking
Open two images in Photoshop:
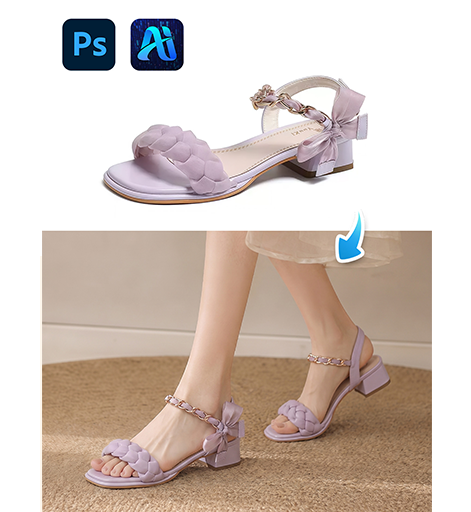
- Image 1: Your target model photo (the person you want to dress).
- Image 2: Your mannequin or product photo showing the outfit.
On Image 2 (the outfit source), use the Lasso Tool to select the entire garment and any accessories. Fill this selection with a bright, solid red color (RGB: 255, 0, 0). This creates your visual command for the AI.
Step 2: Command the AI with Style and Precision
In the PsAide panel, launch Nano Banana and select the Pro version. Choose your desired output aspect ratio (e.g., 3:4 for standard portrait and lookbook formats). Upload your two images in this order:
- Image 1: Your target model photo.
- Image 2: Your mannequin photo with the red-marked outfit.

In the prompt box, enter a clear, instructional command:
“Please dress the model in Image 1 with the dress and accessories from Image 2. Ensure all details remain”
Step 3: Generate Your Realistic Model Worn Image
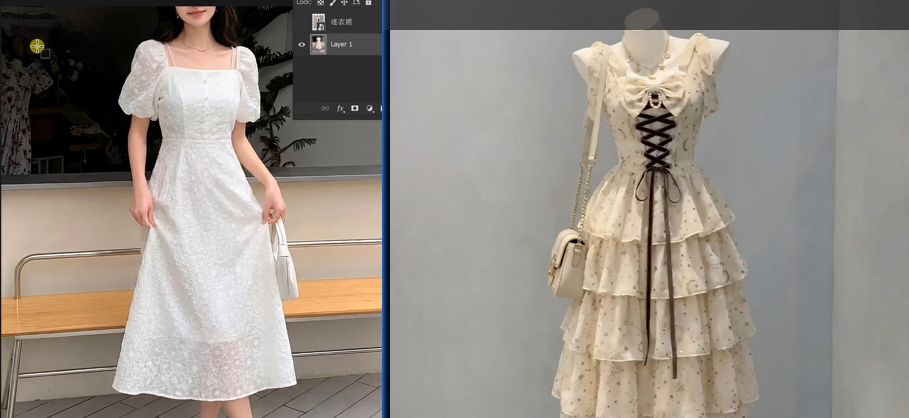
Click “Generate.” Within 45-90 seconds, the Pro version executes a sophisticated transfer:
- Garment Extraction & Analysis: Isolates the outfit from the red marker, analyzing its shape, seams, and details.
- Body Mapping & Warping: Intelligently warps and drapes the garment to fit the model’s specific pose, size, and body shape in Image 1.
- Lighting & Shadow Transfer: Analyzes the light source on the model and re-renders the garment’s highlights and shadows for a seamless blend.
- Detail Preservation: Maintains critical details like collar shape, sleeve length, belt position, and accessory placement.
- Edge Refinement: Softens and blends all edges where the garment meets skin or hair for a natural look.
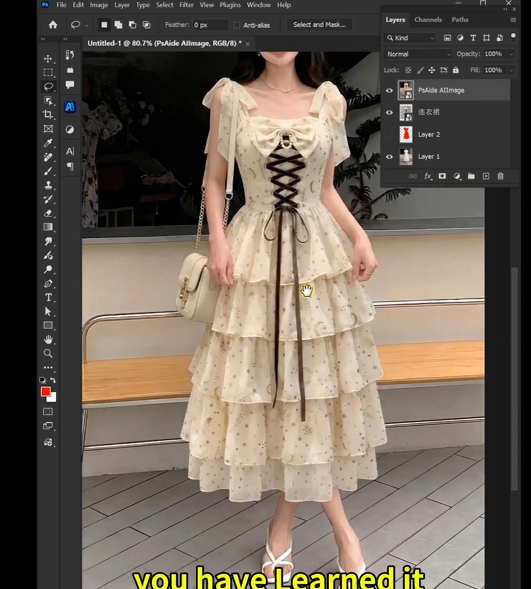
The result is a complete, publish-ready image showing your outfit worn by a real model, ready for your online store or lookbook.
4.Unlocking Faster Fashion Marketing
This technique is invaluable for:
- E-commerce Speed: Launch new products online instantly without waiting for model photoshoots.
- Catalog Creation: Quickly produce consistent model imagery for large seasonal collections.
- A/B Testing Visuals: Test different outfits on the same model for marketing campaigns.
- Cost Reduction: Eliminate or significantly reduce the need for costly studio bookings and model fees.
Stop letting mannequins limit your marketing. With Nano Banana Pro, you can bring your products to life on real models instantly, creating compelling, relatable imagery that drives sales and connects with customers.
5.Download link
https://psaide.com/?sfrom=A86R4u
Invitation Code: A86R4u