Table of Contents
1.The Text Removal Challenge & AI Solution
Q: Why is manually removing text from complex backgrounds so difficult?
A: It requires perfect texture reconstruction. Unlike a plain wall, a poster background often has gradients, patterns, or images behind the text. Tools like the Clone Stamp or Healing Brush struggle to seamlessly recreate these underlying graphics without leaving obvious, repeated patterns or blurry patches.
Q: How does AI achieve a cleaner result?
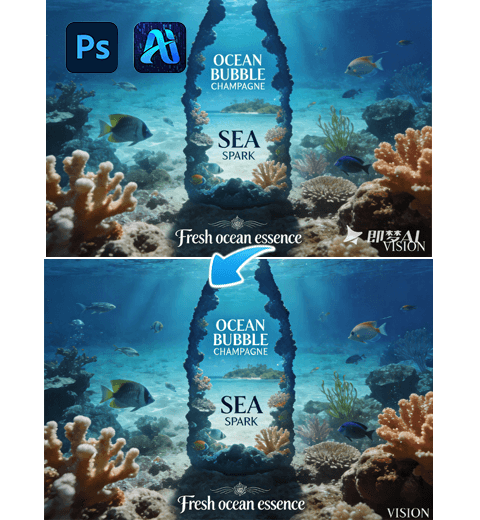
A: AI Advanced Retouch doesn’t just copy nearby pixels. It analyzes the overall context of the image. When you select an area and command “Remove all text,” the AI intelligently generates new pixels that logically extend the background pattern, color gradient, or image detail, making the text disappear as if it was never there.
2.The Power of “Remove all text” Command
The simple prompt “Remove all text.” is a powerful, high-level instruction for the AI. It tells the system to perform inpainting—the process of reconstructing lost or damaged parts of an image. The AI’s strength lies in understanding that “text” is an overlaid element to be deleted, and the “background” beneath it needs to be restored convincingly based on the surrounding visual information.
3.What You’ll Need
- Adobe Photoshop with the PsAide plugin installed.
- Click to get
- Your poster or image with unwanted text.

- 1-2 minutes total.
4.The 3-Step AI Text Removal Process
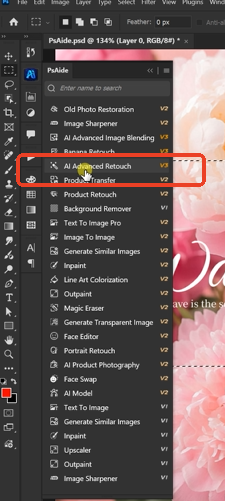
Step 1: Open and Select the Tool
Open your poster image in Photoshop. Navigate to the PsAide panel and launch the AI Advanced Retouch function. This tool is specifically designed for intelligent, content-aware repairs and object removal.
Step 2: Select and Command
Use any of Photoshop’s selection tools to carefully select the text you want to remove. In the text prompt box, enter the clear command:
“Remove all text .”
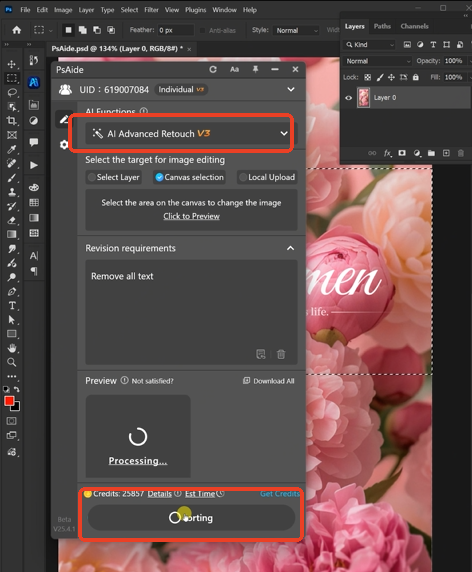
Step 3: Generate Flawless Results
Click the “Retouch” button. The AI will process the selected area(s), typically within 30 seconds. It analyzes the pixels surrounding your selection, predicts the background content that should exist beneath the text, and generates a clean, coherent fill that blends perfectly with the poster’s design. The result is a professional-looking poster with no trace of the original text.

5.Pro Tips for Perfect Cleanup
Final Manual Touch-Up: The AI does most of the work, but you can use the Clone Stamp Tool set to a low opacity for any minor, final blending on the generated area to make it perfect.and effortlessly solve your people cutout challenges!
Precise Selection: Take an extra moment to make your selection as accurate as possible. Tight selection helps the AI focus and often yields better results than a sloppy one.
For Complex Backgrounds: If the background is very detailed (e.g., a face behind text), you may get the best result by removing large text in smaller segments rather than one huge selection.
Download link
https://psaide.com/?sfrom=A86R4u
Invitation Code: A86R4u
Click here to discover more usage tips and in-depth information on Nano Banana Pro!