Table of Contents
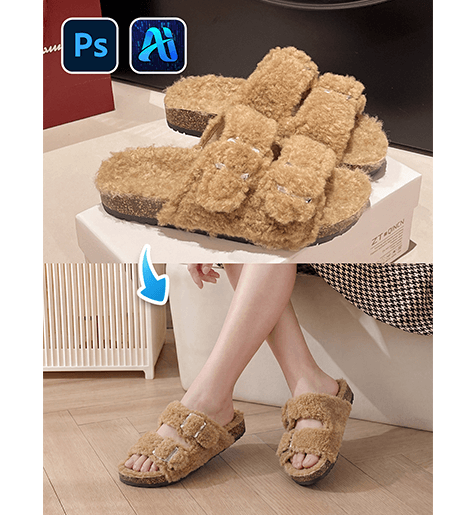
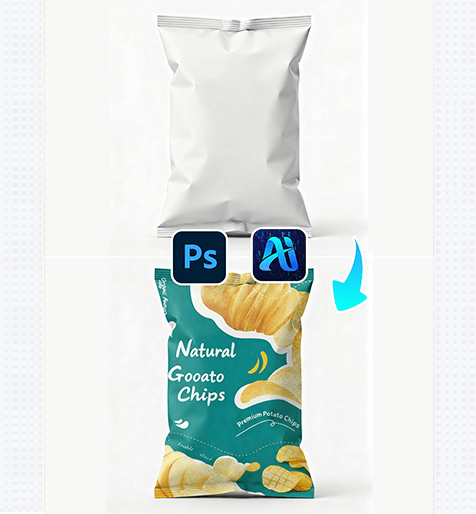
Nano Banana simplifies product design workflows by letting you add custom graphics to snack packaging—ensuring perfect light, shadow, and perspective alignment without manual adjustments. Here’s how it works :
1. Pro Tip for Perfect Graphic Placement
Before editing: Prepare your graphic (e.g., a logo or illustration) as a transparent PNG file. This helps Nano Banana integrate the design smoothly into the snack bag’s texture (e.g., the crinkled plastic of the pouch) without unwanted background artifacts.
2. Key Benefits of Nano Banana for Packaging Design
① Aligns Light & Shadow Automatically:
Unlike manual pasting Nano Banana analyzes the snack bag’s existing lighting and shadows to adjust the graphic—making it look like it was printed on the packaging originally.
② Saves Design Iteration Time:
Testing 2+ graphics on a package used to require hours of perspective warping and shadow painting. With Nano Banana, you can swap graphics in 2-3 minutes, ideal for quick product mockups.
3. 3-Step Workflow: Nano Banana + Photoshop
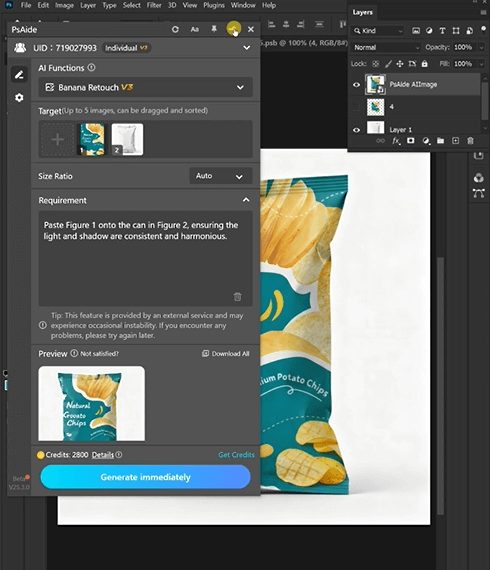
① Import Assets: Open your snack bag image (e.g., the white plastic pouch) and your graphic file in Photoshop. Launch the Nano Banana plugin via the Plugins menu.
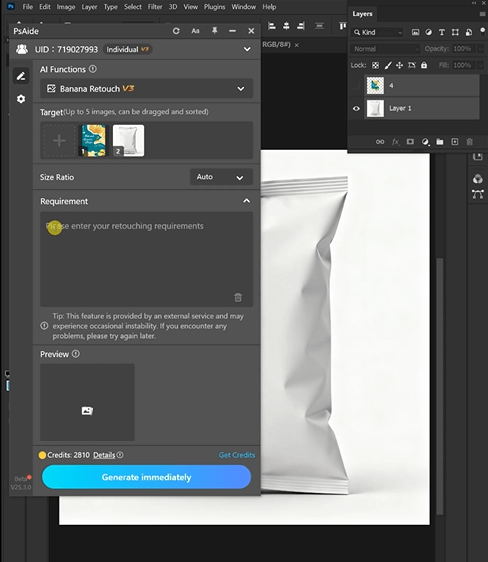
② Upload & Define Requirements: In the plugin panel, upload the snack bag ) and your graphic . Enter a prompt:
Paste Figure 1 onto the can in Figure 2, ensuring the light and shadow are consistent and harmonious.
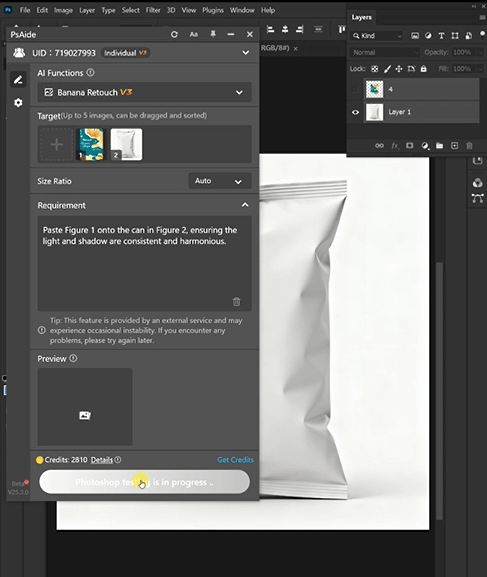
③ Generate & Finalize: Click “Process” in Nano Banana.
4. Tool Access & Download
Nano Banana is a must-have for product designers, marketers, and brands needing fast, realistic packaging mockups.
Download Link: https://psaide.com/?sfrom=ZfhxUK
Invitation Code: ZfhxUK