Table of Contents
1.Choosing the Right AI Sharpening Tool in Photoshop
Q: What’s the fastest way to fix a slightly blurry portrait photo?
A: Image Sharpener V2. This dedicated tool is optimized for one-click operation. Simply open your photo, select the function, and generate. It applies a pre-configured, intelligent sharpening algorithm specifically tuned for facial features and skin texture, delivering instant results without manual adjustments.
Q: When should I use other tools like Nano Banana Pro instead?
A: Choose Nano Banana Pro when you need more than just sharpness. If your photo has complex issues like noise, color fading, or specific artifacts you want to describe (“remove grain,” “enhance eye detail”), Pro’s text-prompt control offers comprehensive correction. For simpler, general sharpening tasks, Image Sharpener V1 provides a reliable baseline enhancement.
2.Understanding Your PsAide Clarity Toolkit
PsAide offers a tiered approach to image clarity:
- Image Sharpener V2: Your “One-Click Fix.” Fastest for general portrait blur. Algorithm is optimized for speed and facial detail recovery.
- Image Sharpener V1: The “Classic Enhancer.” A solid, general-purpose sharpening tool for various image types.
- Nano Banana Pro: The “Creative Director.” Most powerful and flexible. Use text prompts (e.g., “sharpen the eyes and reduce skin blur”) for targeted, complex restoration beyond simple sharpening.
3.What You Need
- Adobe Photoshop with the PsAide plugin.
- Click to get
- A soft or slightly out-of-focus portrait photo.
4.Method 1: Instant Fix with Image Sharpener V2
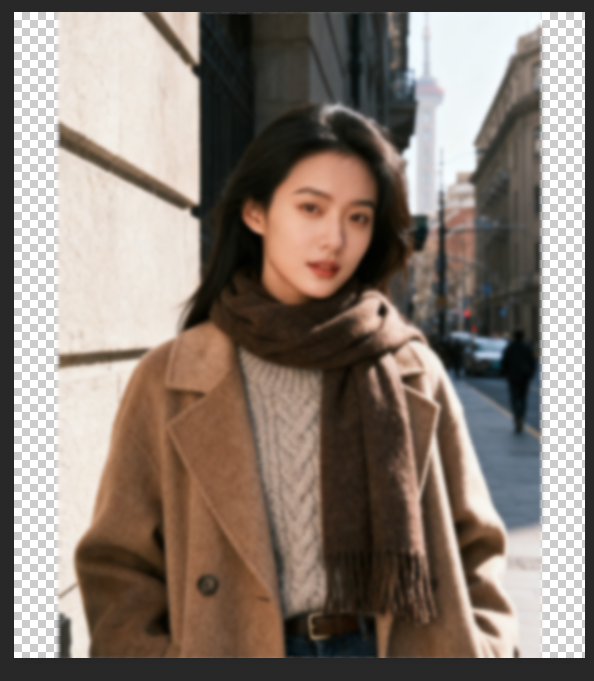
Step 1: Open Your Photo
Launch your blurry portrait in Photoshop. This method is perfect for photos that are generally soft but don’t have major damage.
Step 2: Apply One-Click Sharpening
In the PsAide panel, locate and select Image Sharpener V2. With your photo open, you can often proceed directly. The interface is designed for simplicity. Click “Generate”

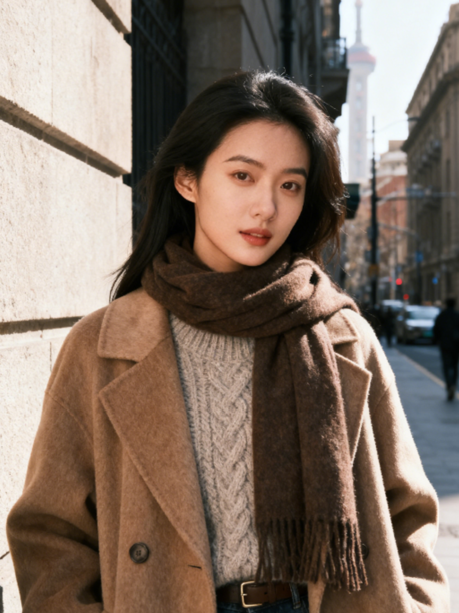
Step 3: Review the Enhanced Result
The tool processes the image in seconds. It automatically detects the face, applies context-aware sharpening to enhance details like eyes, lips, and hair, while preserving natural skin texture to avoid an over-processed, “crunchy” look. Compare the before and after to see regained clarity.
5.When to Choose Nano Banana Pro for Sharpening
Use Nano Banana Pro when you need to instruct the repair:
- Open Nano Banana and select Pro version.
- Upload your image.
- Use descriptive prompts like:
"Sharpen the facial features and enhance detail.""Fix motion blur on the face and clarify the eyes."
- Click Generate. This gives you precise control over the enhancement focus.
6.Pro Tips for Perfect Results
For Speed & Simplicity: Always try Image Sharpener V2 first. It solves most common portrait blur issues instantly.
For Complex Problems: If V2 doesn’t fully address issues like heavy noise or specific blurry areas, switch to Nano Banana Pro with a detailed prompt.
Download link
https://psaide.com/?sfrom=A86R4u
Invitation Code: A86R4u
Click here to discover more usage tips and in-depth information on Nano Banana Pro!