Table of Contents
The Lingerie Retouching Problem
Lingerie photography presents unique challenges that other apparel doesn’t.
First, the fabric is delicate. Silk, lace, and satin show every crease and wrinkle. A single fold can make a $100 garment look cheap.
Second, the presentation matters. Lingerie is often shot on hangers or mannequins. Those need to be removed. The shape needs to look natural, not stretched or distorted.
Third, the angle matters. Flat lays don’t sell. Customers want to see how the garment fits in three dimensions. They need to understand the cut, the straps, the back detail.
Traditional retouching requires hours of work. Smoothing each wrinkle with the clone stamp. Painting out hangers pixel by pixel. Warping the shape to look natural. Creating shadows to suggest volume.
Most brands skip proper retouching. Their product pages suffer. Customers can’t see the quality. Sales are lost.
There’s a faster way.
1、The Solution: Nano Banana Pro in 3 Steps
Here’s how to transform a raw lingerie photo into a professional, wrinkle-free 3D product image using AI inside Photoshop.
What You Need
- Adobe Photoshop with PsAide plugin
- One lingerie photo (any background, any angle)
- 60 seconds
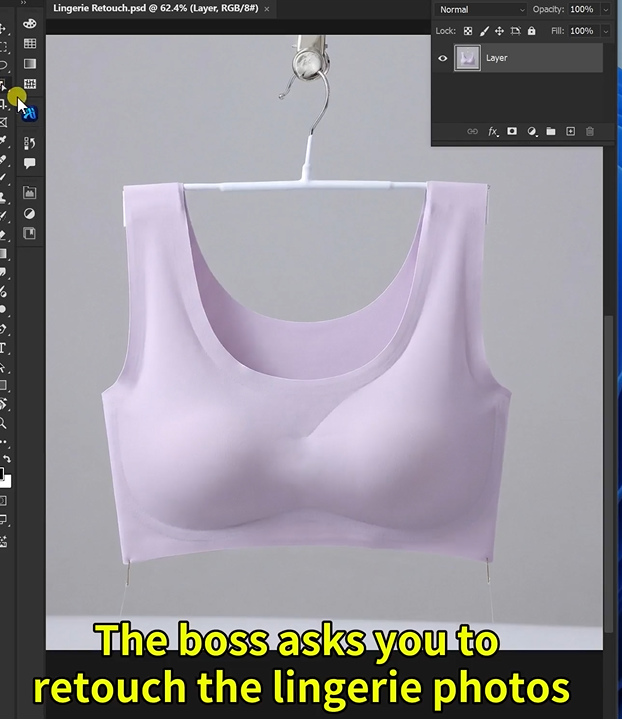
Step 1: Open Your Image
Launch Photoshop. Open your lingerie product photo. Don’t try to smooth wrinkles first. Don’t crop out the hanger. The AI needs to see everything you want removed.
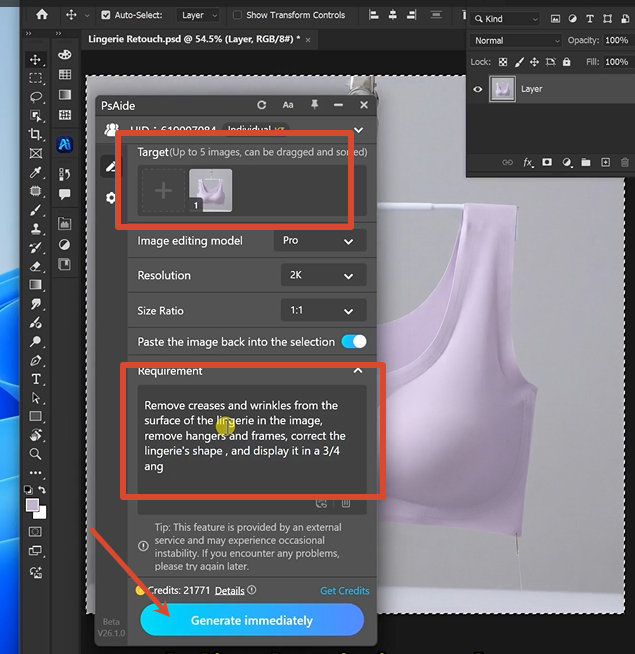
Step 2: Write Your Detailed Prompt
Open the PsAide panel. Launch Nano Banana and select the Pro version. Set output resolution to 2K — sharp enough for lace and fabric details, efficient for e-commerce use.
Upload your single image. Type this comprehensive prompt:
“Remove creases and wrinkles from the surface of the lingerie in the image. Remove hangers and frames. Correct the lingerie’s shape and display it in a three-fourth angled three-dimensional style against a white background.”
Click Generate. Wait 60-75 seconds.
Step 3: Get Your Result
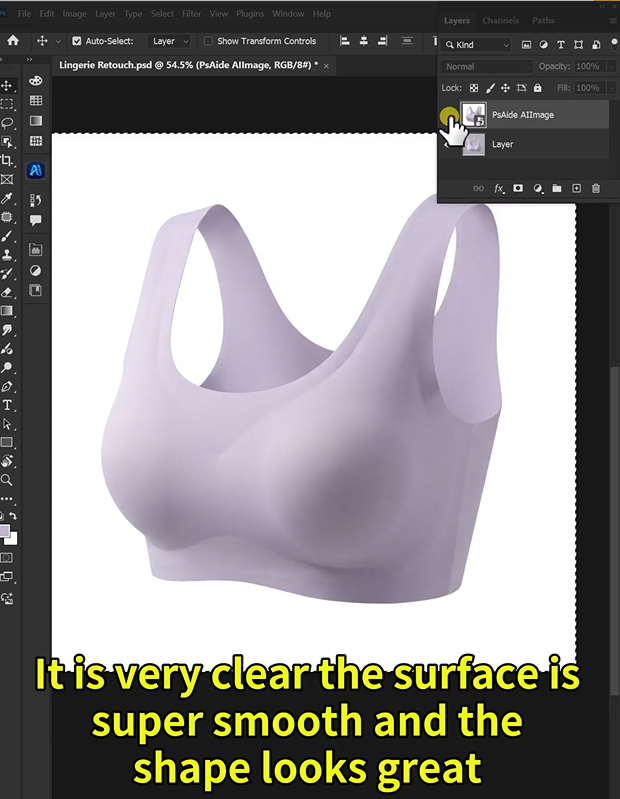
The AI processes your image. It removes every wrinkle and crease from the fabric. It erases hangers, clips, and any display frames. It reshapes the garment to look natural and flattering. It positions the lingerie at a three-quarter angle to show depth and dimension. It places everything on a clean white background.
Your raw product photo is now a professional, e-commerce-ready image.
2、Pro Tips for Perfect Lingerie Retouching
1. Start with good lighting. The AI can remove wrinkles, but it works best when the original photo has even, soft lighting. Harsh shadows are harder to correct.
2. Use 2K resolution for most uses. Lingerie details like lace and embroidery look sharp at 2K. 4K is only necessary for large print catalogs.
3. Be specific about the angle. “Three-fourth angled three-dimensional style” tells the AI exactly how to present the garment. For bras, add “show the cups clearly.” For bodysuits, add “show the full silhouette.”
4. Remove hangers completely. The prompt includes removing hangers and frames. This works for mannequins too. The AI fills in the missing background automatically.
5. Save as PNG for transparency. A white background is great for most e-commerce. But saving as PNG preserves the option to change backgrounds later.
6. For lace and sheer fabrics: Add “preserve lace transparency and delicate details” to your prompt. This prevents the AI from over-smoothing intricate patterns.
7. Batch similar products. Once you have a prompt that works, save it. Apply the same prompt to your entire lingerie collection for consistent results.
3、Summary
You don’t need to smooth each wrinkle by hand. You don’t need to clone out hangers pixel by pixel. You don’t need to guess the right angle for 3D presentation.
One photo. One detailed prompt. One minute.
Your lingerie looks wrinkle-free, perfectly shaped, and professionally presented on a white background.
That’s the difference between hours of manual retouching and working with AI.
4、Download link
https://psaide.com/?sfrom=A86R4u
Invitation Code: A86R4u