Table of Contents
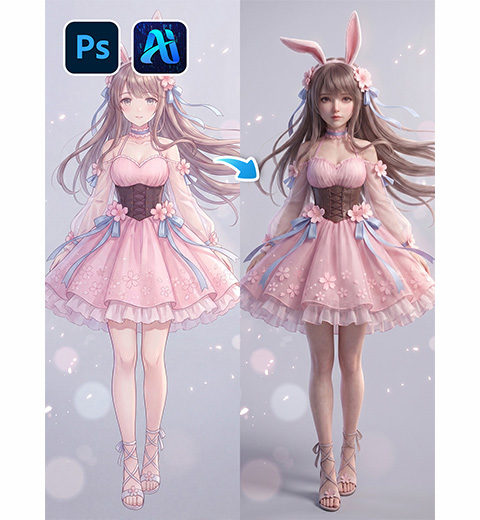
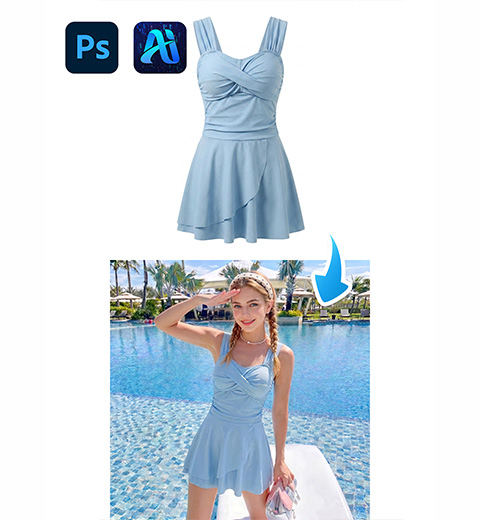
You have a beautiful 2D illustration. A character design. A concept sketch. A product flat. It looks great on paper. But you need to show it in three dimensions.
Maybe you’re presenting to a client. Maybe you’re creating a product mockup. Maybe you’re building a game asset. The flat artwork isn’t enough. You need depth, lighting, and texture.
Traditional 2D to 3D conversion requires specialized skills. 3D modeling software like Blender or Maya. Complex workflows with modeling, texturing, and rendering. Hours of work. Steep learning curves. Expensive software.
Many designers simply don’t have the resources. Others settle for mediocre results from basic filters. The gap between “flat artwork” and “professional 3D render” feels impossible to bridge.
Nano Banana Pro changes everything . It’s a powerful AI model that understands spatial relationships, lighting, and material properties . It can take a simple 2D image and generate a photorealistic 3D version with consistent perspective, realistic shadows, and cinematic detail.
1、The Solution: Nano Banana Pro in 3 Steps
Here’s how to turn any 2D artwork into a professional 3D render using AI inside Photoshop.
What You Need
- Adobe Photoshop with PsAide plugin (integrates Nano Banana Pro)
- One 2D illustration or artwork
- 60 seconds
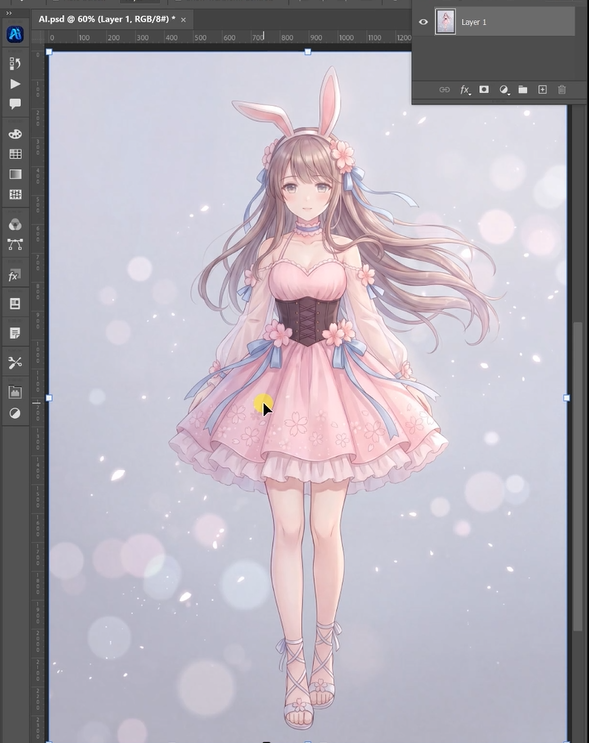
Step 1: Open Your Artwork
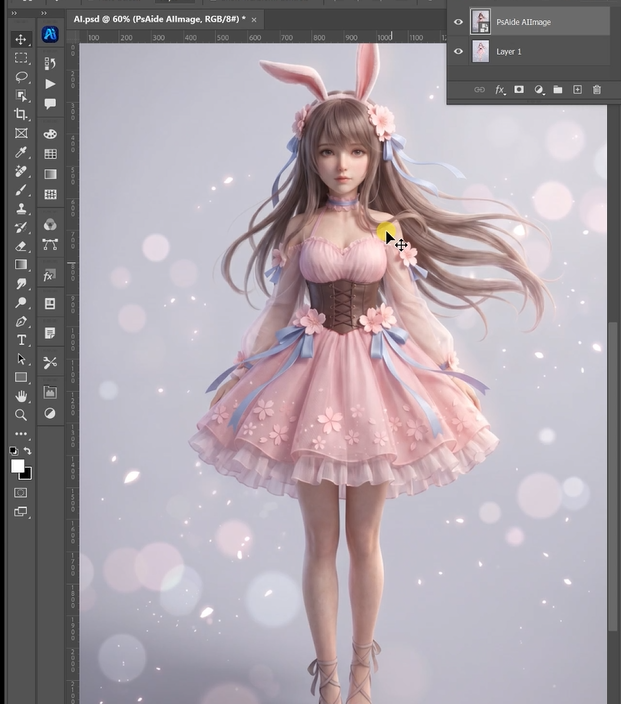
Launch Photoshop. Open your 2D illustration. This could be a character sketch, product flat, or any flat graphic. High-resolution source images work best.
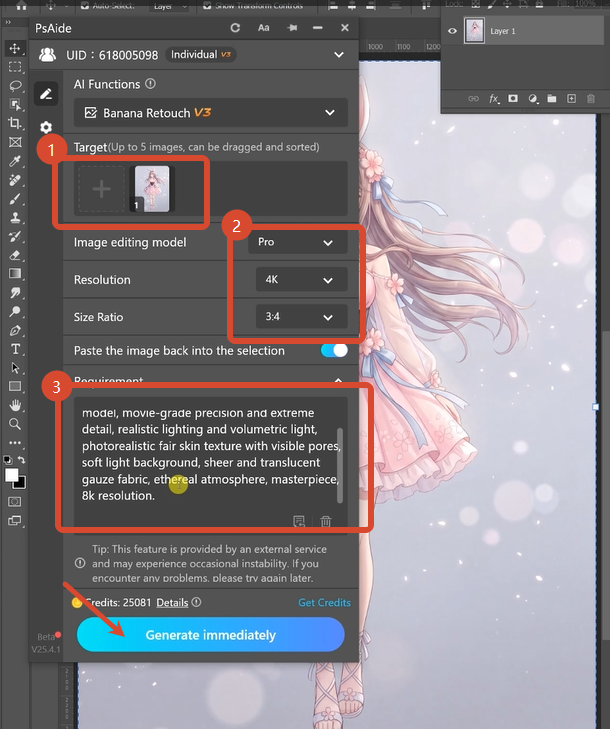
Step 2: Write Your Detailed Prompt
Open the PsAide panel. Launch Nano Banana and select the Pro version. Set output resolution to 4K. This is essential for 3D renders, as it preserves fine details like skin pores, fabric texture, and lighting nuances.
Upload your single image. Type this comprehensive cinematic prompt:
“A cinematic 4K hyper-realistic CG human model, movie-grade precision and extreme detail, realistic lighting and volumetric light, photorealistic fair skin texture with visible pores, soft light background, sheer and translucent gauze fabric, ethereal atmosphere, masterpiece, 8K resolution”
Click Generate. Wait 60-90 seconds.
Step 3: Get Your 3D Render
The AI processes your 2D artwork. It analyzes the shapes and forms. It generates a 3D perspective with consistent angles . It adds realistic lighting and volumetric light effects. It creates photorealistic textures with visible pores and fabric details. It renders everything in cinematic 8K quality.
Your flat 2D artwork is now a professional 3D model render.
2、Pro Tips for Perfect 2D to 3D Conversion
1. Start with clear artwork. The AI works best with clean, well-defined images. Simple silhouettes yield the most dramatic 3D results.
2. Use 4K resolution. 3D rendering requires detail. 4K preserves texture and lighting nuances. 2K is acceptable for previews but 4K is recommended for final renders .
3. Be specific about materials. Describe the texture you want. “Visible pores,” “soft fabric,” “translucent gauze” all guide the AI toward specific material rendering.
4. Describe the lighting. “Volumetric light,” “soft light background,” “cinematic lighting” create different moods. Choose what fits your artwork.
5. Add quality markers. Words like “masterpiece,” “movie-grade,” and “photorealistic” push the AI toward higher quality outputs.
6. Match the subject. If you’re converting a character, describe the character. If it’s a product, describe the product. The prompt should match your artwork’s content.
7. Save your prompt. Once you have a prompt that works, save it. Apply the same prompt to similar artwork for consistent results.
8. Iterate for perfection. The AI generates a new version each time. Run the same prompt multiple times and pick the best result.
3、Summary
You don’t need 3D modeling skills. You don’t need expensive rendering software. You don’t need hours of manual work.
One artwork. One detailed prompt. One minute at 4K.
Your flat 2D design becomes a cinematic 3D render. Realistic lighting. Photorealistic textures. Professional quality.
That’s the difference between struggling with 3D tools and working with AI.
4、Download link
https://psaide.com/?sfrom=A86R4u
Invitation Code: A86R4u