Table of Contents
The Sleepwear Editing Problem
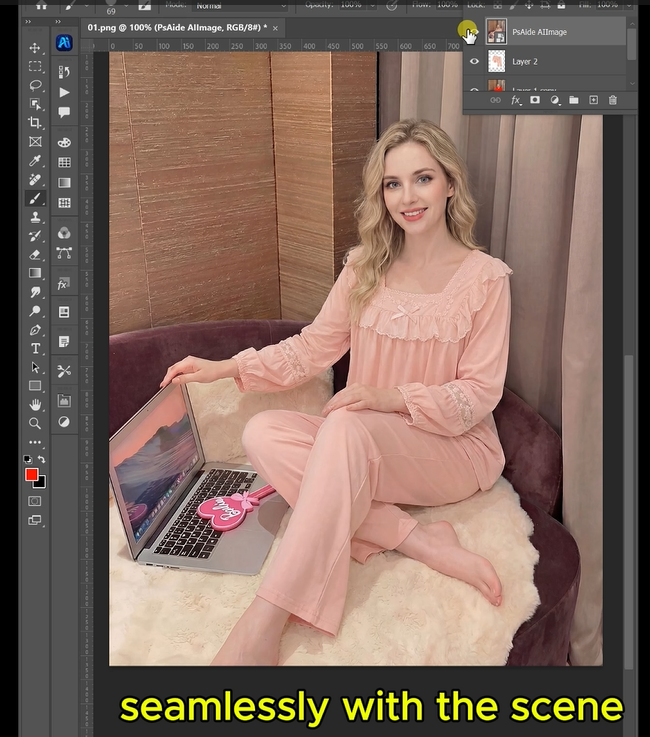
You have a beautiful lifestyle photo. The model is relaxed, sitting on a couch with soft morning light coming through the window. The mood is calm. The composition is perfect.
But the pajamas are wrong. They’re from last season. The pattern doesn’t match the new collection. Or the client decided they want a different color.
What do you do?
Reshoot? That means rebooking the model, the photographer, the studio, the hair and makeup artist. Thousands of dollars. Days of coordination.
Manually edit in Photoshop? Pajamas are soft, loose-fitting garments. They don’t have structured edges like jackets or jeans. Masking loose fabric against skin is difficult. Matching the relaxed drape takes artistic judgment. Recreating natural folds and wrinkles is nearly impossible to do convincingly. And the lighting across soft cotton or silk? That changes with every fold.
Most designers avoid pajama swaps entirely. They reshoot. They eat the cost. They miss the deadline.
There’s a better way.
1、The Solution: Nano Banana Pro in 3 Steps
Here’s how to replace any pajama set on a model using AI inside Photoshop.
What You Need
- Adobe Photoshop with PsAide plugin
- One model photo (wearing original pajamas)
- One product photo (your new pajama set)
- 60 seconds
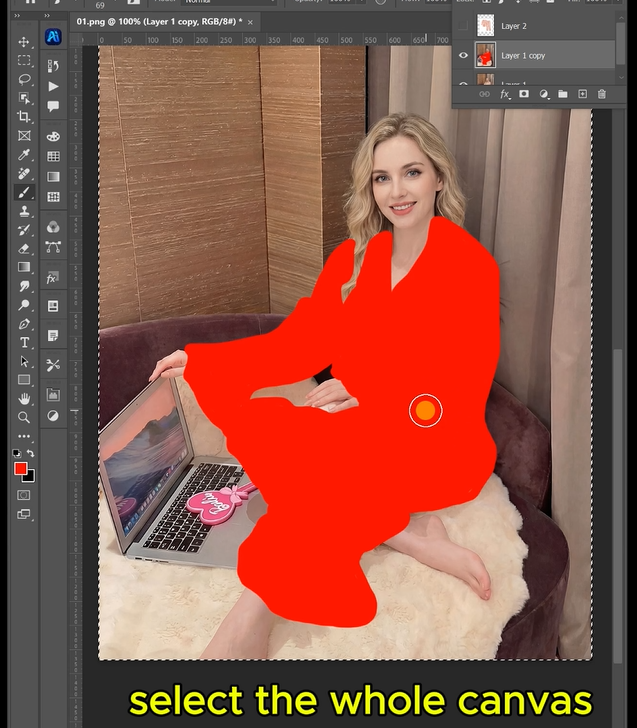
Step 1: Mark the Old Pajamas in Red
Open your model photo in Photoshop. Grab the Lasso Tool. Draw a rough selection around the top piece — the shirt or tank top. Fill it with bright red (RGB: 255, 0, 0). Then draw a separate selection around the bottom piece — the shorts or pants. Fill that with red as well.
Don’t waste time on perfect edges. Just cover the main shapes. The red color is a clear signal to the AI: “Replace exactly these areas.”
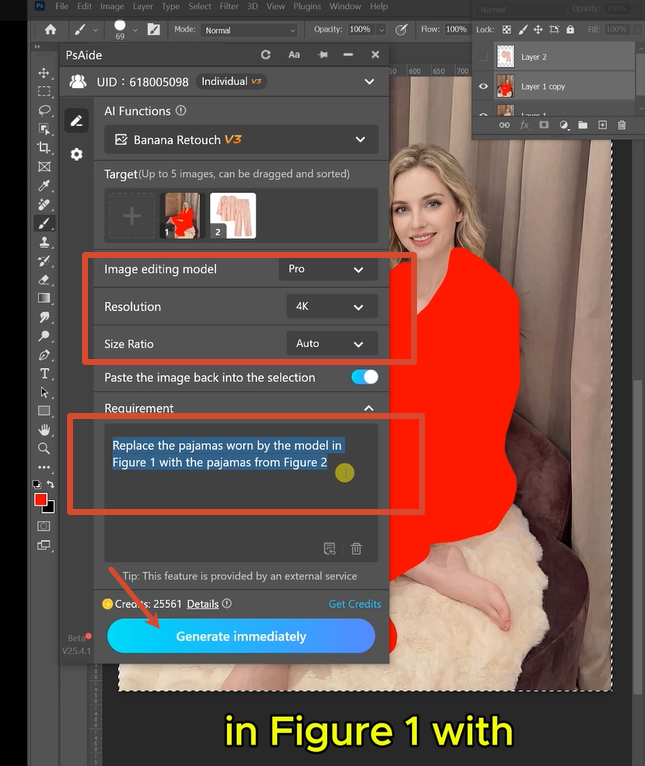
Step 2: Write Your Prompt
Open the PsAide panel. Launch Nano Banana and select the Pro version. Set output resolution to 2K — sharp enough for soft fabric textures, fast enough for quick processing.
Upload your two images in the correct order:
- Figure 1: Your new pajama set product photo
- Figure 2: Your model photo with the red markings
Type this exact command:
“Replace the pajamas worn by the model in Figure 1 with the pajamas from Figure 2”
Click Generate. Wait 45-60 seconds.
Step 3: Get Your Result
The AI removes both red areas. It analyzes the model’s pose — how the arms are positioned, how the torso is angled. It places the new pajama top, matching the shoulder width and sleeve length. It places the new pajama bottom, matching the waist position and leg stance. It generates natural fabric folds and wrinkles based on the sitting or standing pose. It matches the lighting across both pieces.
The model is now wearing your new pajamas. Same pose. Same photo. Different sleepwear.
2、Pro Tips for Perfect Pajama Swaps
1. Mark each piece separately. Pajama tops and bottoms move differently. Separate red markers help the AI treat them individually.
2. Include the full silhouette. Don’t just mark the center of the shirt. Include the sleeves, the hem, the collar. The AI needs to see the whole shape.
3. Match the general style. If your new set is a button-down shirt and the original is a pullover, the AI handles the difference. But similar garment types yield better results.
4. Choose product photos with similar poses. A pajama top shown flat on a table is harder to transfer than one shown on a similar body angle. When possible, use product photos on mannequins or models.
5. 2K resolution is ideal. Soft fabrics like cotton and modal look great at 2K. 4K is unnecessary for web use and slows down processing.
6. Keep your original layers. Save the PSD with your red markings. You can reuse the same model photo to swap multiple pajama styles in seconds.
7. For silk or satin: Add “with soft sheen and gentle highlights” to your prompt for better fabric rendering.
8. For patterned pajamas: Add “preserve the print pattern alignment” to keep stripes or plaids looking correct across the body.
3、Summary
You don’t need a second photoshoot. You don’t need to guess how fabric should drape. You don’t need to paint wrinkles by hand.
Two red markers — one for the top, one for the bottom. One clear prompt. One minute.
That’s the difference between hours of manual editing and working with AI.
4、Download link

https://psaide.com/?sfrom=A86R4u
Invitation Code: A86R4u